
It’s very easy to make your own fruit roll-ups and in this post, I’m sharing my best tips for making them. Learn which fruit is the best to use for fruit leather and what equipment you need to make it (no dehydrator required!). Fruit roll-ups are a fun and healthy snack that are great for gifting, too.
I love making homemade fruit roll-ups (also known as fruit leather). It’s a healthy snack, a great way to use up a lot of fruit, and it makes nice gifts too. It’s so simple to make and you know exactly what’s in it, unlike store-bought fruit snacks, which have a lot of preservatives and other additives.
What is fruit leather?
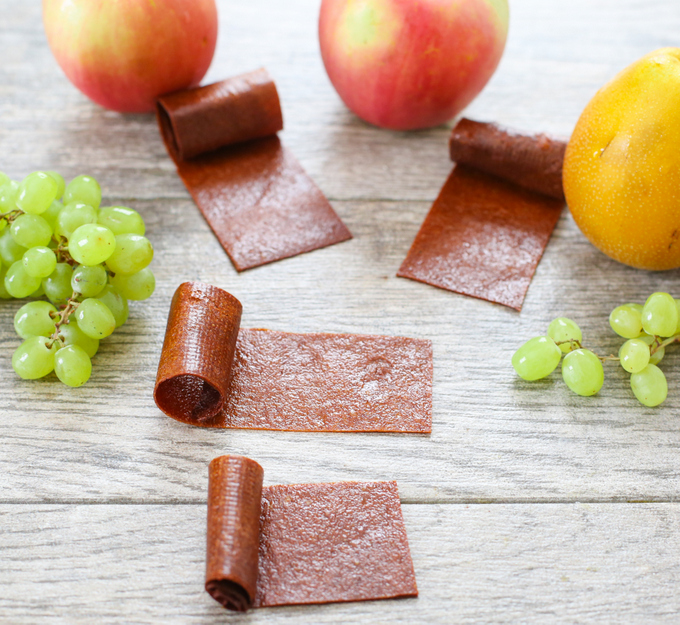
Fruit leather is fruit that has been pureed and then dried until all of the moisture is removed. It’s dried in sheets so you can cut them into strips and roll them up, which is why they’re also called fruit roll-ups.
We’ve been frequenting the farmer’s markets on weekends quite often. I can’t resist those bargain deals at the end of the day, and I always end up with more fruit than we can finish. So that’s when I get out my blender to blend the overripe fruit and make fruit leather.
Some people think you need dehydrators or other fancy equipment to make fruit roll-ups but you don’t. All you need is a blender, a sheet pan with a silicone baking mat, and an oven to make it.
This fruit leather recipe is as simple as pureeing fruit, spreading it on a baking sheet and baking it at a very low temperature for six to eight hours. It’s a fun kitchen project.
Ingredients
- Chopped fruit – I like to use peaches, pears, apples, and grapes.
- Granulated sugar or other sweeteners like honey or agave – this is optional if your fruit is not very sweet.

What kind of fruit works best for fruit leather?
You can use just about any fruit. I like to do a mix. You want to make sure your fruit puree is not too thick and not too watery. Ideally, the thickness should be between a smoothie and a juice so it helps to mix a few fruits together. For this particular mix, I did grapes, apples, pears, and peaches.
For example, peaches don’t produce that much water. Grapes on the other hand, are quite watery. Here are some fruit options that you can mix and match to make fruit leather.
It’s really fun to experiment with different flavor combinations. For best results use a mix of high-water content fruit with fruit that contains less water:
Fruit with High Water Content
- Pineapple
- Oranges
- Cantaloupe
- Grapefruit
- Strawberries
- Watermelon
- Raspberries
Fruit with Lower Water Content
- Apricots
- Blueberries
- Plums
- Apples
- Pears
- Cherries
Instructions
I don’t usually add sugar to my fruit puree, but if your fruit isn’t as sweet, you can add some sugar when you puree the fruit. Keep in mind that when the fruit loses its moisture, it will concentrate the natural sweetness, so you may not need any added sugar.
First, wash and prep your fruit removing any stems, pits, or cores. To make things easier you will want to chop large pieces of fruit before blending. Puree all of the fruit in the blender or food processor until smooth. If your puree is too thick, add more fruit that contains more water. If it’s too thin, add some more fruit that has less water.
I recommend using a silicone mat (like a silpat) to line your baking sheets so the fruit leather is easy to peel off when it’s done. If you don’t have them, you can also line baking sheets with parchment paper.
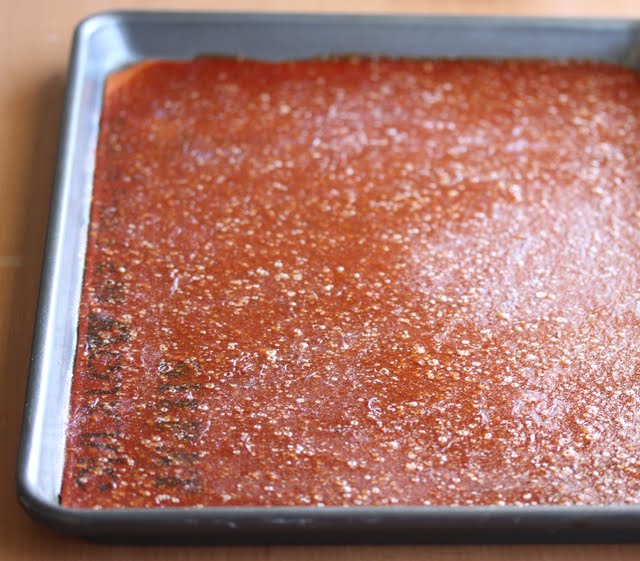
Pour the fruit mixture directly onto the mat and spread it into an even layer that is 1/8” thick.
Preheat the oven to 170°F. Place the sheet pan in the oven and bake the fruit puree for approximately six to eight hours.
How do you know when fruit leather is done?
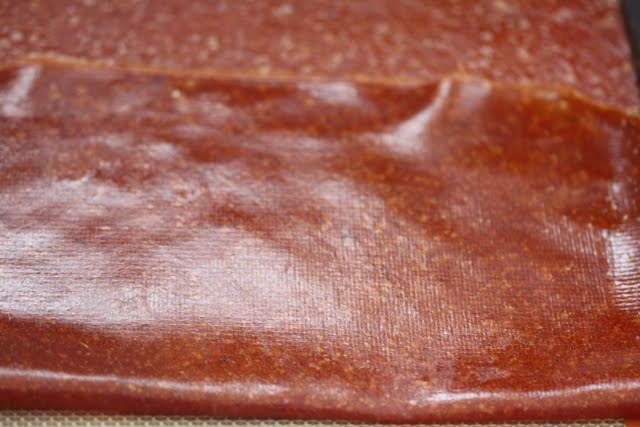
The best way to tell if fruit leather is done is to touch it. It should feel a little sticky or tacky, but dry to the touch and firm and solid.
Once it’s done, peel it off of the silicone baking mat or parchment paper. I like to place it on a cutting board and use a knife or pizza cutter to slice it into strips. Roll them up and you have homemade fruit roll-ups!
Storage Tips
I like to wrap the fruit roll-ups with plastic wrap and keep them in the refrigerator for up to a week. Or, you can store them in a freezer bag and freeze them for up to a month. Just leave them out at room temperature to thaw.
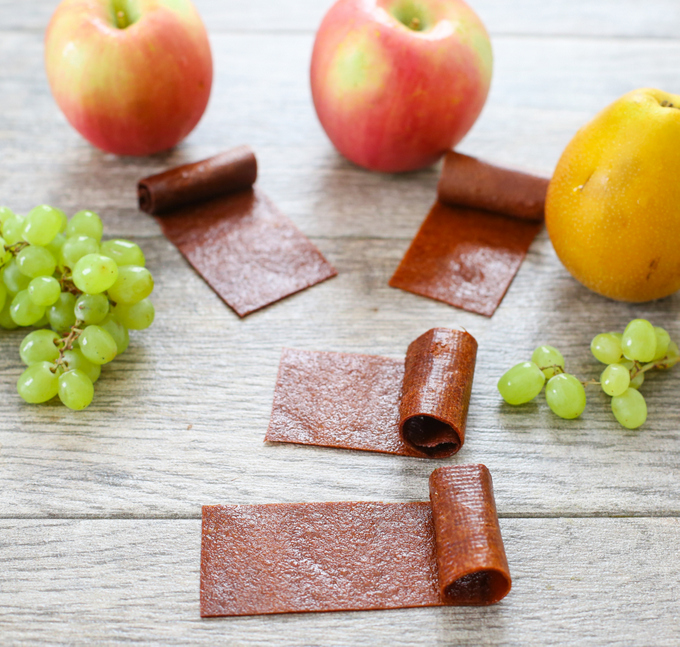
If you make it with no added sugar, homemade fruit leather is a great healthy snack. I also love to give it as gifts and wrap the rolls up in wax paper with cute ribbons for friends and family.
Here are more fruit leather recipes you might like, too!

Fruit Leather
Ingredients
- 6 cups of chopped mixed fruit I used peaches, pears, apples, grapes
- sugar to taste if needed I don't add any to mine and keep in mind that the fruit puree will get sweeter as it dries
Instructions
- Blend fruit and sugar (if using) in a blender until smooth. Make sure your puree is not too thick (i.e., it just sits and doesn't move when you pour it out) and not too thin (it just spreads out like water/juice). You want something in between. If you need to thicken or thin, add fruit with more pulp or more water.
- Set oven at lowest temperature setting (mine was at 170°F). Line two 13 x 18 baking sheet with Silpat mats.
- Pour fruit mixture onto Silpat mats and spread evenly with the back of a large spoon until the fruit mixture makes a sheet about a 1/8 inch thick across the surface of the Silpat.
- Place baking sheets in the oven and bake for 6-8 hours, until fruit is dry. When you touch it, it should be still a little sticky, but dry to the touch and solid.
- Let fruit leather cool. Once it is finished cooling, gently peel off the fruit leather from the Silpat. It should come off the mat easily. Cut into strips. If desired, you can roll them up with parchment paper. Store in airtight container in a cool space.
The nutrition information provided are only estimates based on an online nutritional calculator. I am not a certified nutritionist. Please consult a professional nutritionist or doctor for accurate information and any dietary restrictions and concerns you may have.


