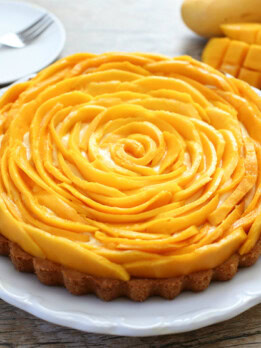
Mango Mousse Tart
This summer tart is light and not overly sweet. It's topped with fresh sweet mango slices and makes a beautiful dessert centerpiece.
Ingredients
Crust
- 1/2 cup unsweetened shredded coconut, I use this one
- 3/4 cup all purpose flour
- 1/4 cup powdered sugar
- 1/2 cup butter, cut into cubes
Mango Mousse
- you will only use about 2/3 of this filling
- 2 tsp gelatin powder
- 4 tbsp water
- 250 g mango puree, about 2 manila mangoes
- 4 tbsp granulated white sugar, or more to taste
- 250 g heavy whipping cream
Mango topping:
- 6-7 ripe mangoes
Instructions
- Preheat oven to 425°F. Pulse together all crust ingredients in a food processor until thoroughly mixed. Grease a 9-inch tart pan. Press mixture into bottom of tart pan, evenly across entire bottom and up part of the sides. Bake for about 12 minutes until golden brown. Let tart crust fully cool.
- Dissolve gelatin into 2 tbsp of water. Heat remaining 2 tbsp water until it is hot/almost boiling and add to gelatin, stirring until gelatin is fully dissolved. Add gelatin and puree into a blender and mix on high speed until fully blended (you can taste and see if it need a little sugar. My mangoes were sweet enough on their own. If it's not sweet enough, you can add a little sugar here and blend). In a stand mixer, add sugar and heavy cream and whip on high speed until stiff peaks form. Slowly add puree into the whipped cream, folding it into the cream until completely mixed and uniform in color.
- For the mango topping, make two large slices as close to the pit as possible (like in the photo above). Carefully remove the skin with a very sharp knife. If your mangoes are on the firm side, you can take each mango half and slice again in half lengthwise (like in the photo above), which will make it easier to remove the skin without cutting into the flesh. Then cut very thin mango slices (like the photo above; you need the slices to be very thin so you can bend/curl them easily).
- Add mango mousse to the center of the crust and then begin to spread out evenly across the surface, leaving a small perimeter around the crust untouched by mango mousse. You will likely only need about 2/3 of the mango mousse. Line the perimeter of the crust with mango slices, letting the edges slightly overlap so that the slices stand up and stay curved. Then start on your next row of mangoes, placing mango slices in the spots in between two mango slices from the previous outer row. The overlapping pattern is what will make the rose pattern. Work until the entire tart is covered with mango slices. For the center, roll up one mango slice and place into the center.
The nutrition information provided are only estimates based on an online nutritional calculator. This is not a comprehensive list of all the nutrients in the recipe (i.e., does not include vitamins, cholesterol, etc). I am not a certified nutritionist. Please consult a nutritionist or doctor for accurate information and any dietary restrictions and concerns you may have.
Did you make this recipe?Please leave a star rating and review below!