

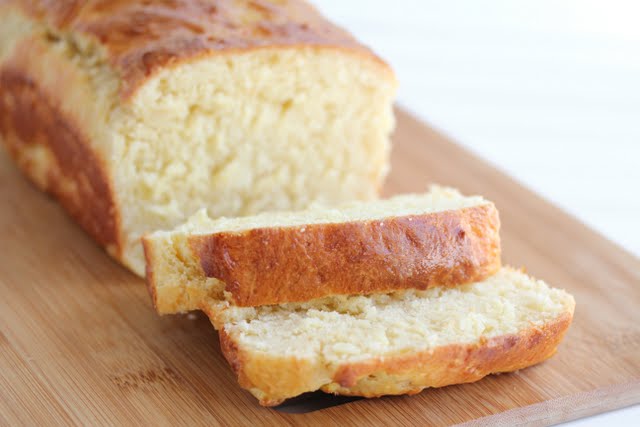
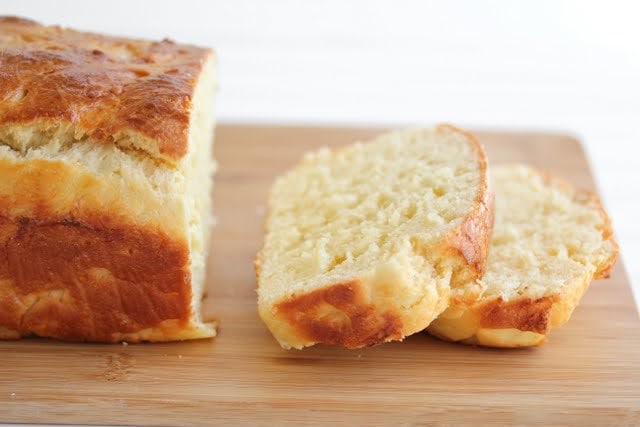
Here’s another recipe from Thomas Keller’s Ad Hoc book. Lovely brioche loaves.
I really adore brioche. It’s soft, buttery, flaky. I love eating thick slices with a little spread, using it to make French toast, sandwiches, etc.
So when flipping through my new book, I immediately zeroed in on the brioche recipe. Like most brioche recipes I’ve tried, this requires a lot of early preparation. I would say that this recipe was a little more time consuming than some of the other brioche recipes I’ve tried. But I loved the result.

You might like to try my homemade challah bread, too.
Ad Hoc's Brioche
Ingredients
- 1/3 cup very warm water 110-115°F
- 1 (0.25-oz) package active dry yeast or 2 1/4 tsp
- 2 1/2 cups cake flour
- 2 cups all-purpose flour
- 1/3 cup granulated sugar
- 2 1/2 tsp fleur de sel or fine sea salt
- 6 large eggs at room temperature
- 10 oz unsalted butter cut into 1" cubes, at room temperature
Instructions
- Combine the water and yeast in a small bowl. Let stand for 10 minutes, then stir until the yeast is completely dissolved. Set aside.
- Sift together the flours, sugar and salt into the bowl of a stand mixer fitted with the dough hook. Add the eggs and beat for 1 minute at low speed, scraping down the sides with a rubber spatula as needed. Slowly add the dissolved yeast and continue beating at low speed for 5 minutes. Stop the machine, scrape any dough off the dough hook, and beat for another 5 minutes.
- Add the butter cubes, about one-quarter of them at a time, beating for about 1 minute after each addition. Once all the butter has been added, beat for 10 minutes more, until the dough is smooth and silky.
- Transfer the dough to a large floured bowl and cover with plastic wrap. Let stand in a warm place until doubled in size, about 3 hours.
- Turn the dough out onto a generously floured work surface and gently work out the air bubbles by folding the dough over several times while lightly pressing down on it. Return the dough to the bowl, cover with plastic wrap, and refrigerate overnight.
- Generously butter two loaf pans. Turn the dough out onto a floured work surface. With floured hands, divide the dough in half, shape it into 2 rectangles that fit into the loaf pans, and put the dough in the pans. Let the dough rise, uncovered, in a warm place until it is about 1/2 inch above the top of the pans, about 3 hours.
- Preheat the oven to 350°F.
- Bake the brioche until it is well browned on top and sounds hollow when tapped, 35-40 minutes. Remove from the oven and immediately turn the brioche out onto a cooling rack.
- If serving immediately, let the bread cool for 10 minutes, then slice. If serving within a few hours or up to 2 days, promptly wrap the hot bread in aluminum foil and set aside at room temperature until ready to use. To freeze, wrap the hot bread in foil and promptly freeze. The bread can be frozen for up to 2 months; when ready to use, reheat, un-thawed in the foil, in a 250°F oven for 20-25 minutes.
Notes
The nutrition information provided are only estimates based on an online nutritional calculator. I am not a certified nutritionist. Please consult a professional nutritionist or doctor for accurate information and any dietary restrictions and concerns you may have.


I had a chef poke me in the chest because I said un thawed . It’s just thawed lol he was right
Too funny! Very common mistake!
I tried this recipe but I needed to add more flour in proportion as it was too watery..maybe I shud add 3 cups cake flour and 2 1/2 cups APF..brioche turned out very nice.
Please advise.
Thanks
The dough shouldn’t be watery – maybe you didn’t measure the flour or the liquid ingredients accurately?
My dough is extremely sticky throughout the process. Am I not kneading it long ?
you may need to knead it longer if it’s too sticky
plagiarized your photo
https://maquinadepao.blogspot.com.br/2013/03/brioche-rapido.html?m=1
Ugh. thank you for letting me know!
Jw do I have to use cake flour for this
yes, the cake flour makes a difference for the texture of the bread
Can this recipe be used to make buns instead of loaves?
I think so!
When you say 70 degree, are you referring to Fahrenheit or Celsius? Can put it in the oven to proof? Kindly advise.
All the temperatures refer to farenheit, though I’m not sure where it says 70..
Thanks for posting this recipe. I had it and seemed to have misplaced it! I was inspired watching a baking show and wanting to make a bundt style sweet brioche cake, but couldn’t imagine using any other brioche recipe than this one. This recipe produces the most incredible melt in your mouth brioche. I am going to make the brioche as directed then after resting over night I am going to prepare the dough as if I was making cinnamon buns. Taking a generously buttered bundt pan sprinkling the bottom with a paste mixture of brown sugar, cinnamon, honey and melted butter. I am going to fan the cinnamon bun dough slices on the bottom of the bundt pan, top with brown sugar cinnamon mixture and repeat another layer of the cinnamon bun dough slices. Fingers crossed it works out:)
Oooh, your brioche cake sounds devine!
I made this bread exactly as the recipe reads and it turned out exceptionally good, but I think the crumb may be to soft and cake-like for French toast which is what I wanted it for. Any suggestions would be appreciated.
Hmm, I’ve done it as french toast. If you cut thick slices it should work.
Wow! Nice Brioche there!
I have a question though. I’m trying to make this but I don’t understand
the following:
“Turn the dough out onto a generously floured work surface and gently work out the air bubbles by folding the dough over several times while lightly pressing down on it.”
Several times? I thought we have to knead it quite vigorously by pressing it with your hand, folding half from left, turn it a quarter, and repeat? Any techniques to recommend?
Also, how do i know when I have “kneaded” enough?
You did have to knead it previously, but when you let it rise, more air bubbles will form. So that step is about getting those air bubbles out. Just continue the motion until the air bubbles have been pressed out. Hope this helps!
Will it goes tough after a day or two? Yummy ! Gotta try it later
It was fine after a day. beyond that, it didn’t last that long, so I’m not sure at what point it starts turning tough
did you put an egg wash on before baking? in most recipe the last round of proofing, normally is covered.. however in this recipe it says leave uncovered. did this work for you?
I did not put an egg wash. It looks a little shiny I think because of the sunlight. Yes, I left it uncovered. I know most breads require it to be covered, but this one specifically said not to so I didn’t
Great recipe! This will be my first time making brioche or even any type of bread for that matter! To make the bread rise, what would be considered “a warm place”? Thanks!!
I usually like to keep the temperature around 70 degrees or higher for it to rise properly. Good luck!
this is one delicious & fluffy looking brioche! it’s definitely one of my most favorite bread. you can’t replicate the aroma that permeates out of your oven when making brioche! ….now i have a craving.
I know what you mean. I love the smell of brioche baking in my oven!
Lovely! Brioche. I’m not sure if I had them before but I’m sure
I haven’t made them before. A few of my attempts with yeast turn out disastrous- except when I used bread machine. Do you think it’s okay if I throw all the ingredients in bread machine?
Love from Malaysia,
Ju
Well the thing with this bread is that you have to refrigerate it overnight and let it rise for quite a few hours in between. More than for other breads. So I think you can use the bread machine to mix and knead. and again to bake, but you would need to follow the other steps from the recipe still. Or else your bread will not rise properly.
Yum, brioche! I like the new look of the blog logo, Kirbie!
Thanks. I’m still debating whether I like the banner. May fiddle with it more, but my favorite part is the visual index!