
You can make your own butterfingers with three ingredients. Plus, it’s a great way to get rid of leftover candy corn! It’s perfect with Halloween coming up.
Last year I came across a recipe for homemade butterfingers with just three ingredients. Halloween had just ended, so I bookmarked the recipe to make for the following year.
Somehow I managed to remember, so with Halloween around the corner, I’ve been on a mission to make a few homemade versions of popular candies starting with Butterfingers.
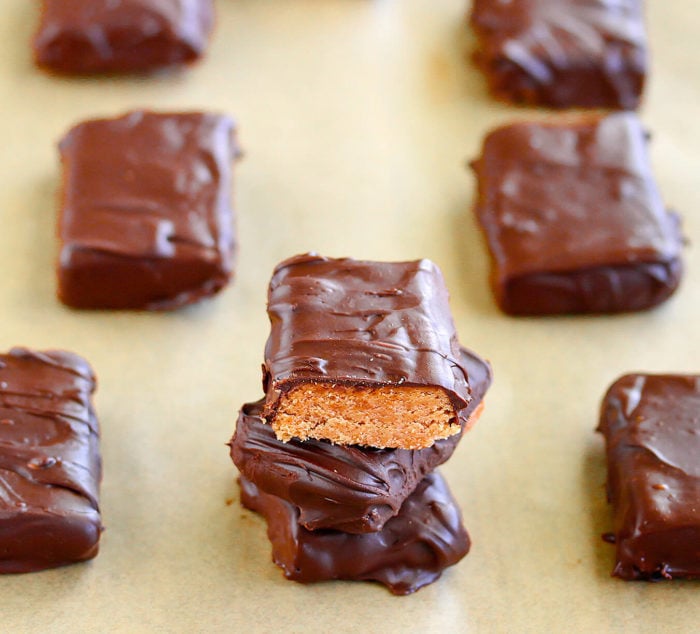
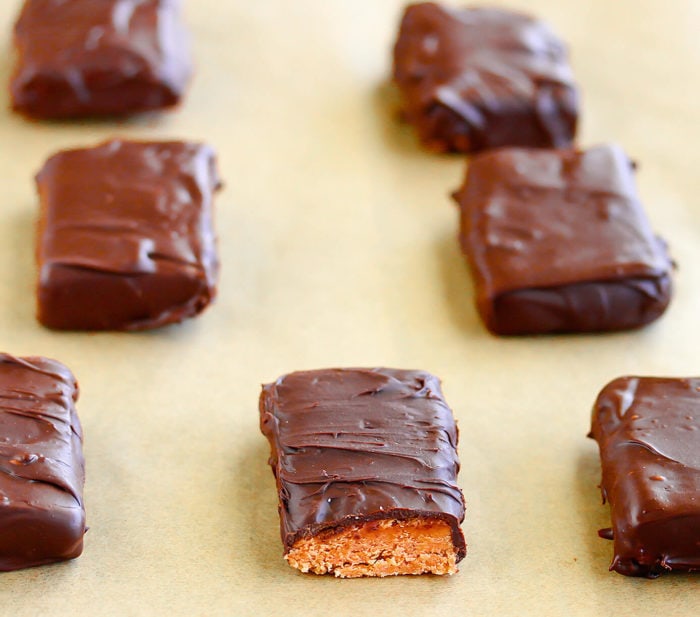
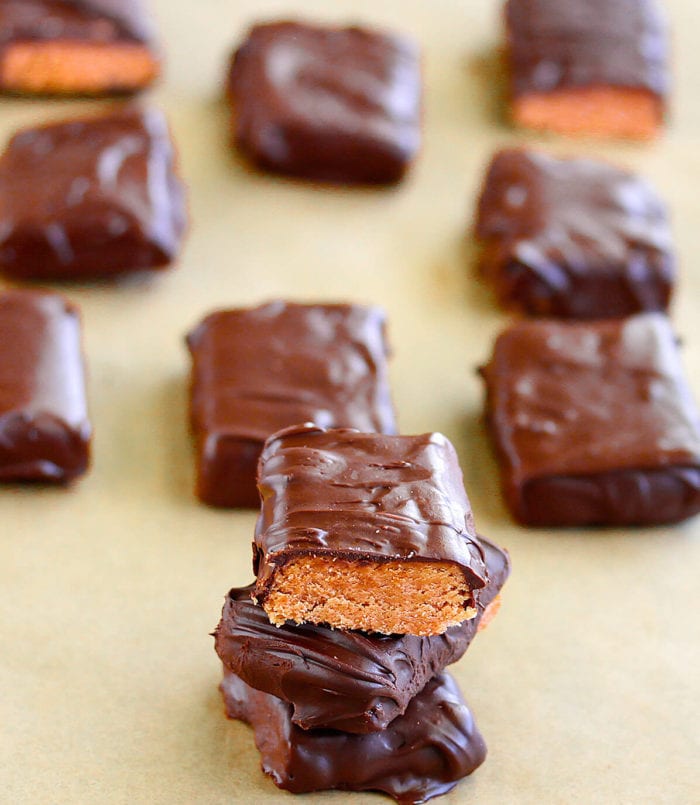
They look remarkably similar to the real thing and they taste similar, too. The inside isn’t as crisp and flaky as a real Butterfinger, but they taste great and are fun to make.
Ingredients
I’m always surprised when homemade versions of popular candy are so easy to make. For homemade butterfingers you only need three ingredients:
- Candy corn
- Peanut butter
- Dark chocolate chips
The key ingredient for this recipe is the candy corn and there really isn’t a substitute. Normally, I would never buy it but I made an exception because I really wanted to make this recipe.
Recipe Steps
- Melt the candy corn in the microwave. You can also do this on the stove in a saucepan.
- Add the peanut butter to the melted candy and stir to combine. Pour the mixture into a baking pan (I used a 7×3” pan) lined with parchment paper. Press it into an even layer and then freeze it for 10 to 15 minutes or until it hardens.
- Melt the chocolate in a bowl in the microwave (or on the stove).
- Cut the candy corn mixture in the pan into whatever size bars you would like to make. Use a sharp knife to make this easier.
- Coat each piece in the chocolate, coating it evenly on all sides. Place the pieces on a baking rack with a piece of parchment underneath to catch the chocolate drips.
- Once you’ve coated all of the candy in chocolate, place the candy in an even layer on a baking sheet lined with parchment paper.
- Place the candy bars in the freezer so the chocolate hardens and sets.
Recipe Tips
- If your chocolate is really thick when you melt it, you can thin it with a small amount of oil. It should be thin enough to easily coat the candy.
- Make sure the candy corn you use is fresh. If it’s old and hard, the center of your candy bars will be hard and brittle.
- Be sure to place the chocolate-coated candy on a baking sheet when you freeze it – don’t freeze it on the baking rack otherwise the chocolate on the bottom might break off.
- Store the candy in an airtight container and they will keep up to five days at room temperature.
This recipe is easy peasy and a great way to use up candy corn from Halloween. If you want more homemade candy recipes here are a few other recipes you might like to try:
3 Ingredient Homemade Butterfingers
Ingredients
- 8 oz candy corn
- 8 oz peanut butter
- 1 1/2 cups dark chocolate chips
- 2 tbsp oil optional
Instructions
- Pour candy corn into a microwave safe bowl. Microwave for 1 minute and stir. Microwave again for another 30 seconds and stir again. If candy corn is not completely melted, continue to microwave and then stir at 30 second intervals until candy corn is completely melted.
- Add in peanut butter and mix until thoroughly combined. If candy corn hardens, microwave for another 30 seconds and then stir to mix. Pour mixture into a 7 x 3 pan lined with parchment paper and press to evenly distribute. Place in freezer for about 10-15 minutes until it hardens.
- Meanwhile, melt chocolate in another microwave safe bowl for 30 seconds and then stir. Microwave again and stir, continuing at 30 second intervals until chocolate is completely melted. (Mine needed about 1 1/2 minutes total). Careful not to overcook the chocolate. If you want to make the chocolate thinner and easier to coat, add in 2 tsbp of oil and stir into chocolate, until completely mixed.
- Remove candy corn mixture from freezer. Using a sharp knife, cut into butterfinger bar sizes (or whatever size you prefer). I did mine about 1 inch by 2 inches. Dip buttefinger in melted chocolate. Make sure to coat both sides. Then place on a cooling rack that has parchment paper underneath. Let the chocolate set with the drippings falling onto the parchment paper below. Repeat with remaining bars. Once finished, remove bars from cooling rack and place them in a single layer on a parchment paper lined container/baking sheet/or other flat surface. Place bars in freezer to completely solidify and set the chocolate.
The nutrition information provided are only estimates based on an online nutritional calculator. I am not a certified nutritionist. Please consult a professional nutritionist or doctor for accurate information and any dietary restrictions and concerns you may have.


Love love this simple and cost effective recipe. I make candy every year for the holidays and i have now added this tasty treat to my Christmas candy dish. Thanks so much for sharing this delicious n quick croud winning recipe with us… im now a fan!
you’re welcome!
This is the best recipe. One note oil bowl before microwaving candy. It will not stick to bowl.
thank you for sharing!
I just made these and they’re AMAZING. So tasty and easy.
This is my first time making candy, but I let them harden in the freezer in the cooling rack and the bottoms broke off. Was I supposed to put them back on parchment paper to harden in the freezer?
Sorry I didn’t make that clear, but yes you need to remove them from the cooling rack before freezing. The cooling rack is just to allow the chocolate drippings to come off and then you should place them on parchment paper and into the freezer.
I made this yesterday and they are incredibly hard – like break a tooth hard! I used natural peanut butter. Would that make a difference? Or adding more peanut butter to add more softness?
hmm, that is so strange. You can try adding more peanut butter. Natural pb should be fine as long as you mixed it well. Was your candy corn newish? If it’s too old that may be the problem.
Thanks!! – I bet if you added some rice crispies, that would give you the crispiness. Of course then it would be 4 ingredients…. 🙂
haha! yes, that would increase the ingredients, but it would be yummy!
What can I replace with if I don’t have candy corn? Thanks! 🙂
I have no idea, sorry. The key ingredient for this recipe is candy corn.
Candy corn??? I would have never thought of it. This made me think of buckeyes that I usually make around the holidays. Granted not even close in simplicity.
I never would have thought it either. But it works. and it’s a good way to get rid of candy corn. hehe.