
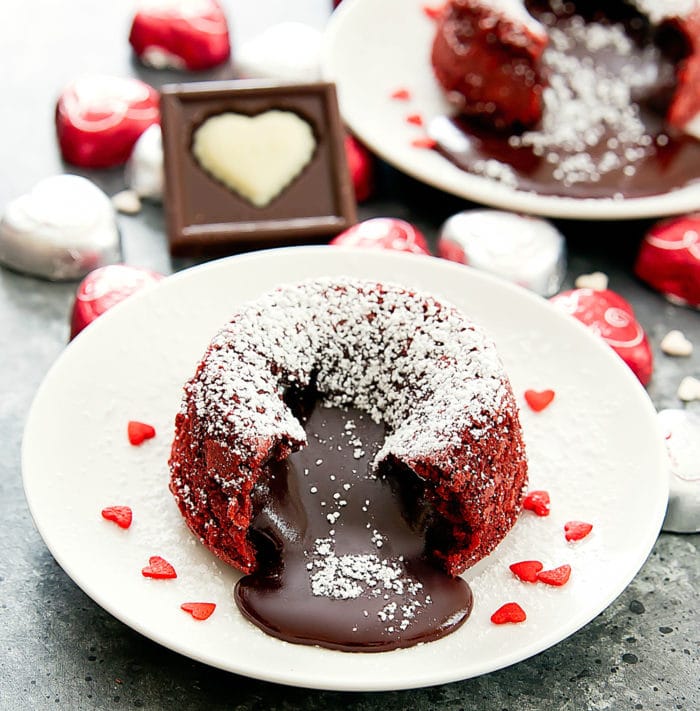
These red velvet cakes have a molten lava center. It’s an easy dessert for two and great for Valentine’s Day dessert.
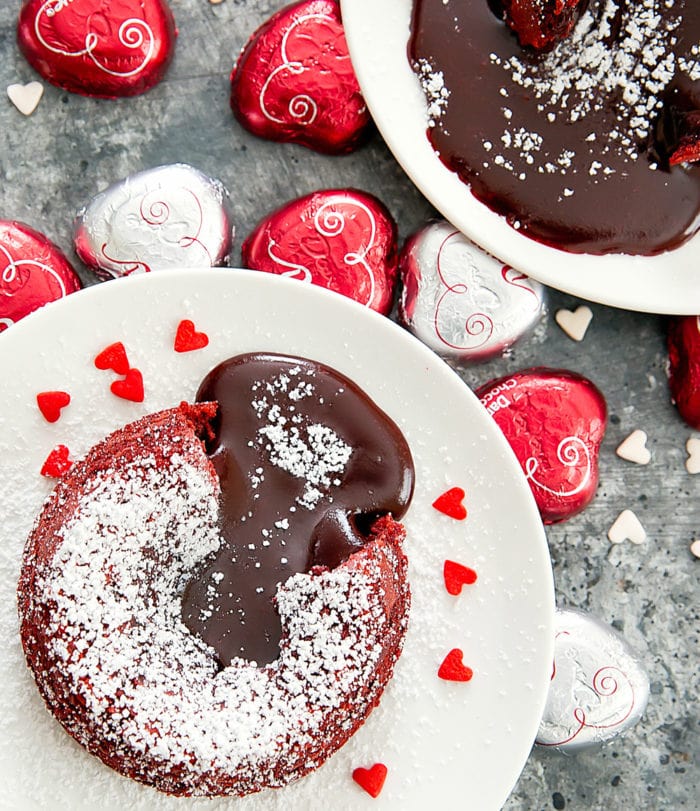
I’ve made chocolate lava cakes, Nutella lava cakes, and Matcha green tea lava cakes. So of course I had to make a red velvet version.
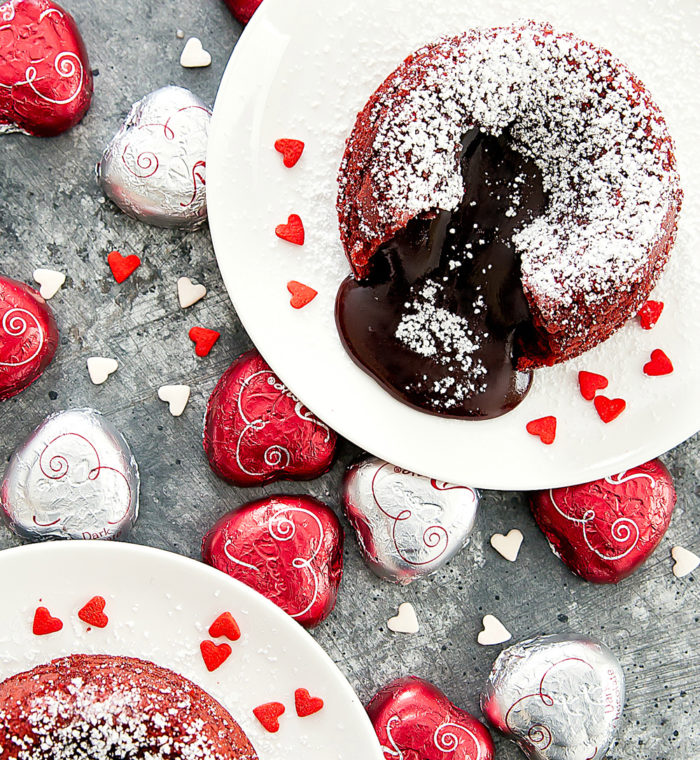
I’m pretty excited with how these turned out. And I’m sorry for all the hearts, but I love heart-shaped things!
I usually don’t like using food coloring in my desserts, but red velvet cakes are an exception because it’s not quite the same unless it’s red. I like using food color gels because you don’t need to use as much to get a nice color in your desserts. I use Americolor Liquid Gel Super Red.*
You can top them with fresh fruit, but the berries I’ve purchased lately haven’t been very sweet so I stuck with a simple dusting of powdered sugar.
*Some of the product links contained in this post are affiliate links. Much like referral codes, this means I earn a small commission if you purchase a product I referred (at no extra charge to you).

Red Velvet Molten Lava Cakes
Ingredients
- 1/3 cup chopped white chocolate
- 3 tbsp unsalted butter melted
- 1/4 cup granulated white sugar
- 1 large egg
- 3 tbsp all purpose flour
- 1 tbsp unsweetened cocoa powder
- 1/2 tbsp red food coloring gel
- powdered sugar for dusting
Instructions
- Add white chocolate to a medium or large glass mixing bowl. Find a pot that is slightly smaller in diameter than your mixing bowl so that when you place the mixing bowl on top of the pot, the bowl will not touch the bottom of the pot. Add about 1 inch of water to your pot and bring to a simmer. Place bowl with chocolate on top. Slowly whisk chocolate until it is completely melted. This will take a few minutes.
- When chocolate is melted, turn off heat but keep your mixing bowl in the pot and on the stove. This will keep the batter warm. Add in melted butter and stir until butter is completely incorporated. Stir in sugar until smooth.
- Whisk in the egg until batter is smooth. Add in flour and cocoa powder and whisk until smooth. And in food coloring and whisk until smooth. Add more food coloring if needed or desired.
- Thoroughly grease the insides of two 4 oz ramekins with butter. Make sure you don't miss any spots, otherwise the cakes won't pop out properly. Lightly flour the inside of the ramekins. Turn ramekins upside down and hit a few times against counter so that any excess flour falls out.
- Divide batter evenly into the two ramekins. Place into freezer for 30 minutes to an hour.
- While freezing, preheat oven to 400°F. After at least 30 minutes in the freezer, place ramekins straight from freezer onto a baking sheet and into the oven. Bake about 14-16 minutes. Watch the cakes closely toward the end. You want the center to be barely just set (the surface should be dry and look cake-like, but if you gently touch the surface, you can tell it's wobbly and not completely cooked underneath). Remove cakes from oven and allow to cool and set for 10 minutes.
- Use a spatula and run around the edges of the cake to loosen the cake. Place a dessert plate, inverted, on top of ramekin. Pressing the plate on top of the ramekin (use gloves as the ramekin should still be quite hot), very carefully and quickly, flip over so that the plate is now at the bottom and the ramekin is upside down. Gently tap the upside down ramekin to ensure cake is on the plate. Lift up ramekin. Dust with powdered sugar and serve immediately.
Notes
The nutrition information provided are only estimates based on an online nutritional calculator. I am not a certified nutritionist. Please consult a professional nutritionist or doctor for accurate information and any dietary restrictions and concerns you may have.


Excellent Excellence Red Velvet Molten Lava Cakes Yummy
Could you make these ahead? Make & freeze the batter on Friday, and cook them on Saturday? If so, when should I take them out of the freezer? Thanks!
We haven’t tried freezing them for that long before baking. It’s hard to say, without testing, how they will turn out if they are frozen for a whole day – our best tip, if you do this, is to increase the baking time a little since they will be a lot more frozen after a day. You might want to try it out first (if you are making them for a special occasion) to see if it works okay – sorry we can’t help more!
Has any one try this with gluten-free flour? Celiac and can’t eat wheat.
Maybe a reader will chime in – we haven’t tried it, but maybe a cup4cup GF flour might work?
Hi I love your recipes! I have one question, I was hoping to make the filling of the red velvet lava cake white chocolate. Which would you suggest using for the filling, a white chocolate ganache or a white chocolate bar? I would be placing it on the batter and into the oven
Thank you in advance!
We haven’t tried either of those and can’t say for sure how that will work. If you use a chocolate bar, it probably won’t melt well and ooze when you cut into it. As far as ganache, it might just get absorbed into the cake.
Okay it makes sense thank you for replying its now one of my favourites ?
I tried it it was devine mine baked for 30minutes after being in the freeezee for an hour.Quick question why do we have to put it in the freezer before bake and doesit make any difference if you put it straight in the oven after mixing?
I’m glad you enjoyed it! The freezer is required before the bake for the molten center. The batter needs to be cold when it goes in so it doesn’t overcook when it is in the oven
I tried it it was delicious mine baked for 30 minutes after being in the freezer for an hour.Quick question why do we have to put it in the freezer before bake?And does it make any difference if you put it straight in the oven after mixing?
They need to freeze first so that they don’t overcook in the oven. If you bake them straight after making the batter, the cakes will cook very quickly and you won’t have a molten center.
Oh my gosh… that chocolate gushing out!! I can probably dip my face into that, not that I would:)
haha!