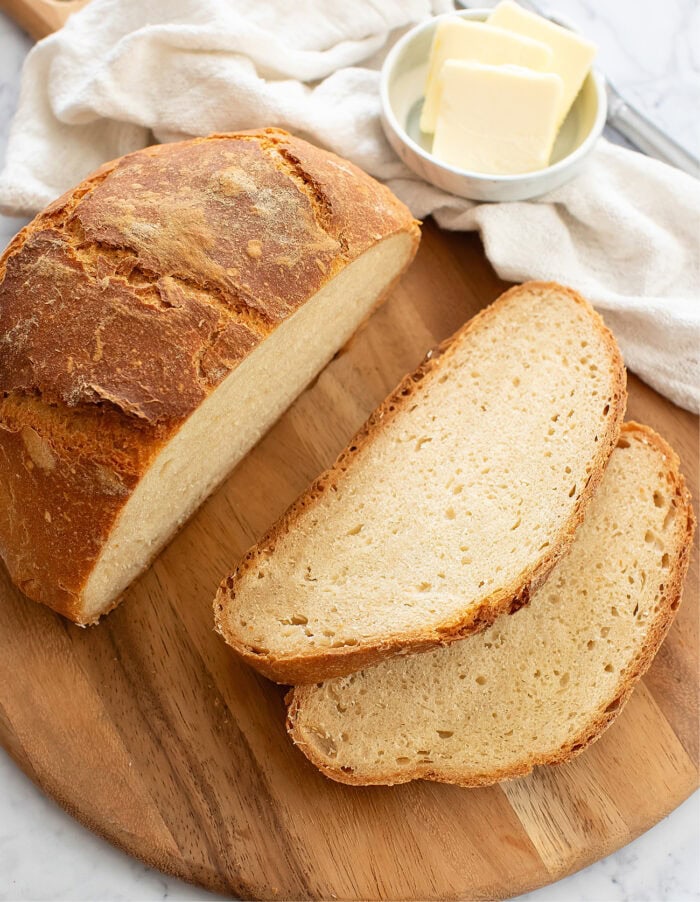
A crusty, artisan loaf of bread without any yeast. This easy bread needs only 2 ingredients and is nearly fool-proof. The bread bakes up perfectly golden with a crispy crusty exterior and a soft inside. Making bakery-style bread has never been so easy.
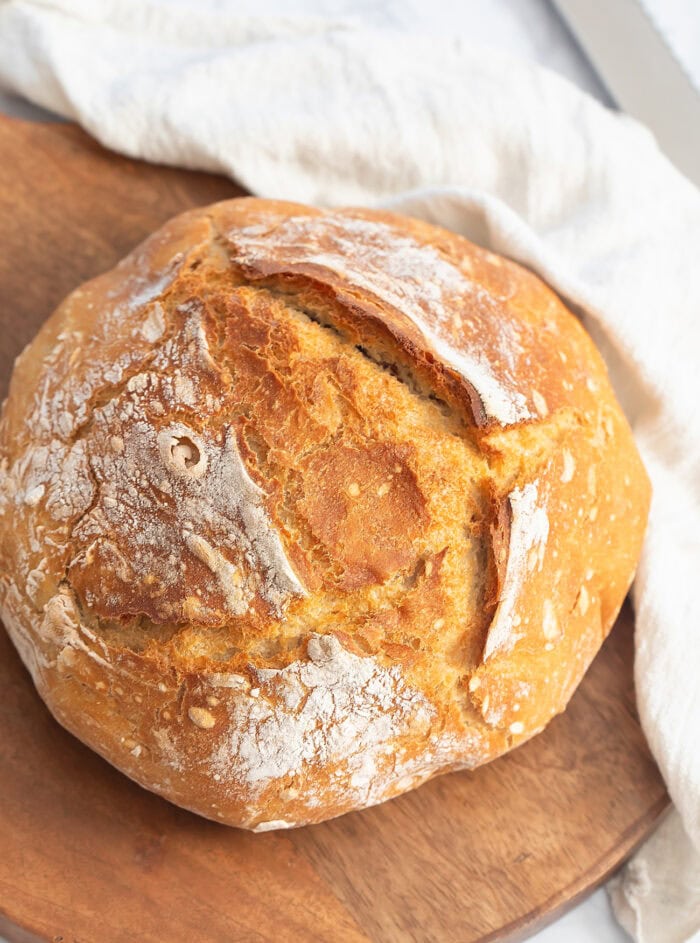
I didn’t think it was possible to make an artisan loaf like this without yeast but it is possible and so simple. It is so easy to make, even a novice baker can make this.
Ingredients
- Self-rising flour
- Sparkling water
Self-rising flour: Instead of yeast, this bread uses self-rising flour. Self-rising is flour that already has baking powder and salt added to it. If you are using self-rising flour, make sure to use one that has a regular amount of protein and not a low protein one. This is discussed in more detail in the notes section of the recipe card. If you don’t have self-rising flour, you can also make your own by combining all purpose flour, baking powder and salt.
Sparkling water: The bread is made with sparkling water. It will actually work with most sparkling beverages but I chose to use plain sparkling water so that the bread tastes like regular bread and doesn’t have any flavors or sugars that are contained in other sparkling beverages.
This bread is similar to my emergency bread. However, instead of baking it right away, the bread dough is given time to rise and ferment. I got the idea after seeing a bread recipe made this way using kombucha and self-rising flour. Letting the dough ferment gives the bread more flavor and also helps it develop the texture of traditional artisan bread. The bread is also baked in a dutch oven which helps give it a beautiful crunchy golden crust.
How to Make No Yeast Bread
- The flour and water are first mixed together until a dough forms.
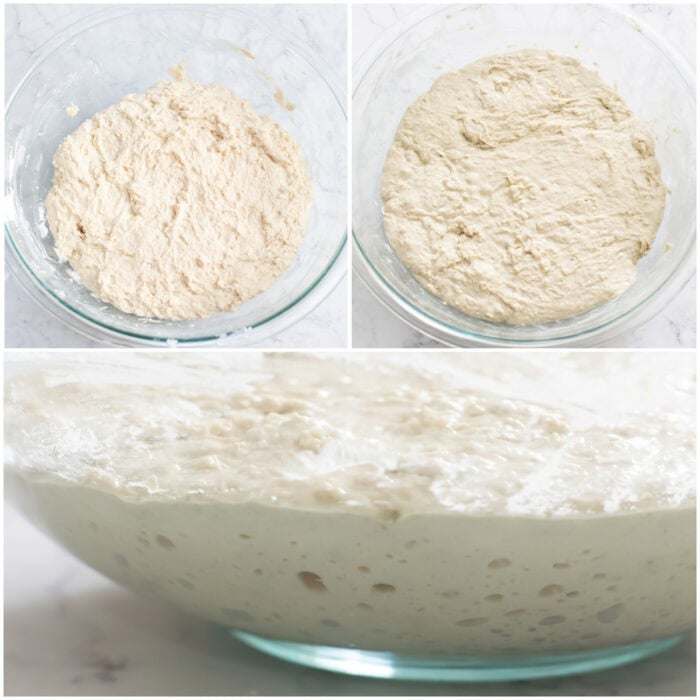
- The dough is then covered in plastic wrap and placed in a warm space for a few hours, giving it time to rise. You’ll know the dough is ready when it has risen and there are bubbles in the dough.
- The dough is then lightly covered in more flour until you are able to shape it into a round ball.
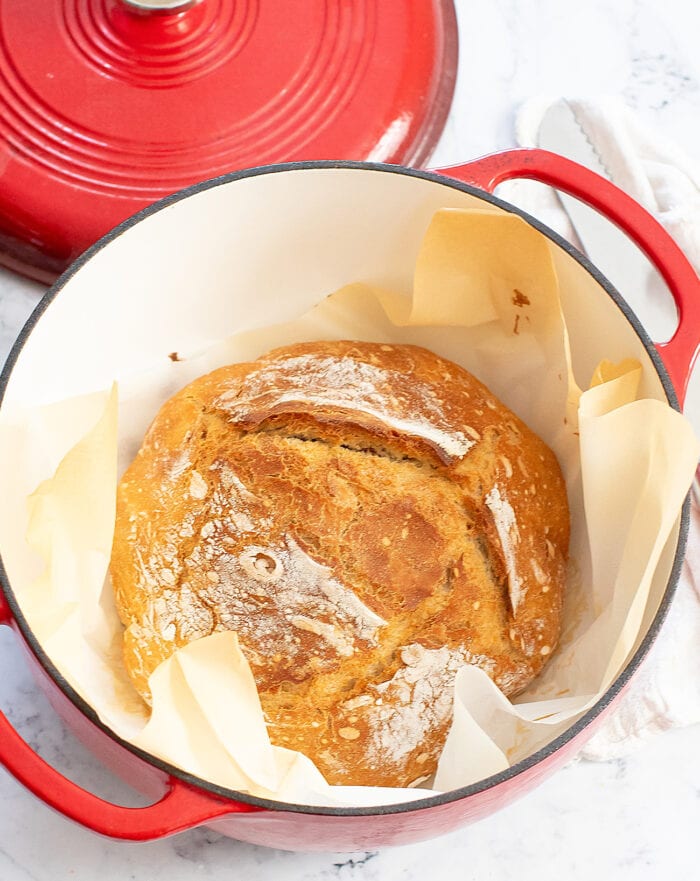
- The bread dough is placed onto a sheet of parchment paper and placed into your preheated dutch oven and then baked in the oven. The bread will first bake with the lid on. This allows the bread to steam inside which helps it rise higher. The lid is removed for the second half of the baking time so that it can develop a very thick crunchy crust.
Bread Texture
This bread has the texture of bakery-style artisan bread. It is soft on the inside and very crusty on the outside.
More Easy Bread Recipes
2 Ingredient No Yeast Artisan Bread
Ingredients
- 4 cups (519 g) self-rising flour please see note before starting
- 12 fl oz (355 ml) sparkling water
Instructions
- In a large glass mixing bowl, combine the flour and sparkling water. Mix well with a spatula until a shaggy dough forms. The dough will be sticky and wet. We recommend using a glass mixing bowl so that you can check the progress of the dough later by peeking at the bottom of the bowl.
- Tightly cover the bowl with plastic wrap and let rest at room temperature for at least 3 hours. You can rest anywhere between 3 and 12 hours. The longer the dough rests, the better the flavor will be. Your dough is ready when it has risen, is wetter than before and if you look at the bottom of the glass bowl there should be large bubbles in the dough.
- About 30 minutes before baking, preheat your oven to 450°F (232°C). Place a large Dutch oven (4.3 quarts or bigger) with its lid on in the oven while it preheats. This is important. The dutch oven needs to preheat before adding the bread.
- After the dough has rested, wet your hands with some water. Grab one side of the dough, stretch it upward, and then fold it over the center of the dough. Repeat this process from all eight sides of the dough.
- Lightly flour a work surface with self-rising flour. Carefully turn the dough out onto the floured surface, seam side down. Use a bench scraper or lightly floured hands to rotate and drag the dough towards yourself on the floured surface, until you form a round, taut ball.
- Place the shaped dough, seam side down, on a piece of parchment paper. If desired, you can cut one small snip with scissors at the top of the dough . This is optional. It does create a big split along the top of the bread as it bakes but the edges of the split tend to get a bit darker brown while the bread is cooking. The bread will have smaller natural seams and splits as it bakes even if you don't do any cuts.
- Remove the preheated Dutch oven from the oven. Remove the lid and carefully transfer the parchment paper with the dough into the hot Dutch oven.
- Put the lid back on and place it back into the oven to bake covered for 35 minutes.
- After 35 minutes, remove the lid and continue baking the bread for another 20-25 minutes or until the bread is golden brown and sounds hollow when tapped on the bottom.
- Let bread cool fully before cutting and serving.
Video
Notes
- Adapted from The Conscious Plant Kitchen
- This bread works best with sparkling water though other sparkling beverages do work but you will taste the flavors in those other sparkling beverages. We were able to make this with kombucha and sparkling cider. We also tried with Poppi (a sparkling prebiotic soda) but the dough did not rise as much and the sugar from the drink made the bread taste oddly sweet.
- Most single serving sparkling water cans are 12 fluid ounce cans so you will need exactly one 12-oz can to make this bread. We used La Croix sparkling water.
- Self-Rising Flour: There are 2 main kinds of self-rising flour sold in the US. One that is a lower protein (2 grams per 1/4 cup (30g)) flour and one that has a regular amount of protein (3 grams per 1/4 cup (30 g)). Brands like King Arthur Flour and White Lily make the low protein flour. Brands like Gold Medal and most store/generic brands contain a regular protein amount. The amount of protein affects how much liquid is absorbed. For this recipe, you want a flour with a regular amount of protein. Please use a self-rising flour with 3 grams of protein per 1/4 cup (30 g). Or make your own self-rising flour with the recipe below.
- Homemade self-rising flour: Combine 4 cups of all purpose flour, 2 tbsp baking powder and 1 tsp salt. Whisk to evenly combine. Make sure your all purpose flour has a regular amount of protein (3 grams per 1/4 cup). Most brands in the US contain this amount but there are some brands with higher protein (4 grams per 1/4 cup) such as King Arthur Flour and Bob's Red Mill. You do not want a high protein flour for this bread. It will be dense and dry.
- This recipe has only been tested using a Dutch oven. It may be possible to make the bread without a Dutch oven but adjustments would need to be made to baking time, temperature and the results would not be the same.
- This bread was made with Gold Medal self-rising flour*, La Croix pure sparkling water* and a 4.3 Quart Amazon Essential Dutch Oven.* We've also baked the bread in a 6 quart Lodge Dutch oven.*
- *This product link is an affiliate link. This means I earn a commission from qualifying purchases.
Nutrition
The nutrition information provided are only estimates based on an online nutritional calculator. I am not a certified nutritionist. Please consult a professional nutritionist or doctor for accurate information and any dietary restrictions and concerns you may have.





I made the 4 Ingredients Apple cake! It was delicious and so easy to make!
We’re so glad you loved this recipe!
Thanks Kirby! Just in case, I think maybe instead of yeast and salt (blech), I perhaps may use simple cooking oil, vegetable or maybe corn or olive depending on taste preference and use. Seemed to work best for staying soft as warmted longer such as hot plate tortillas back when.
Hello! This recipe does not call for any yeast or salt!
Can I make self rising flour using bread flour?
We have not tested this recipe with bread flour. While you can make a self-rising bread flour, the amount of liquid needed in this recipe would need to be adjusted if working with bread flour
The bread is very chewy and heavy. It didn’t raise up quite enough. In a way I’m not surprised as I thought baking powder lost its ability to rise once it gets wet. I did get bubbles. It tastes okay and we will eat it. I added a bit of olive oil when I kneaded to help it last longer.
The bread should not be heavy. It sounds like it did not rise properly. If you cook it in a dutch oven as recommended, the bread will steam in there which allows it to rise properly. Also you mentioned you added olive oil. Adding oil to the bread will change the texture and make it more heavy so that could also be why your bread is heavy.
Easy but mine didn’t work I will try again plus no Dutch oven
Can you explain how yours didn’t work?
Okay, I’m amazed! I never would have guessed that two ingredients would make such a delicious loaf of bread. It’s just as I like it with a crispy crust and soft inside. I figured the first time I made it would just be an experiment and I would need to improve on my technique the next time. However it came out perfectly the first time. One thing I might do next time is add a little bit of salt because I think it would benefit from that addition.
I’m so glad it turned out well for you! I thought it was salty enough since the flour already has salt added to it, but you can definitely adjust to your liking!
Looks eas
it is!
Wondering how beer would work? We like beer so no flavor issues.
beer should work well!