
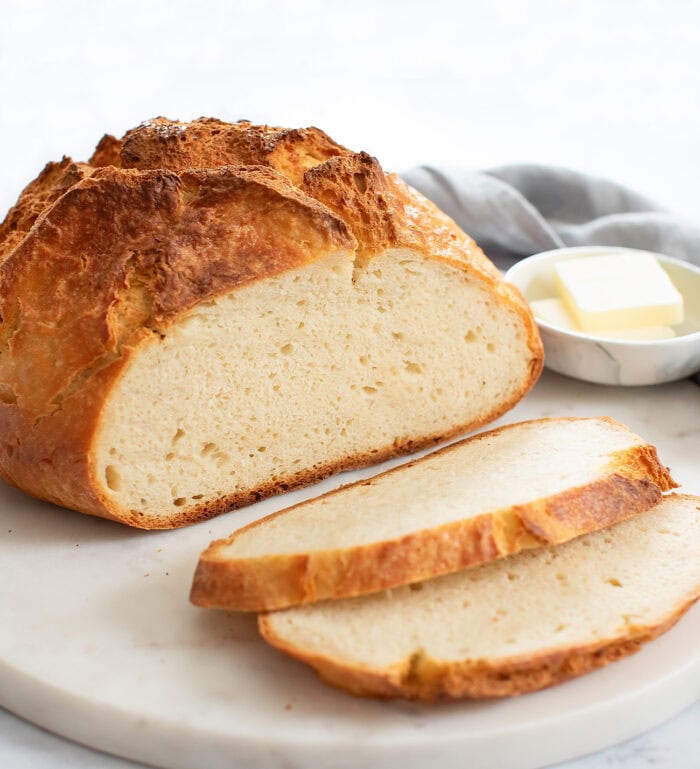
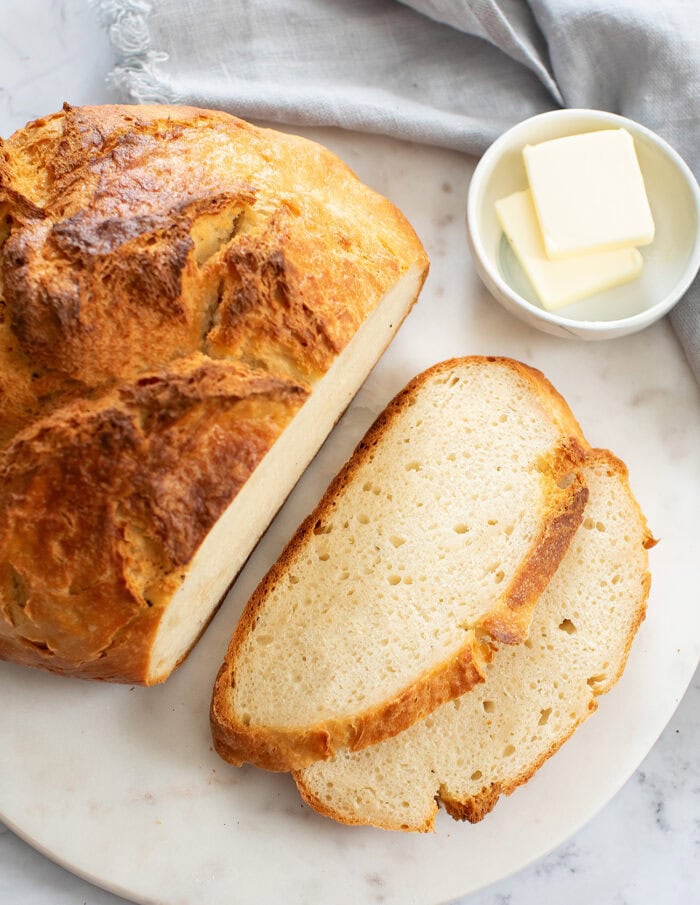
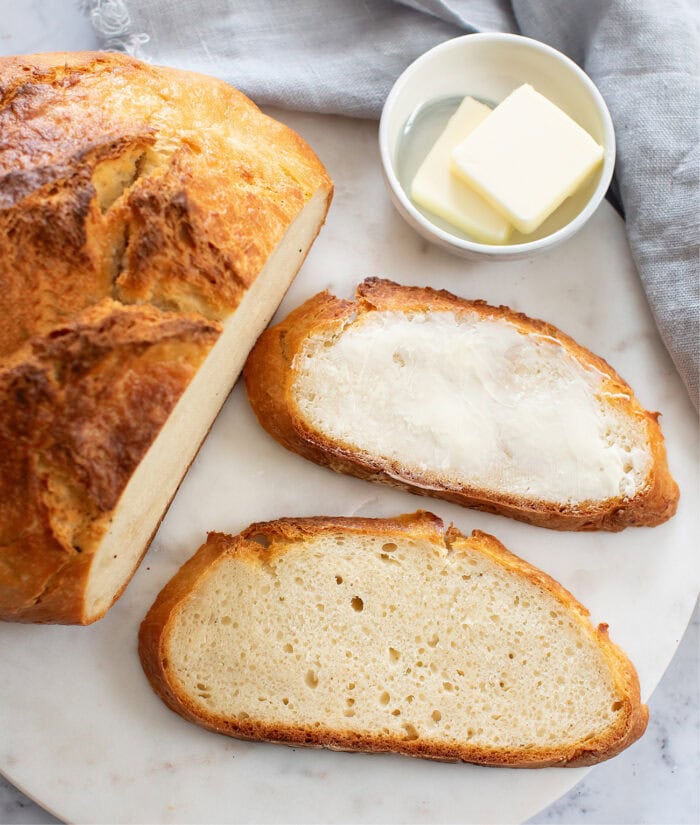
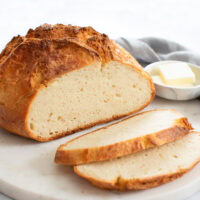
This bakery-style yogurt bread is incredibly easy to make. You only need 2 ingredients. No kneading is required. The bread also doesn’t need yeast, but still has a texture of a traditional yeast bread. The bread is crusty on the outside and soft and chewy on the inside.
I love baking my own bread, especially since I started creating these easy, no knead and no yeast bakery-style artisan bread loaves. This one is my favorite version yet. It’s inspired by my yogurt bread recipe, but made into a crusty bakery loaf.
Ingredients
- Self-Rising Flour
- Plain Whole Milk Yogurt
Self-rising flour: Self-rising flour is all purpose flour that is already premixed with baking powder and salt. Instead of yeast, this bread uses baking powder to get its rise. However, the bread won’t taste like a soda bread and will instead taste like a yeast bread because the dough is proofed for several hours. If you don’t have self-rising flour on hand, you can also make your own by combining all purpose flour with baking powder and salt.
Plain Whole Milk Yogurt: Make sure you use regular yogurt and not Greek yogurt. Greek yogurt is too thick and contains too much protein. It will make the bread far too dense. This bread works best with plain whole milk yogurt. The yogurt will add a slight tangy flavor but it is barely noticeable.
Need a substitute for yogurt? I’ve also got a version that uses sparkling water instead of yogurt.
How to Make Yogurt Bread
- The self-rising flour and yogurt are stirred together until all of the flour is incorporated and a dough forms. Cover the top of your mixing bowl with plastic wrap and then place the dough in the fridge for 4-6 hours to ferment. The bread is then ready to be baked.
- The bread needs to be baked in a dutch oven. This helps the bread rise and helps it develop its crusty exterior. The bread is baked for about 35 minutes with the lid on and then the lid is removed for the last part of the baking, allowing the surface to brown and crisp up.

Bread Texture
This bread has a texture just like an artisan bread loaf you would find at a bakery. It is crusty on the outside and soft and chewy on the inside. The yogurt adds richness and flavor to the bread. This bread won’t taste like sourdough. If you prefer a sourdough taste, then you may want to try my 2 Ingredient Shortcut Sourdough bread instead.
Why this Recipe Works
- This bread is inspired by my easy yogurt bread recipe. But instead of baking it right away, the bread dough ferments in the fridge for several hours which helps develop its flavor and creates a more airy texture. I first shared this technique with my 2 Ingredient Artisan Bread.
- The bread is baked in a Dutch oven. The Dutch oven traps in steam, which helps the bread rise properly. The steam also helps the bread develop its crusty exterior and its rustic appearance.
- As a result, this bread has a very similar appearance and taste to traditional bakery-style breads made with yeast, but is much easier to make.
More Easy Bakery-Style Bread Recipes
2 Ingredient No Knead Yogurt Bread
Ingredients
- 4 cups (527 g) self-rising flour see note before starting
- 2 1/3 cups (567 g) plain whole milk yogurt
Instructions
- In a large glass mixing bowl, combine the flour and yogurt. Mix well with a spatula until a shaggy dough forms. The dough will be sticky and wet.
- Tightly cover the bowl with plastic wrap and place it into the fridge. Let the dough rest and proof for 4-6 hours (up to 12 hours). The longer the dough rests, the better the flavor will be but the dough will also be wetter and harder to work with if rested too long.
- About 30 minutes before baking, preheat your oven to 450°F (232°C). Adjust your bottom oven rack to the bottom rung in your oven. Place a large Dutch oven (4.3 quarts or bigger) with the lid covered onto the bottom oven rack in the oven while it preheats. This is important. The dutch oven needs to preheat before adding the bread. You also want the bread to bake on the lowest rung so that the top of the bread doesn't get too dark.
- After the dough has rested, wet your hands with some water. Grab one side of the dough, stretch it upward, and then fold it over the center of the dough. Repeat this process from all eight sides of the dough.
- Lightly flour a work surface with self-rising flour. Carefully turn the dough out onto the floured surface, seam side down. Use a bench scraper or lightly floured hands to rotate and drag the dough towards yourself on the floured surface, until you form a round ball. Place the shaped dough, seam side down, onto a piece of parchment paper.
- Remove the preheated Dutch oven from the oven. Remove the lid and carefully transfer the parchment paper with the dough into the hot Dutch oven. Carefully add a few ice cubes to the bottom inside of the Dutch oven, but outside of the parchment paper. (So the ice should not touch the dough because the ice is outside of the parchment paper). Put the lid back on and place it back into the oven to bake covered for 35 minutes.
- After 35 minutes, remove the lid and reduce the oven temperature to 425°F (218°C). Continue baking the bread for another 15 to 20 minutes or until the bread is browned on the surface and fully cooked. The very tips on the top part of the bread where the seams split may turn very dark before your bread is fully baked. This is normal. You can just trim that off once the bread is done. Let bread cool fully before cutting and serving.
Notes
- Make sure to use plain whole milk regular yogurt and not Greek yogurt. Greek yogurt has too much protein and will make your bread very dense. I used Stonyfield whole milk yogurt.
- Self-rising flour amount. There are 2 main kinds of self-rising flour sold in the US. One that is a lower protein (2 grams per 1/4 cup (30g)) flour and one that has a regular amount of protein (3 grams per 1/4 cup (30 g)). Brands like King Arthur Flour and White Lily make the low protein flour. Brands like Gold Medal* and most store/generic brands contain a regular protein amount. The amount of protein affects how much liquid is absorbed. For this recipe, you want a flour with a regular amount of protein. Please use a self-rising flour with 3 grams of protein per 1/4 cup (30 g). Or make your own self-rising flour with the recipe below.
- *This product link is an affiliate link. This means I earn a commission from qualifying purchases.
- Homemade self-rising flour: Combine 4 cups of all purpose flour, 2 tbsp baking powder and 1 tsp salt. Whisk to evenly combine. Make sure your all purpose flour has a regular amount of protein (3 grams per 1/4 cup). Most brands in the US contain this amount but there are some brands with higher protein (4 grams per 1/4 cup) such as King Arthur Flour and Bob's Red Mill. You do not want a high protein flour for this bread. It will be dense and dry.
Nutrition
The nutrition information provided are only estimates based on an online nutritional calculator. I am not a certified nutritionist. Please consult a professional nutritionist or doctor for accurate information and any dietary restrictions and concerns you may have.


Great recipe- Just baked it and it looks beautiful, haven’t tried it yet. One question- is it better to let the bread cool in the Dutch Oven, or take it out?
Thank you!
Thanks Colleen! It is probably best to take it out of the Dutch oven so it doesn’t continue baking!
This bread was fun to make, and I made my own self rising flour- thanks for that help! I ended up getting busy and did not make the bread for 24 hours, and was sure it wouldn’t turn out right but it looks and smells beautiful! Almost done baking. Thanks for the recipe!
We’re so glad you enjoyed this recipe!
Looks such an easy recipe. Will have to give it a go. Brilliant 2 ingredient recipes. Thanks.
Thank you!!
Two questions ….. I hope that you don’t mind!
One ….. Could you use a sweeter flavoured yoghurt to give a sweet breakfast bread?
Two ….. Could you bake this in an oblong loaf tin of is it a must to use a Dutch oven?
Thank you!
Alexandra
This is meant to be a savory bread so I think you may find the taste odd to add something that is just a little bit sweet to it. In addition if you use a sweetened yogurt you would need to adjust the flour amount because the sugar in the yogurt adds additional moisture. This bread can’t be baked in a loaf pan. It is designed for a dutch oven. I do have a recipe for yogurt bread in a loaf pan: https://kirbiecravings.com/2-ingredient-yogurt-bread/
Can this (or any of your bread recipes) be made in a bread machine?
We have not tested that method so we are unsure what the final results would be!
Very good results
We’re so happy to hear that!!
Turned out great
We’re so glad you enjoyed this recipe!
This needs a video
Thank you for your input! We plan on making a video in the near future.
Can this bread be made with your homemade self-rising flour but without the salt? What purpose does the salt serve in baking anyway? For people on low sodium diets there is a sodium free baking powder that I can use and have been looking for recipes without baking soda and low to no salt for my 90+ year old parents. These bread recipes look fantastic!
The bread can technically be made without the salt but you may likely find the bread very bland without any salt at all.
Can this be made with any other type of flour? My husband cannot eat gluten.
We have not tested this recipe with any other type of flour!
Can’t wait to make!
We love to hear that! Let us know how you like the recipe!
Can I add milk to my Greek Yogurt to make it as thin as regular yogurt, or would there still be too much protein? What if I thinned the Greek yogurt with water?
I’m asking because I always have Greek yogurt on hand, but never buy regular yogurt.
Greek yogurt is too thick and contains too much protein. It will make the bread far too dense! This bread works best with plain whole milk yogurt.
Thank you so very much for your recipe and can’t wait to try it.
You’re welcome! Let us know how you like it!
Can you add sugar to this recipe and if so how much sugar?
We have not tested this recipe by adding sugar so we are unsure what the final result would be!
All I generally have is Greek yoghurt… I wonder if I could water (or milk) it down a bit to reduce the density?
It might be possible, but it would be very difficult to determine how much you would need to add to reduce the thickness as well as the protein levels in the yogurt. Without testing it, we aren’t sure what the amounts would be.