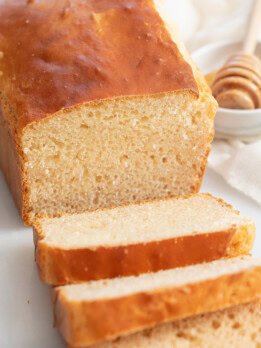
3 Ingredient Honey Bread (No Yeast, Eggs, Butter or Oil)
This easy honey bread is just 3 ingredients. It doesn’t require any yeast, eggs, butter or oil. The dough takes less than five minutes to prepare. The bread comes out soft and sweet. It can be enjoyed plain or used for sandwiches.
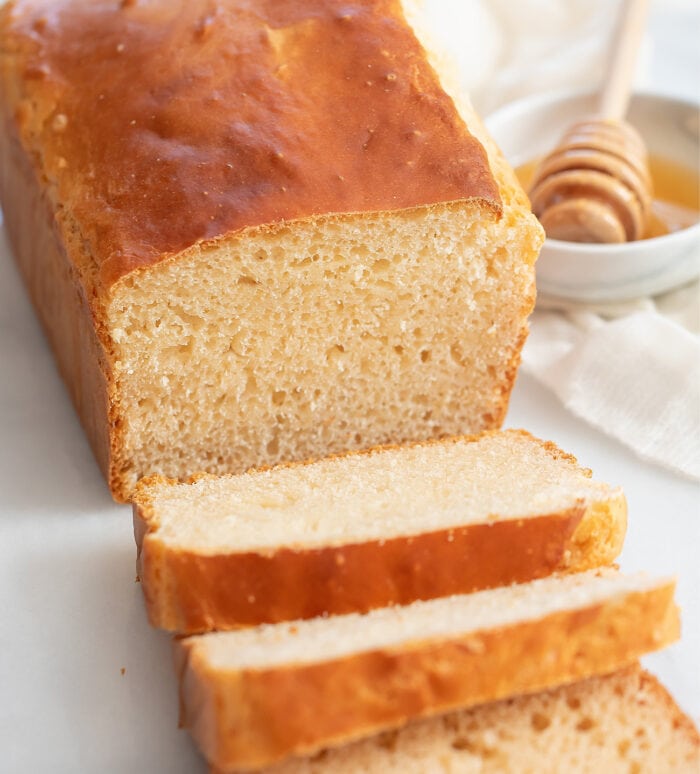
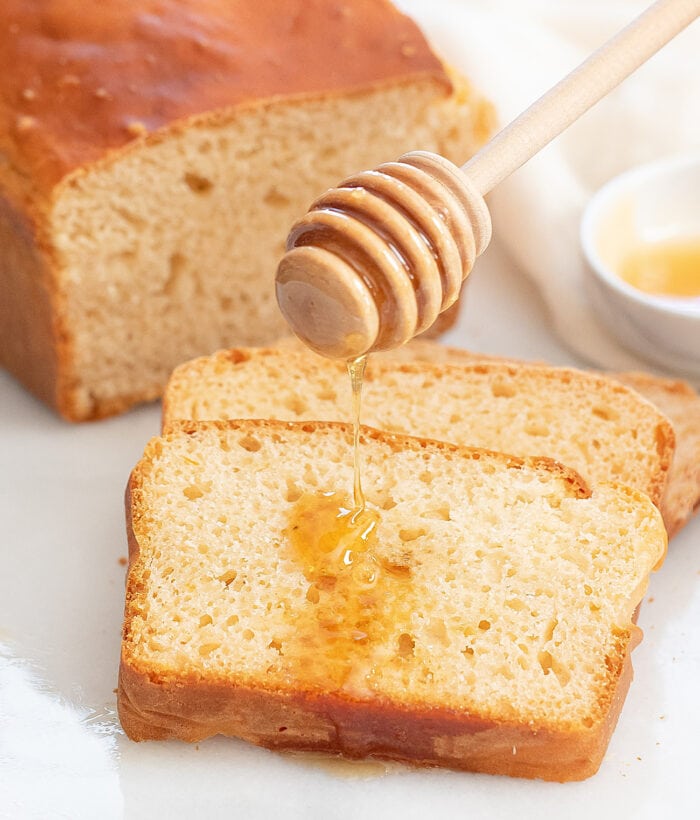
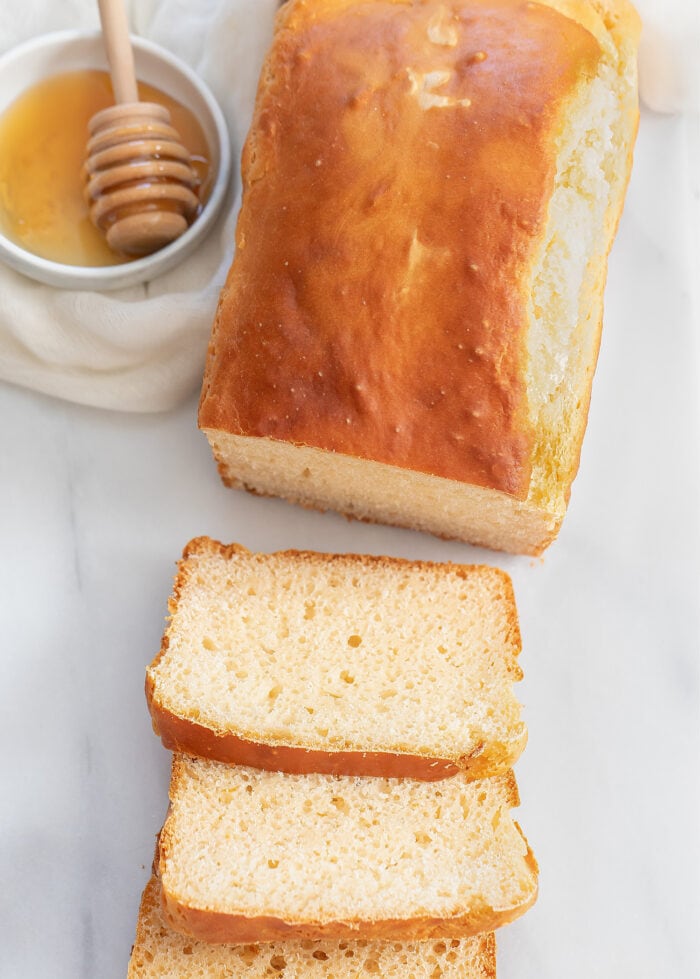
I love honey-flavored baked goods and this honey bread is one of my favorite breads to make. The bread is lightly sweetened with honey. You can eat it plain or drizzled with more honey or you can even use the bread to make sandwiches.
Ingredients
- Self-Rising Flour
- Milk
- Honey
Self-Rising Flour: Self-rising flour is all purpose flour that is already premixed with baking powder and salt. I like to always have self-rising flour on hand because it saves a few extra minutes. If you don’t have self-rising flour, you can easily make your own by mixing together all purpose flour, baking powder and salt.
Milk: This recipe uses low-fat milk. I used 1% milk.
Honey: Honey adds some sweetness and moisture to the bread.
How to Make Honey Bread
The flour and milk are first stirred together until a wet dough forms. The honey is warmed up briefly so that it is a thin liquid and then stirred in. You want to warm up the honey first so that it is easier to stir into the dough. The dough is then poured into your prepared baking loaf pan and ready to be baked.
Texture and Sweetness
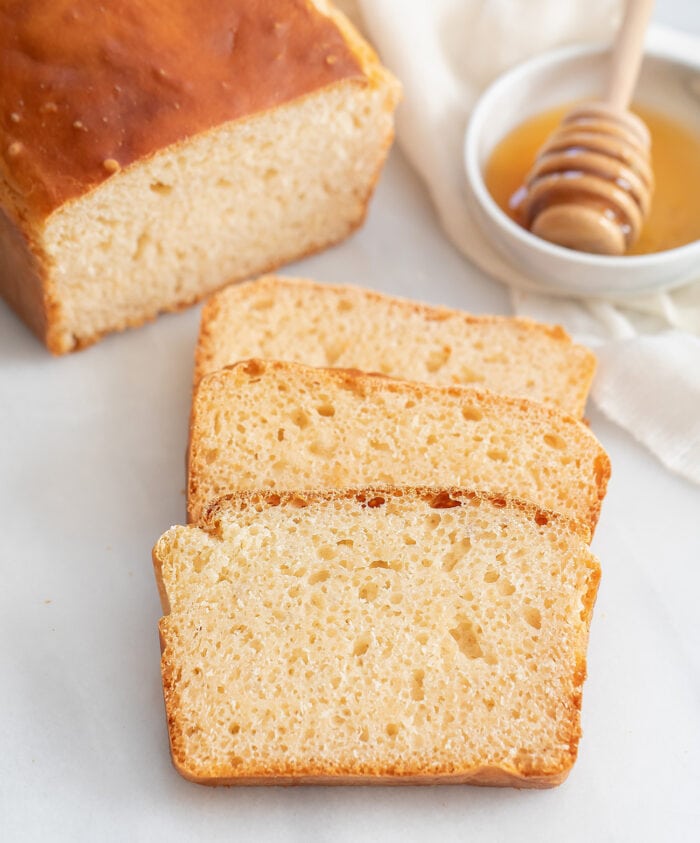
This bread has a similar texture to bread made with yeast. It is not a cake-type bread. It is soft but sturdy enough for adding a spread or making sandwiches. The bread is sweetened with honey but it’s not so sweet that it would be considered a cake or dessert.
More Easy Bread Recipes
- 3 Ingredient Lemon Bread
- 3 Ingredient Honey Bread Rolls
- 3 Ingredient Healthy Bread Rolls
- 4 Ingredient French Bread
3 Ingredient Honey Bread
Ingredients
- 3 cups (375 g) self-rising flour, see note regarding flour amount
- 1 1/4 cups (296 ml) lowfat milk
- 1/4 cup (59 ml) honey
Instructions
- Preheat oven to 350°F (177°C). Line an 8 x 4 inch baking loaf pan with parchment paper.
- Add flour and milk to a large mixing bowl. Use a whisk to mix the two together, whisking until no flour lumps remain. Be careful not to overmix as it can make your bread tough.
- Warm up the honey briefly in the microwave (about 15 seconds) until it is a thin runny liquid. You can also warm up the honey on the stove. Pour honey into the bread batter and stir in until honey is evenly mixed in and bread batter is uniform in color.
- Add batter to your prepared loaf pan. Bake for about 40 minutes or until bread is done. When bread is ready, if you apply light pressure to the surface, it should bounce back. Let the bread cool fully before slicing. The bread is best enjoyed soon after it is baked. If you are eating the next day, warm up bread slices before eating.
Notes
- This recipe was originally tested with White Lily's self-rising flour which has a lower protein content than some other brands of self-rising flour. Please check the protein content of your flour before starting. If your self-rising flour has 2 grams of protein per 1/4 cup, then you can use the amount stated in the recipe. If your self-rising flour has 3 grams of protein per 1/4 cup, then remove 6 tbsp of the flour from the amount in the recipe and replace with 6 tbsp of cornstarch.
- Homemade self-rising flour: If your all purpose flour has 3 grams of protein per 1/4 cup, use the following measurements: Add 2 cups + 10 tbsp all purpose flour, 4.5 tsp baking powder, 6 tbsp cornstarch and 3/4 tsp salt to a bowl. Whisk until evenly combined. If your all purpose flour has 2 grams of protein per 1/4 cup, use the following measurements: Add 3 cups all purpose flour, 4.5 tsp baking powder, and 3/4 tsp salt to a bowl. Whisk until evenly combined.
- To properly measure flour, spoon the flour into the measuring cup and then level off with a knife. Do not directly dip the measuring cup into the flour because this results in too much flour. Use this method of measuring whether you are measuring self-rising flour or measuring all purpose flour to make your own self-rising flour.
- Make sure you don't add the honey until the end. If you add it at the beginning, it will stick to the flour and cause it to clump.
- Warm up the honey before adding it. This will make it easier to mix into the batter and distribute evenly. If you don't warm it up, it will be thick and sticky and hard to mix in.
- This bread is lightly sweetened. It is not meant to be like a cake or dessert.
- The bread tastes best the same day it is baked. If you plan on eating it the next day, you should warm up the bread again (in the microwave or a toaster oven) to get the texture back to when it was first baked (it will be more brittle and crumbly if you don't reheat it).
- I used one percent low fat milk. While I have not tested any substitutions, I think this bread will also work with milk alternatives like oat milk or almond milk.
This is a Wonderful Easy recipe and the Bread is Delicious!!!!
Thank you! So glad you liked it!
I tried making this 3 times and it does not work. It looks and tastes horrible. I am a good cook, but nothing I did could save the bread. Threw it out every time.
We’re sorry to hear you had trouble with this recipe. Many readers have made this successfully. It could be the flour you are using? This recipe was made with a low protein flour. We discuss this in detail in the notes on what to do if you are using a regular or high protein flour. Using regular or high protein flour without these changes would make the bread very dense or dry.
Suppose to be My husband & I enjoyed it.
We’re so happy to hear that!
Made this today, much husband & I absolutely enjoyed this!! Will be making this regularly.
Hi Barbara! We’re so glad you and your husband enjoyed this bread!
Hello,
The recipe calls for low-fat milk, but I only have 2% milk, will this work?
Yes it should work just fine!
I saw this recipe and decided to make it. I am glad that I did because it was so easy to put together and came out tasting really good. I plan to make it again. I wanted to add some cheese to it but wasn’t sure if it would work with the cheese. Has anyone tried it with cheese? Anyway,thanks for the great recipe! ?
We have not added cheese to this bread so we are not sure how that would turn out! We’re glad you enjoyed the recipe!
I love how easy this bread is and how fast it comes together. The taste is nice as well. I was thinking of adding some cheese to it but didn’t, because I wanted to try it “as is” for the first time. Thanks for sharing this great recipe. I am going to use leftover pieces to make French toast in the morning. Can’t watch try it!
I’m so glad you like the bread!
Made this tonight and it turned out very nice. I used oat milk because that’s what I had on hand, but it worked just fine. Also I only had all-purpose flour, but the conversion instructions did the trick. Great recipe, will definitely make this again.
We’re so glad you enjoyed this recipe Jenna!
INCREDIBLE SCENT ..makes you want to lock the door and eat the whole loaf.
I put the warmed honey into the milk and stirred it in , saving a step. Worked out fine.
What a luscious loaf.. how simple and perfect.
We’re so glad you loved it!
I tried this and loved it! I limit my carbs, so I used a combination of almond flour, tiger flour and oat flour. It was fantastic and now I get requests from all who tried it to make it again and again. Thank you!!
That’s great! Thanks for sharing your adjustments, too.
I’m fairly new at bread making so please don’t take my comment as criticism. I understand it is totally me doing something wrong. I’m husband and I love the flavor of this bread but it always turns out very bumpy on top. I have measured the flour by spooning as suggested also. Am I over mixing? I didn’t have success mixing with a whisk as the dough gets stuck in the whisk. Is there a better technique to mixing the flour and milk? I appreciate all your help.
Did you use an electric mixer? The batter may have been overmixed. If you don’t want to use a whisk, you could try mixing with a spatula until the batter is just combined.
This comment is for Jane Gimlin….
Flour has different grinds (weights).. maybe and sometimes it compacts itself in the bag.
I would try sifting it next time. I smoothed out the top of my loaf by slightly wetting my hand and rubbed the top flat. Also, I melted a tablespoon of butter and drizzled it over the top of the loaf about 5 minutes before it would come out of the oven..n which enhanced the flavor even moreso.
Keep trying. This recipe is a keeper!
Thanks for sharing your tips!
Sounds really good and easy. Can this bread be made with sugar instead of honey?
We’ve only tested it with honey.
I made this and it was interesting and tasted good. Yes it was more bisquit-like, than regular bread but definitely pairs well with a roast, potatoes, and gravy I think your readers would be better served if they knew how to mix the flour and milk. If you mix it like flatbread, where you add the flour to the milk until the dough is light and workable and use a spatula instead of a whisk, it works well. The honey makes this bread shine
What alterations do i need to make to the 3 ingredient honey to make it gluten free and also a substitute for the honey?
Sorry, but we haven’t tested this as a gluten-free bread.
Could you make this with gluten free self rising flour?
Sorry, but we haven’t tried that.
Absolutely amazing
I’m so glad you liked it!
Haven’t seen this recipe or tried it.
We hope you try it soon!
Could you add raisins or sultanas to make it like a fruit loaf?
We haven’t tried it, but it could work – let us know if you try it!
I just made this and mine came out to a dough not a batter. It’s in the oven but I’m sure it won’t work. I couldn’t mix it with out using my hands like it was a dough. I checked all of the measurements and I did all correct. What could be the problem. I would love to make this every day.
The batter may have been overmixed. Be sure to warm up the honey briefly in the microwave (about 15 seconds) until it is a thin runny liquid.
Mine did not turn out like the picture, it was a big biscuit…which I’m not mad about at all lol if I don’t wanna take the steps and cut ingredients to make biscuits I will definitely make this! And enough for a crowd!
If it had a biscuit-like texture, you might have added too much flour or overmixed the batter.