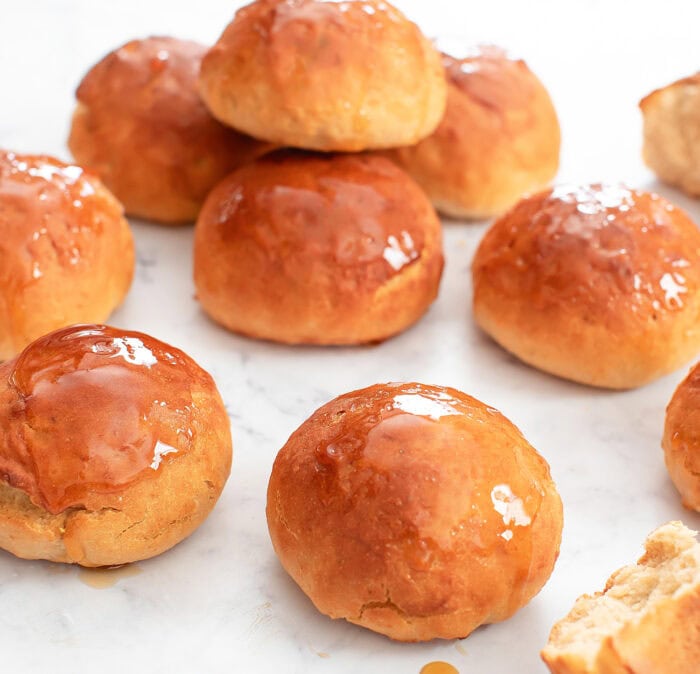
Soft honey yogurt bread rolls that don’t require any yeast or kneading. These rolls are easy to make and only require 3 ingredients. They are an easy side dish to serve with a meal.
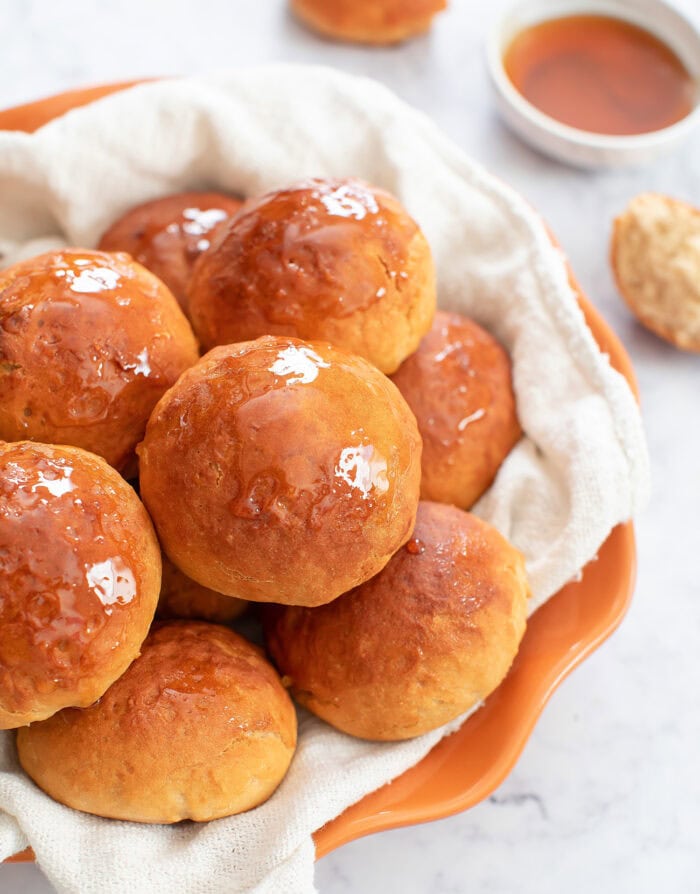
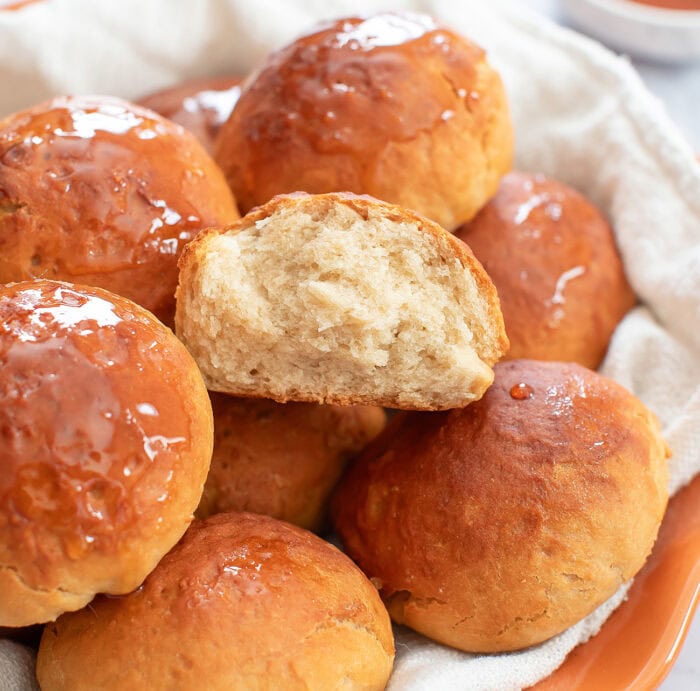
I love the flavor and texture of these rolls. The yogurt gives these rolls a slight tangy flavor similar to sourdough. The honey adds a little sweetness. They are very soft and a little chewy. You can’t tell that the rolls are made without yeast.
Ingredients
- Self-rising flour
- Yogurt
- Honey
Self-rising flour: Self-rising flour is all purpose flour that is premixed with baking powder and salt. The baking powder is used to help the bread dough rise. You can also make your own self-rising flour blend by combining all purpose flour, baking powder and salt.
Yogurt: This recipe uses regular yogurt. I used plain whole milk yogurt. Make sure to use regular yogurt and not Greek yogurt. Greek yogurt contains too much protein and will make the bread come out very dense.
Honey: Honey adds a little bit of sweetness to these rolls.
How to Make Honey Yogurt Bread Rolls
- The yogurt and honey are first mixed together. The flour is then stirred in until a dough forms.
- The dough is then left to rest in the fridge for a few hours. This helps the dough develop better flavor and texture.
- The dough is then divided into 12 equal pieces and rolled into balls.
- The bread rolls are then ready to be baked.
Recipe Highlights
- These bread rolls are easy to make. No kneading, no yeast. No need for multiple rises.
- The bread has a lot of flavor. The yogurt gives the bread a little bit of a sourdough flavor. The honey adds sweetness.
- The rolls are so soft and chewy and have a crusty exterior.
More Bread Roll Recipes
3 Ingredient Honey Yogurt Bread Rolls
Ingredients
- 2 cups (479 g) plain yogurt
- 1/2 cup (4 fl oz/118 ml) honey
- 4 cups (530 g) self-rising flour see note before starting
Instructions
- In a large mixing bowl, add the yogurt and honey and mix until thoroughly combined. Add in the flour and mix with a spatula or your hand just until all the flour is incorporated and a shaggy dough forms. I like starting with a spatula and then using my hand for the last part of mixing to fully incorporate all of the flour.
- Tightly cover the bowl with plastic wrap and place the bowl into the fridge to rest (between 3-6 hours). This resting time allows the dough to develop more flavor and air pockets which will give it a better texture.
- About 30 minutes before baking, preheat your oven to 425°F (218°C). Add a large cast iron skillet (or large baking dish that is oven safe at 425°F) to the bottom rack of the oven while it preheats. Adjust the rack that the bread will bake on to just above the bottom rack (You want the bread to bake as low in the oven as possible so the surface doesn't get too dark). Bring a tea kettle or large pot of water to a boil.
- After the dough has rested, wet your hands with some water. Grab one side of the dough, stretch it upward, and then fold it over the center of the dough. Repeat this process from all eight sides of the dough.
- Generously flour a work surface with self-rising flour. Carefully turn the dough out onto the floured surface, seam side down.
- Use a bench scraper or sharp knife to divide the dough into 12 equal portions. I recommend weighing the dough to make sure all the rolls are the same size.
- Shape each piece into a ball by pulling the edges to the center and pinching to seal. Place seam side down on your work surface and roll under your hand to create tension and form a round, taut ball.
- Place the rolls on a parchment-lined baking sheet, spacing them about 1.5-2 inches apart. If desired, you can brush tops of the bread rolls with egg white wash (see note for more details). This will give them a more smooth finish. This is optional and you can opt to not add the egg wash and your rolls will have a more rustic finish.
- When your oven is preheated, carefully pour boiling water into the cast iron skillet/baking dish.
- Then quickly add the baking sheet of rolls and bake for about 20-25 minutes or until dark golden brown on the outside and fully cooked. To check if bread rolls are done, you can tap the bottom and they should sound hollow. If you still aren't sure if the bread rolls are done, you can cut one open to check.
- Let the rolls cool on a wire rack for about 30 minutes before serving. If desired, brush the tops of the bread rolls with more honey before serving.
Notes
- Yogurt: Make sure to use plain regular yogurt and not Greek yogurt or any other types of thick yogurt with high protein. The high protein will make your bread very dense. I used plain whole milk yogurt but it should also work with low fat or fat free yogurt.
- Self-rising flour amount. There are 2 main kinds of self-rising flour sold in the US. One that is a lower protein (2 grams per 1/4 cup (30g)) flour and one that has a regular amount of protein (3 grams per 1/4 cup (30 g)). Brands like King Arthur Flour and White Lily make the low protein flour. Brands like Gold Medal and most store/generic brands contain a regular protein amount. The amount of protein affects how much liquid is absorbed. For this recipe, you want a flour with a regular amount of protein. Please use a self-rising flour with 3 grams of protein per 1/4 cup (30 g). Or make your own self-rising flour with the recipe below.
- I made these with Gold Medal self-rising flour (Amazon | Walmart)*
- *These product links are affiliate links. This means I earn a commission from qualifying purchases.
- Homemade self-rising flour: Combine 4 cups of all purpose flour, 2 tbsp baking powder and 1 tsp salt. Whisk to evenly combine. Make sure your all purpose flour has a regular amount of protein (3 grams per 1/4 cup). Most brands in the US contain this amount but there are some brands with higher protein (4 grams per 1/4 cup) such as King Arthur Flour and Bob's Red Mill. You do not want a high protein flour for this bread. It will be dense and dry.
- Optional egg wash finish: If you want the bread rolls to have an egg wash finish, add the egg white of a large egg into a small bowl and whisk it lightly. Then brush rolls with the egg white. Adding egg wash will make the surface of the rolls smoother and give them a slightly shiny finish. There will still be splits on the surface of the bread rolls but they will be more off to the sides of the rolls rather than on the top. If you don't do an egg wash finish, the bread rolls will have a more rustic finish with more splitting along the tops of the rolls and the bread rolls will have a more matte finish rather than a shiny finish.
Nutrition
The nutrition information provided are only estimates based on an online nutritional calculator. I am not a certified nutritionist. Please consult a professional nutritionist or doctor for accurate information and any dietary restrictions and concerns you may have.




So easy to make and so soft and flavorful! These were actually my favorite part of Thanksgiving dinner. Really appreciate you sharing this recipe, this will become part of our tradition.
We’re so happy to hear that and so glad you enjoyed these for Thanksgiving!
This recipe looks so easy and especially delicious!! I am excited to do a test run before Thanksgiving and if successful, it will definitely include add them to my menu. I’m also going to make Honey Butter as the perfect topping. Mmm… I’m craving them right now… Too bad it’s 12:15am EST.
YUM! We hope you enjoy them!
Good morning from Western Australia
I have noticed that Aussie cup measures are different to the American cup, will this difference have a change with the cooking time?
Also I am lactose intolerant so the only yoghurt in my country area is lactose free greek yoghurt, so do you have any simple suggestions, if I have to have the bread denser I will go with it but my first attempt was a bit too dense,, it also was another recipe with a lot more self raising flour.
Thank you
Kay.
Hello! We are not sure what the difference would be based on the measuring cups. Greek yogurt contains too much protein and will make the bread come out very dense, we have not tested it with other kinds of yogurt so we are unsure what the results would be with something different!
Can these rolls be made with gluten free flour
We haven’t tested the recipe with gluten free flour but if you do try it, please let us know how it turned out!