
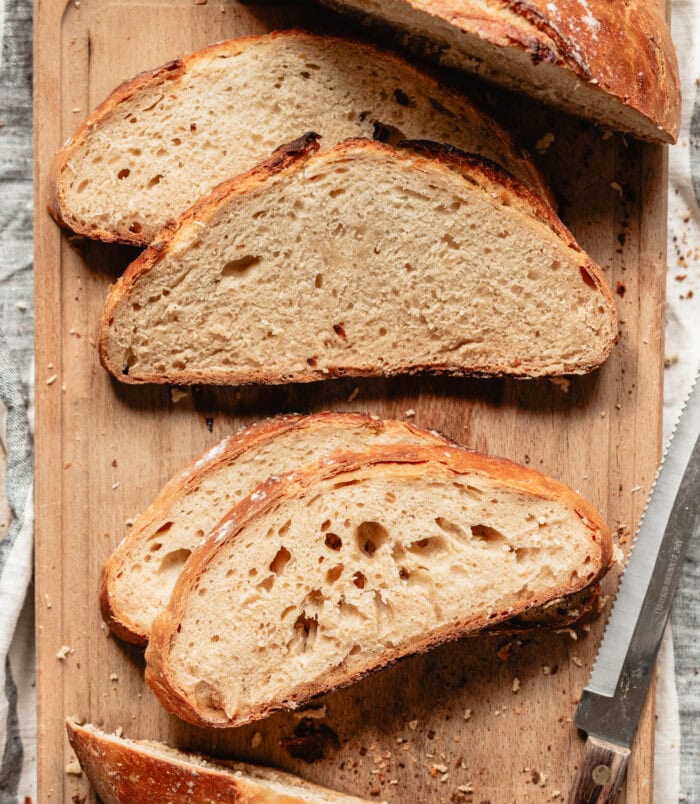
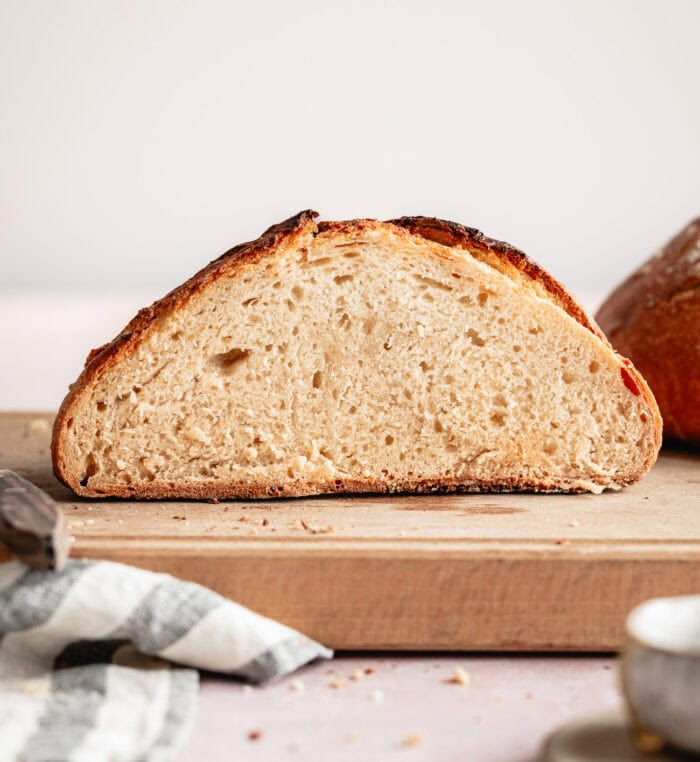
This bakery-style honey bread doesn’t require yeast or kneading. It also doesn’t need to be baked in a Dutch oven. The bread is super easy to make and nearly fool-proof. You only need 3 ingredients. The bread is crusty on the outside and soft and sweet on the inside.
This honey bread is one of my new favorite breads to make. I love the subtle sweetness and flavor that the honey adds. This bread is incredibly easy to make even if you’ve struggled with homemade bread recipes before. The bread has a texture like it was made with yeast but you don’t need any yeast. As an added bonus, this bread can be made even without a Dutch oven.
Ingredients
- Self-rising flour
- Sparkling water
- Honey
Self-rising flour: Self-rising flour is all purpose flour that already has baking powder and salt added to it. Since this bread does not use yeast, it uses baking powder to get its rise.
Sparkling water: Make sure you use sparkling water where the carbonation has been added to it (so not a natural mineral water). The bread does rely on the carbonation in the water to help it rise properly.
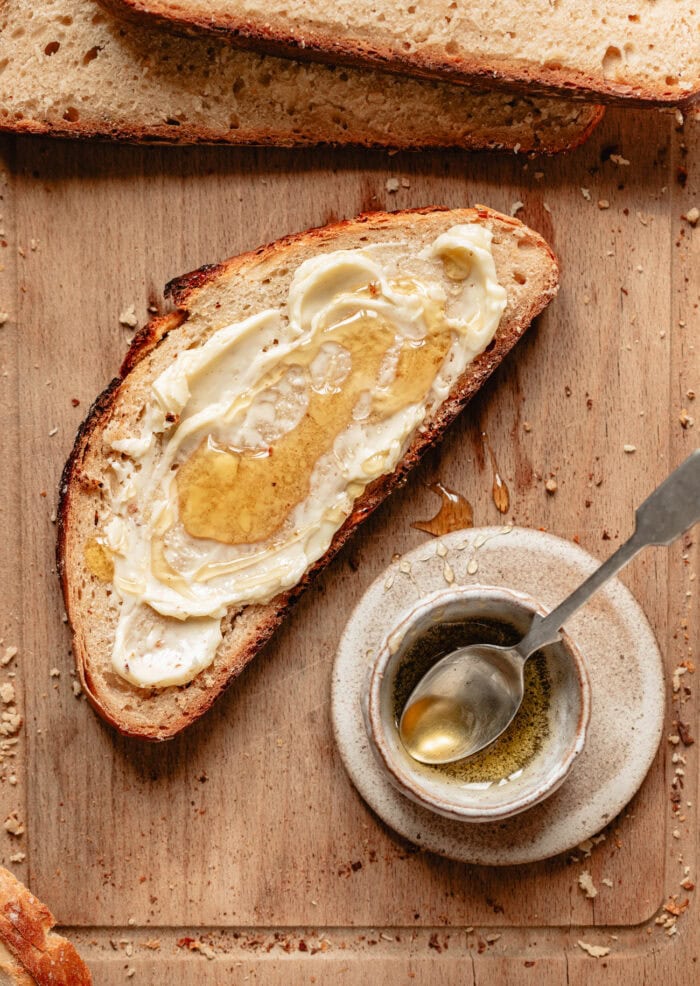
Honey: Honey adds flavor and a little sweetness to this bread.
How to Make Honey Bread
- The flour, water and honey are combined in a bowl until a dough forms.
- The dough is then covered and placed into the fridge to allow it to ferment.
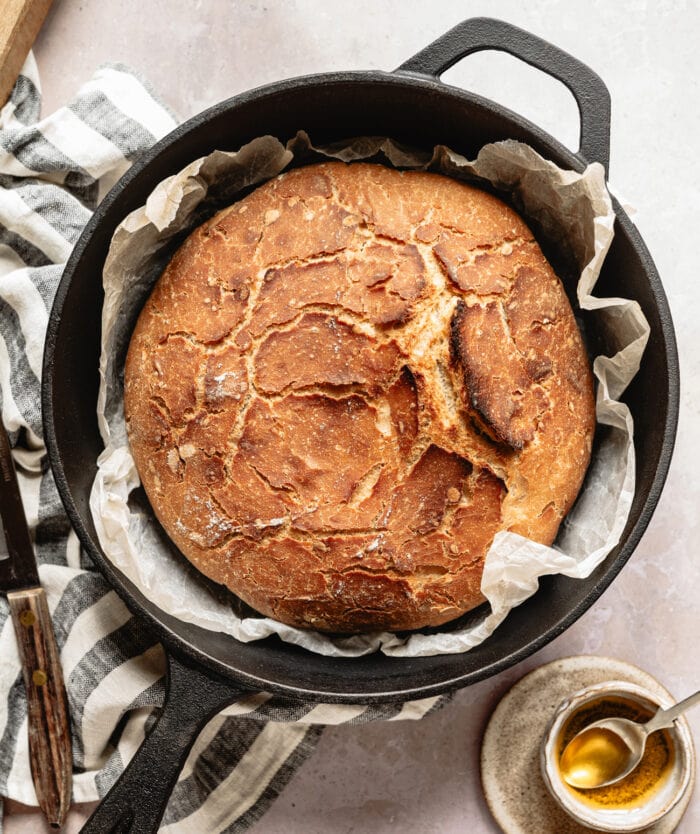
- After a few hours, the bread is ready to be baked. The bread can either be baked in a Dutch oven or it can be baked on a baking sheet with a large oven-safe pot placed over the bread.
Baking Bread without a Dutch Oven
Most recipes for these kind of crusty, artisan-style bread loaves usually require a Dutch oven. And if you have one, I definitely recommend you use it because it is ideal for baking these bread loaves. However, every time I share one of these bread recipes I get asked if it can be made without a Dutch oven. So I’m finally excited to share that this can be made without a Dutch oven. The bread rises just as well and tastes great. The only downside is that the exterior doesn’t brown quite as nicely as the Dutch oven version. The bread surface turns out both darker and paler rather than a very even dark golden brown.
To bake this bread without a Dutch oven, you’ll need a baking sheet, parchment paper and a very large and deep pot that is oven-safe and can withstand high temperatures (at least 425F). You can also use a very large and deep cake pan if you have one. The pot is placed over the bread dough and acts similar to a Dutch oven, trapping in heat and moisture and allowing the bread to rise well.
Why This Bread Works
- The bread ferments for a few hours. This allows the dough to develop more flavor and air bubbles, which is what is key to the bread having a texture more like a yeast bread.
- The bread is baked in a Dutch oven or baked covered which traps in the steam, helping the bread rise. The steam also helps the bread develop its thick crust and rustic appearance.
More Bakery-Style Bread Recipes
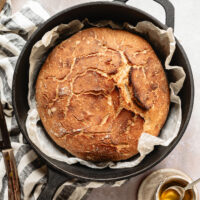
3 Ingredient Honey Bread
Ingredients
- 4 1/2 cups (580 g) self-rising flour please see note before starting
- 12 fl oz (355 ml) sparkling water see note before starting
- 1/3 cup (79 ml) honey
Instructions
- In a large glass mixing bowl, combine the flour, sparkling water and honey. Mix well with a spatula until a shaggy dough forms. The dough will be sticky.
- Tightly cover the bowl with plastic wrap and place it into the fridge. Let the dough rest and ferment for 3-6 hours.
- About 30 minutes before baking, preheat your oven to 425°F (220°C). Move your bottom oven rack to the lowest rung in your oven and place a large Dutch oven (4.3 quarts or bigger) with its lid on in the oven while it preheats. If you are not using a Dutch oven, put a large baking sheet on the lowest oven rack. You want to bake the bread on the lowest rack possible because the surface of the bread will get a bit dark from the honey and baking it on a lower rack will prevent the bread surface edges from turning too dark.
- After the dough has rested, wet your hands with some water. Grab one side of the dough, stretch it upward, and then fold it over the center of the dough. Repeat this process from all eight sides of the dough so that the dough forms a taut ball.
- Lightly flour a work surface with self-rising flour. Carefully turn the dough out onto the floured surface, seam side down. Use a bench scraper or lightly floured hands to rotate and drag the dough towards yourself on the floured surface, until you form a round ball.
- Place the shaped dough, seam side down, onto a piece of parchment paper. Cut one small snip with scissors at the top of the dough (about 1/2 inch long).
- Remove the preheated Dutch oven from the oven. Remove the lid and carefully transfer the parchment paper with the dough into the hot Dutch oven. Put the lid back on and place it back into the oven to bake covered for 40 minutes.
- If not using Dutch oven, carefully transfer the parchment paper with dough onto your baking sheet. Cover the dough with a very large oven-safe pot or cake pan that is oven safe in high temperatures of at least 425°F. You want the pot/cake pan to be at least 10 inches wide and at least 5 inches deep.
- After 40 minutes, remove the lid and continue baking the bread for another 15 to 20 minutes or until the bread is browned on the surface and cooked through. When bread is done, it should sound hollow when you tap the bottom. If the surface of your bread is getting too dark, you can loosely tent it with foil. (For the non Dutch oven version, bake covered for 45 minutes, before baking uncovered for about 15 minutes. The non Dutch oven version will also not brown as evenly. The edges where the bread splits tend to be very dark and there will also still be some paler spots on the bread.)
- Let bread cool fully before cutting and serving.
Notes
- Sparkling water: Make sure to use a sparkling water where the carbonation has been added to it. Natural sparkling water does not work well for this bread.
- Self-rising flour amount. There are 2 main kinds of self-rising flour sold in the US. One that is a lower protein (2 grams per 1/4 cup (30g)) flour and one that has a regular amount of protein (3 grams per 1/4 cup (30 g)). Brands like King Arthur Flour and White Lily make the low protein flour. Brands like Gold Medal* and most store/generic brands contain a regular protein amount. The amount of protein affects how much liquid is absorbed. For this recipe, you want a flour with a regular amount of protein. Please use a self-rising flour with 3 grams of protein per 1/4 cup (30 g). Or make your own self-rising flour with the recipe below.
- *This product link is an affiliate link. This means I earn a commission from qualifying purchases.
- Homemade self-rising flour: Combine 4.5 cups of all purpose flour, 2 tbsp + 3/4 tsp baking powder and 1 and 1/4 tsp salt. Whisk to evenly combine. Make sure your all purpose flour has a regular amount of protein (3 grams per 1/4 cup). Most brands in the US contain this amount but there are some brands with higher protein (4 grams per 1/4 cup) such as King Arthur Flour and Bob's Red Mill. You do not want a high protein flour for this bread. It will be dense and dry.
- Because of the honey in this recipe, the edges where the bread splits on the surface can get a bit dark during baking. This is why the bread is baked on the lowest oven rack and baked covered for a longer period of time. If the edges get a little too dark, you can scrape/trim the edges before serving.
- The non-Dutch oven version of this bread rises just as well as the Dutch oven version and has a very nice crusty exterior. However, it won't look as pretty as the Dutch oven version. The crust doesn't brown as evenly as has some paler spots as well as some darker edges.
Nutrition
The nutrition information provided are only estimates based on an online nutritional calculator. I am not a certified nutritionist. Please consult a professional nutritionist or doctor for accurate information and any dietary restrictions and concerns you may have.


This looks wonderful! Can you make it with gluten free flour?
Thank you! We have not tested this recipe with a gluten free flour so we are unsure what the final result would be!
I have a toaster oven and cannot put a full size Dutch oven in it. Can the bread be divided into smaller cast iron pans?
Hi Lee! We have not tested that but if you give it a try we suggest you keep an eye on them and the baking time since we aren’t sure how long they would need to be in there!