I know you’re probably thinking “What? Another pork belly post?”
As you may have guessed, sometimes I get a little obsessed. Even though I’m convinced I found the most perfect roasted pork belly (which I shared with you two weeks ago), I’ve come across other methods that had me curious.
This roasted pork belly has an interesting technique of scalding the pork belly skin first, which is supposed to help the skin crisp up. It’s one extra step, but not too time-consuming.
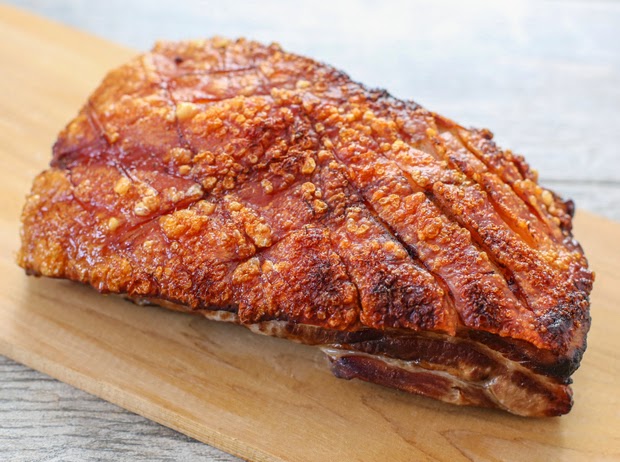
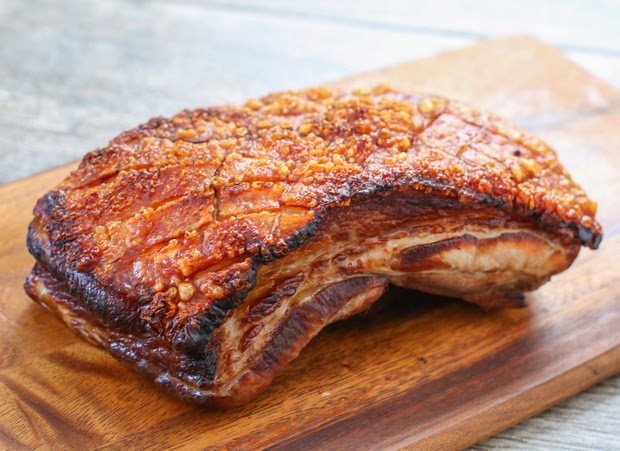
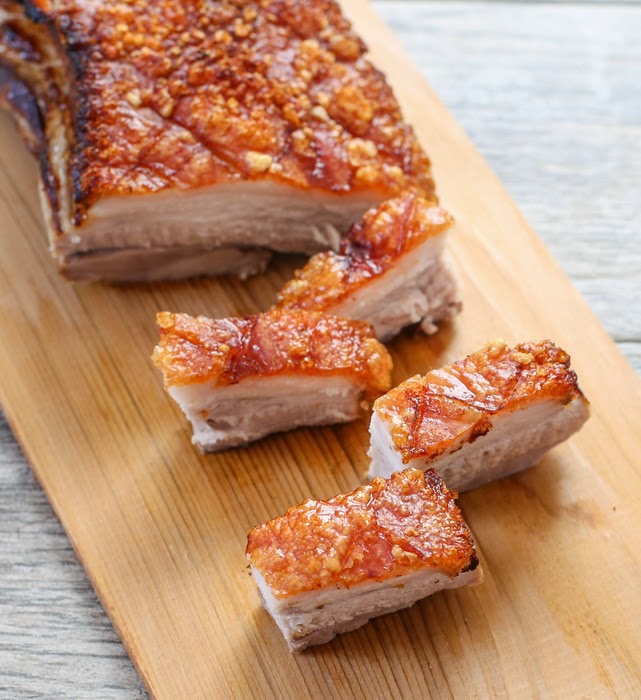
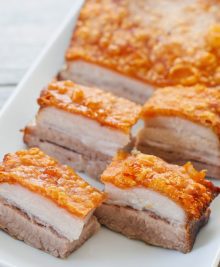
Verdict? The scalding technique does add a noticeable extra crispness to the skin which I really enjoyed. I wish I didn’t have to score the skin though and I don’t like how dark it turns. I still favor the golden pork belly which produces a crunchy crackling skin while maintaining a beautiful color and doesn’t require you to score the skin, but this recipe is pretty darn good too.
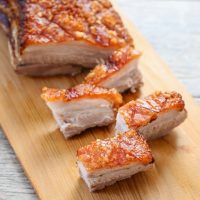
Crunchy Skin Pork Belly
Ingredients
- 2 lb pork belly
- 3 cups boiling water
For the Marinade
- 1/4 cup soy sauce
- 1/3 cup shaoxing rice wine
- 2 tbsp brown sugar
- 2 cloves garlic minced
Instructions
- The night before, score the pork belly skin, careful not to cut into the meat, but you do want to cut deeply into the skin. The skin is scored by slicing lines diagonally across, about 1 inch apart, and then slicing lines diagonally the opposite way. Over the sink, pour boiling water evenly across the skin. Then dry off skin with paper towels.
- Mix marinade ingredients in a bowl and then pour into a rectangular pan that is big enough to hold the pork belly. Place pork belly into the container, making sure only the meat touches the marinade and the skin stays completely dry. If the marinade level is too high you can pour some of it out. Place in fridge, uncovered, overnight, so that the skin is able to dry out.
- On the day of cooking, preheat oven to 350°F. Completely line a roasting pan with foil (this will make clean-up much easier). Pour 1 inch of water into the bottom of the pan. Place a wire rack on top of roasting pan to hold the pork belly. Place the pork belly on the wire rack. The pork belly will cook above the water, with the pork drippings dripping down below into the water. Make sure the pork belly is level (if one part is lower/shorter the skin will not cook evenly. if you have to, use something oven-safe to prop up a shorter part to keep it completely level). Place into the top half of oven. Bake for about 40 minutes until meat looks cooked.
- Remove pork belly and increase oven temperature to 465°F. Bake for another approximately 20 minutes until skin is completely bubbly and crisp. Let pork belly cook a few minutes before cutting and serving.
Nutrition
The nutrition information provided are only estimates based on an online nutritional calculator. I am not a certified nutritionist. Please consult a professional nutritionist or doctor for accurate information and any dietary restrictions and concerns you may have.





Very helpful and creative
Recipes
Thank you!
I followed these instructions exactly and ended up with super hard skin I couldn’t even cut it. So disappointed. I think you need to revise your instruction to cook at 350F until internal temp is 165F. The last step should be a broil step until the skin is crispy. 🙁
We haven’t had any issues with the skin turning too hard and many readers have had success with the recipe as written. It sounds like you may have overcooked it or perhaps you put the pork belly too close to the top of the oven.
If you use the scalding method for the Crunchy Skin Pork Belly recipe, do you not need to spread the one cup of salt over it like you do for the Crispy Golden Pork Belly recipe??
No, this is a different method for crisping up the skin than the salt crust one. You also score the skin for this one which is why the salt crust would not work.
Hi there,
In the second cooking step after removing the salt, do you keep the pork above the water?
Thanks,
Kerry
yes
Have made it many times in the last year. It turns out perfect and crunchy EVERY SINGLE TIME. Best recipe ever. Juicy meat and crunchy skin. I will be making 8 kgs for Xmas this year! Will have to serve it at room temp. ? ?
Sorry, not this scored skin recipe, the other with the salt and not scored.
I’m so glad the recipe has turned out well for you!
I bought 2-1/3 lbs of Pork Belly (w/ skin) yesterday (unfortunately it wasnt a single piece, it was sliced into 3 strips about 1-1/4 inches wide each). I prepped and marinated it last night and and roasted it this morning.. it came out great.. but I wish the flavor was a bit stronger.. I will say that the skin was way crispier, crunchier than I expected, which is awesome!!
Also, since I had 3 pieces, I butted them up against each other and pushed 3 wooden skewers through them to hold them together.. I also, misread the recipe and scored skin all the way into the fat (but didn’t “cut into the meat.” But it still came out great.
I’m gonna have to experiment with the marinade to see if I can get a stronger flavor. I might also try smoking the meat in my smoker for 40 minutes, then crisping the skin in the oven at 475F.
Thanks so much for sharing the recipe and cooking process!!
I’m glad the skin came out well! You could always make a stronger marinade with more soy sauce, etc.
So yes excellent procedure, I chose to use teriyaki sauce, garlic , black pepper and sugar in my marinade to soak overnight and furthurmore mixed a little sugar like 2/3 salt 1/3 sugar for the crust and the adjustment only because of my choice of taste. I forgot to score the skin which gave a challenge to cut it up in little strips , but the skin was crispy enough that I was able to crack the skin with the knife to get to cut the meat …the flavor was great with a little salt and sugar residue cooked in to the skin for a pleasant surprise . This is a fool proof method , thanks ..Wayne
glad you enjoyed the recipe!
One question I have, when you say that you can remove the skin in one piece, does that mean you should remove it? or rather it’s just a comment and it needs to be left in place with the salt on top?
hi, you are’t supposed to remove the skin at all. After the first bake, you are supposed to remove the salt crust that forms ad then continue to bake the pork belly without the salt crust.
Trying this one out tomorrow with high hopes thanks. Is there no need for any oil or salt on the skin at all?
nope. just as the recipe is!
In the last step, you remove the pork belly and increase the temperature. Then you cook it for 20 minutes. Do you put it back once it reaches 465° thus cooling the pork belly?
yes you wait for the oven to adjust before putting it back in. it shouldnt cool down that much since it should only take a few minutes for the oven to reach the new temp.