
Japanese mochi ice cream can be made in your own home. You can customize it with your favorite ice cream flavors and keep them stored in the freezer for a fun and delicious treat.
What is Mochi?
I adore mochi ice cream. For those unfamiliar, mochi is a Japanese rice cake made with glutinous rice flour and has a chewy texture. There are many different types of mochi, and you can also use it to make other kinds of desserts like mochi ice cream.
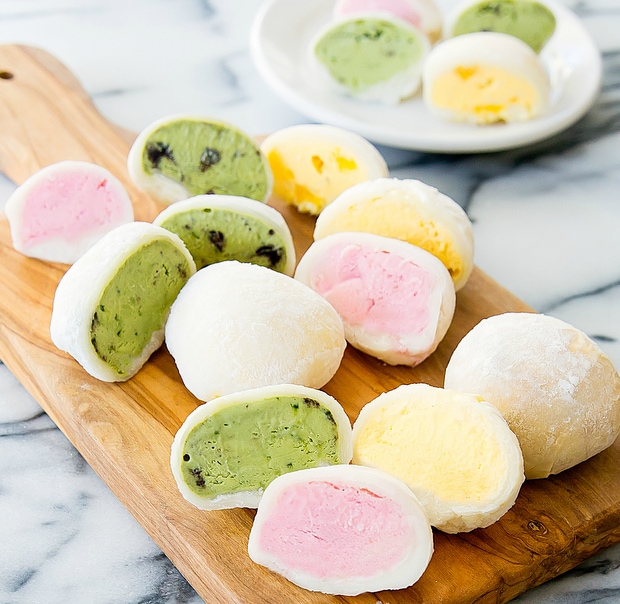
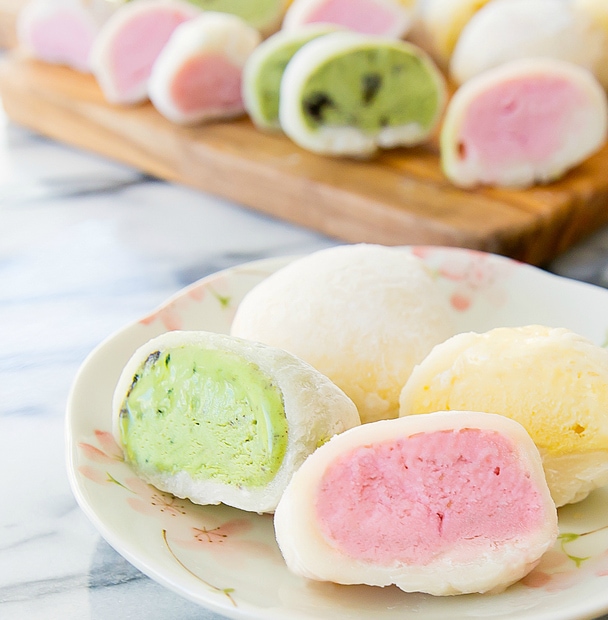
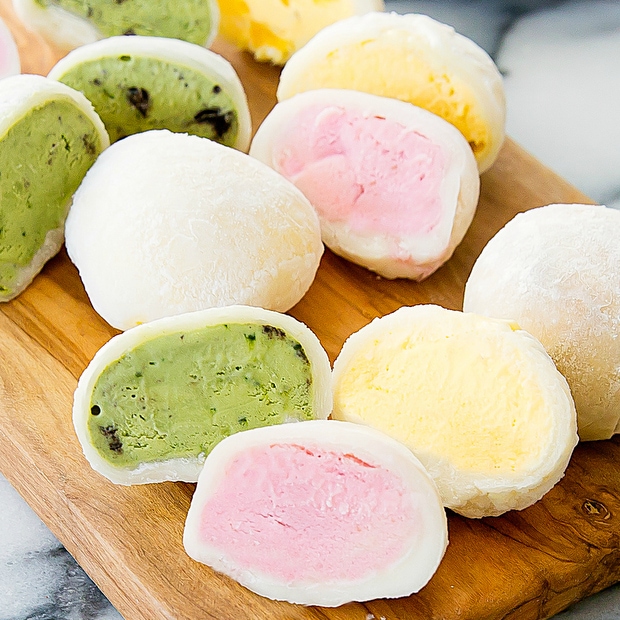
Mochi Ice Cream is a thin layer of mochi wrapped around an ice cream filling. It’s creamy, sweet, with a little chewy outer shell, and just a very delightful and cute treat.
They have become quite popular in the last few years, and I’ve been able to find them at most major grocery stores, like Vons and Ralphs. Trader Joe’s makes their own version, and the Whole Foods in San Diego carry the Bubbies brand, which is flown in from Hawaii.
I buy them a lot, but I’ve been wanting to try making my own. I’ve always enjoyed the chewy texture of mochi, and it’s been one of my favorite Japanese desserts since I was a kid. Heck, even our family dog’s name is Mochi!
I wasn’t introduced to ice cream mochi until college. I don’t quite remember how my first experience came about, but I do remember having one of those “mind-blown” moments once I tried it. I immediately became obsessed with these little round treats. They are a fun snack or dessert.
Homemade Mochi Ice Cream
I’ve been puzzled over how to make mochi ice cream for years. I’ve made regular mochi with glutinous rice flour. But the dough I used to make regular mochi did not seem like it would work well with ice cream mochi, and I was also afraid that once frozen, the mochi would stiffen and lose its chewy texture.
Luckily, I found a great recipe post and video tutorial for mochi ice cream from Just One Cookbook. Over the years, I’ve found her blog to be a great resource for Japanese recipes, so I knew her recipe would be a great place to start.
Ingredients
- Shiratamako
- Water
- Granulated sugar
- Cornstarch
- Ice cream
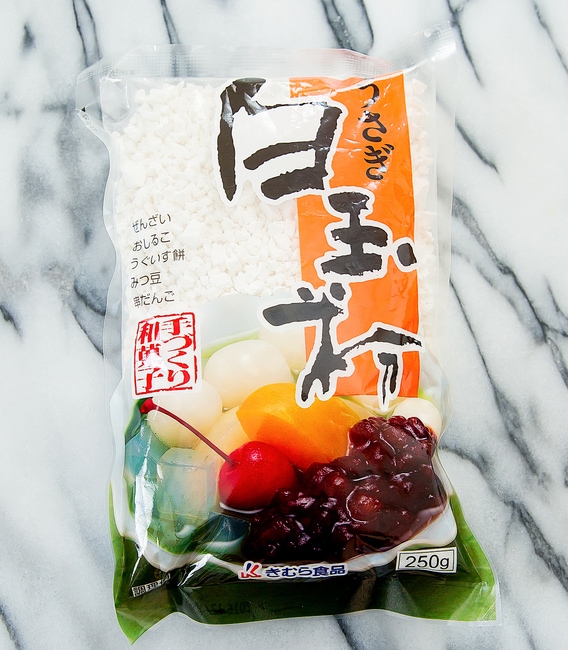
The key to producing good mochi ice cream is using Shiratamako. You can find it in most Japanese grocery stores, like Mitsuwa or Marukai. Even though this package doesn’t have it labeled in English, it was clearly labeled on the shelf.
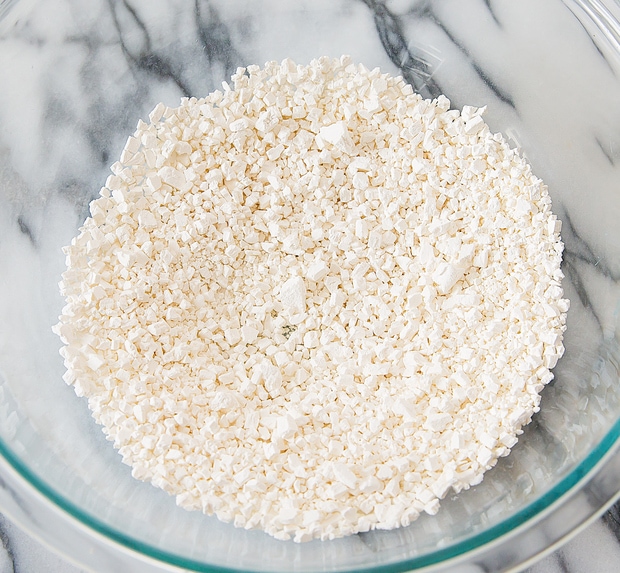
This is not the same as the more commonly found packages of powdery glutinous rice flour or mochiko. While Shiratamako is also made of glutinous rice, it is processed differently and is shaped like coarse granules rather than a fine powder.
How to Make Mochi Ice Cream
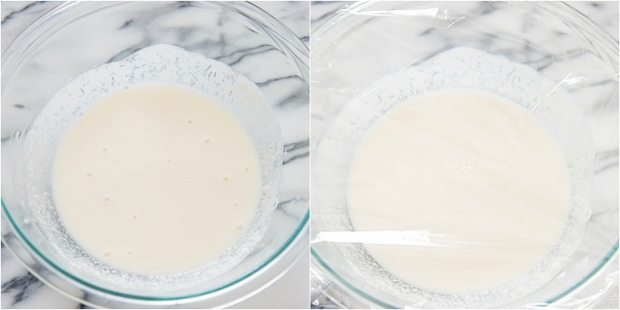
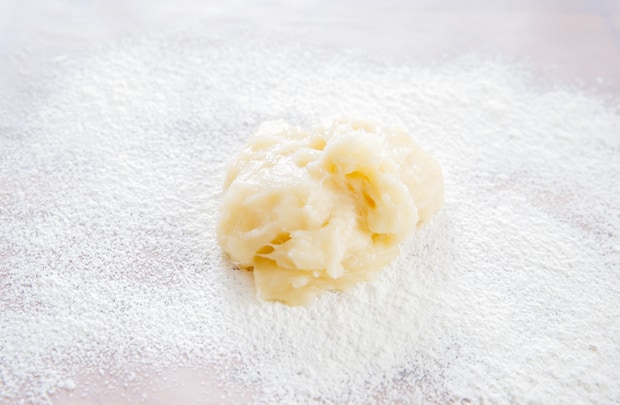
Once you have the right flour, the dough can easily be made in the microwave. First, you dissolve the dough, then you wrap it plastic wrap.
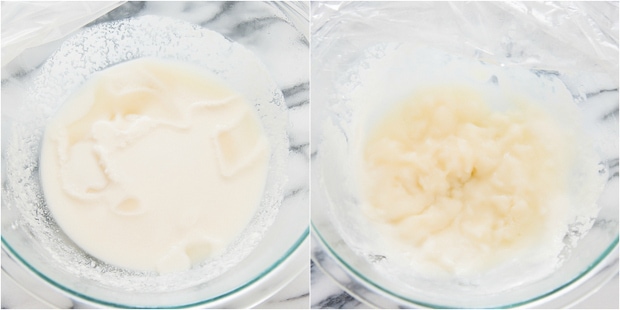
Cook it for one minute (bottom left photo). Then you mix and cook it for one more minute (bottom right photo).
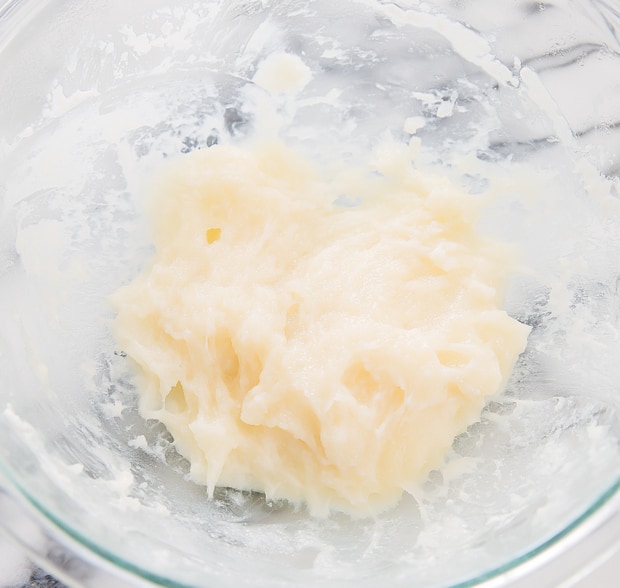
Then you gather the dough and cook it for about 30 more seconds until the dough is no longer white and slightly translucent.
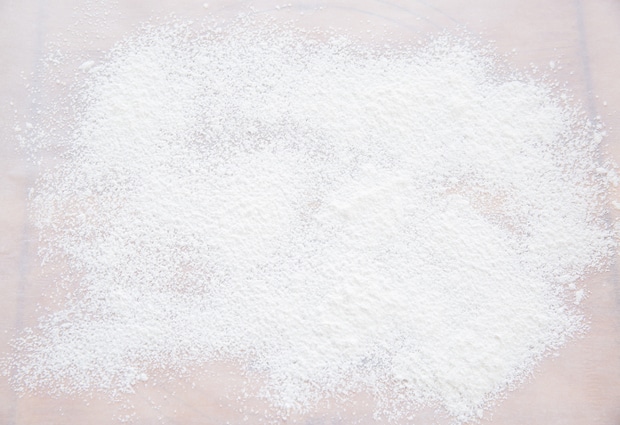
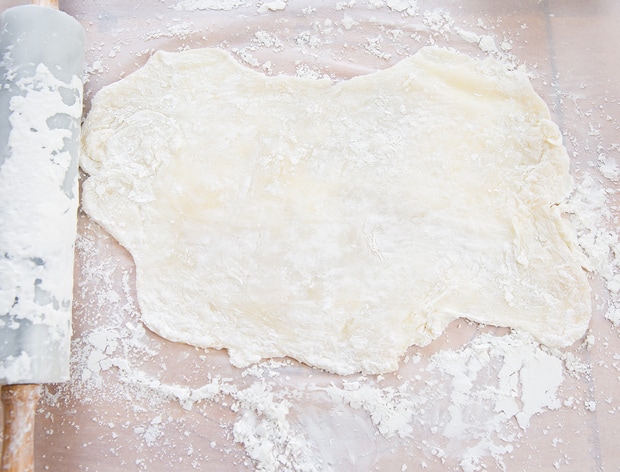
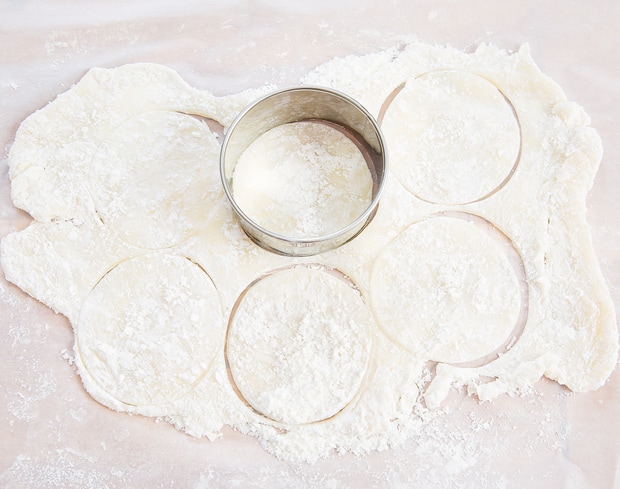
A little more time-consuming is the rolling out of the dough. It’s very, very sticky, but the use of cornstarch really helps. You roll the dough out very thinly, then cut circles.
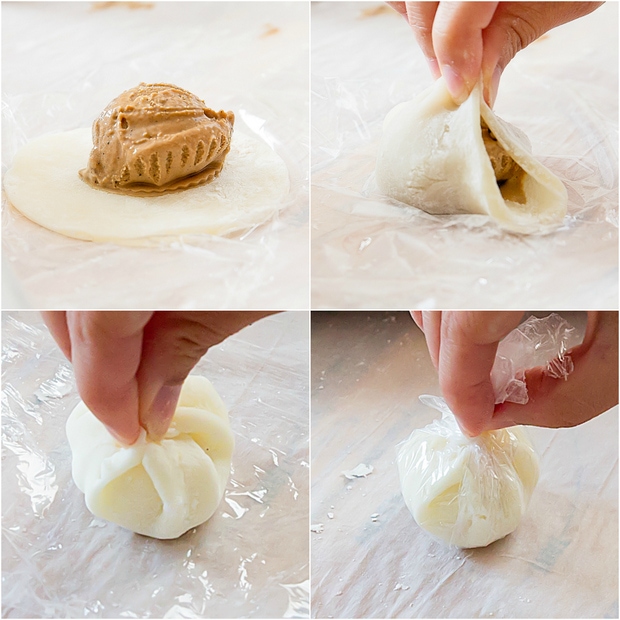
The trickiest part is evenly wrapping the ice cream in the mochi. You need to do it quickly because the ice cream will immediately start to melt and once it wets the dough, the dough will no longer remain sticky enough to seal. It does take a few tries to get it right.
For my first few, I either filled too little or too much or wrapped them too slowly. I started with chocolate flavor, and as you can see, there are no chocolate ones in the picture because I messed those up! But after a few, I got the hang of it and managed to produce some decent-looking ones.

They aren’t as perfectly shaped as machine-made ones, but they do taste good.
Storage Tips
Store the mochi ice cream in a freezer-safe container in the freezer. When you’re ready to enjoy them, let them sit out at room temperature for a bit before eating them.
The mochi dough will initially be hard when you remove them from the fridge. But if you let it thaw for just a little bit, the mochi will become soft and chewy again.
More Mochi Recipes
- Mochi Brownies
- Butter Mochi
- Strawberry Mochi Waffles
- Strawberry Filled Mochi with Sweet Red Bean Paste
- Matcha Mochi
Mochi Ice Cream
Ingredients
- 100 g Shiratamako
- 180 ml water
- 55 g graulated white sugar
- 1/3 cup cornstarch
- ice cream of your choice
Instructions
- In a large, microwave-safe bowl, add sugar and shiratamako and whisk together. Add in water and whisk until smooth and shiratamako is completely dissolved.
- Cover surface of bowl with plastic wrap. Microwave at full power for about 1 minute. The mixture should look like it's starting to clump and cook in certain sections. Stir with a spatula to evenly mix. Place plastic wrap back on and cook in microwave for 1 minute. Now the entire mixture should have turned solid, like wet dough. Stir until dough becomes one clump. Place plastic wrap over the bowl again. Cook for about 30 more seconds in the microwave or until dough loses its white color, becoming slightly transculent.
- Lay a large sheet of parchment paper down on your working surface. Add 3 tbsp of cornstarch to a mesh strainer and use that to sprinkle and lightly dust the surface of your parchment paper. Dust your rolling pin. Place your mochi dough onto the middle of your cornstarch dusted parchment paper. Add more cornstarch to the top of the dough. Begin to roll out your dough. If any part of the dough starts to stick to your rolling pin, add a little more cornsarch to that section of the dough. Roll dough out as thinly as possible, about 1/8 inch thin. Place dough into the fridge for 15 minutes to set.
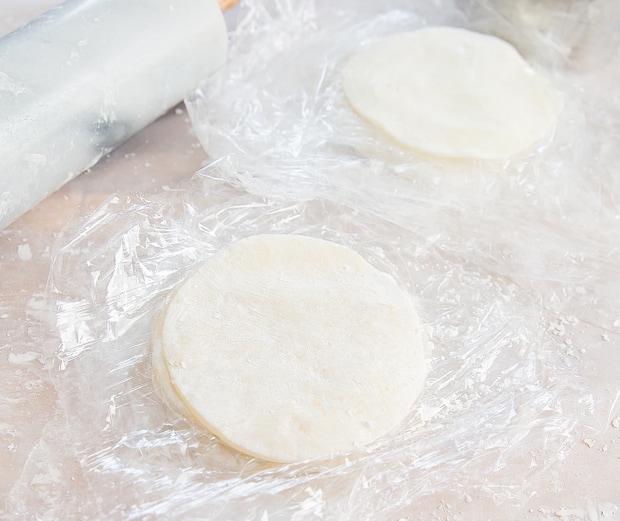
- Using a 3.5 inch cookie cutter, cut circles into your dough. Place finished circles into a pile, but wih a sheet of plastic wrap in between each one. You want each sheet of plastic wrap to be big enough to wrap the finished mochi in. When you have finished cutting out all the circles you can with the dough, re-roll dough scraps and repeat until all dough is used up. You should be able to get 12-13 circles.
- To wrap the ice cream in the mochi, you will need to work quickly. It's best to read through this step before proceeding. If you are using previously scooped frozen balls, take them out one by one. If you are using several flavors of ice cream, only remove one container of ice cream at a time and scoop only one ball at a time using the same packing/leveling of a 1.5 tbsp cookie scooper as discussed in the notes section. First, to prepare the dough, dust off any excess cornstarch from both sides of the dough. Gently pull on the dough a little to stretch it out a little more. Place your ice cream ball directly in the center of your mochi wrapper. Be careful that none of the ice cream touches the sides of the mochi wrapper. If it does, your mochi wrapper will lose it's stickiness and will be unable to seal. Working quickly, first lift both ends of your wrapper up and over the mochi, meeting in the center, and pinching the center closed. Then gather dough up from one open side and pinch it closed at the center. Then gather from the other side and meet in the center and pinch. Repeat. You should need to gather dough two times from each side, for a total of five pinches at the center. You want to alternate each side because if you seal only one side shut first, the ice cream will leak out the other side. Once the dough is sealed at the center, wrap the plastic wrap around and twist. Then layer the ice cream mochi ball with pinched ends facing down, inside a muffin pan cavity. This will help it keep it's shape. Place immediately into freezer before moving on to next one.
- When finished, let mochi ice cream sit in freezer for several hours. When ready to eat, let them thaw for about 1 minute (maybe less depending on the temperature of your house) to allow the mochi dough to soften, before eating.
Notes
- If you are using only one flavor of ice cream, it's best to scoop out individual balls and freeze them overnight.
- If you plan on using several flavors, and just a few of each flavor, I found that this wasn't really needed as the ice cream stayed cold enough to scoop and wrap 3-4 balls.
- If you are freezing ice cream overnight, use a 1.5 tbsp cookie scooper. Tightly pack the cookie scoop with ice cream and then level off the scooper. I found this to be the perfect amount of ice cream. When I tried an unpacked scoop, there wasn't enough ice cream filling. When I packed it and didn't level the scoop, then it was too much ice cream to wrap around.
- Recipe slightly adapted from Just One Cookbook
The nutrition information provided are only estimates based on an online nutritional calculator. I am not a certified nutritionist. Please consult a professional nutritionist or doctor for accurate information and any dietary restrictions and concerns you may have.


I really wanted to try these, we are die hard mochi lovers in this family! Being from a rural part of Ontario with no near by Japanese grocery store options, I ordered the powdery glutinous rice flour off amazon because I thought it was the same. Now reading the comments, will this not work?
It should work, but the texture won’t be exactly the same.
Hi! Looks amazing and I can’t wait to try it! Will it work with the powdery glutinous rice flour if I can’t get the special japanese one where I’m from?
The texture isn’t quite the same with the powdery glutinous rice flour.
Your pic is on Britney Spears’ IG!!!!
I saw! Very exciting =)
This was a happy accident. I was on your site looking for something else and saw this recipe for Mochi. It was perfect timing cause I was looking for something fun to do for NYE. Well…I have made three batches in three days. They are SO GOOD and everyone loves them. So far we have tried mint chocolate, dulce de leche, and strawberry and have loved every one. I think this will be a new go-to. Thanks!
I’m so glad they worked out for you!
How can I do it without a microwave? Also, can I use a sugar alternative? Coconut or brown sugar etc? Thank you ??
We’ve only tested this recipe with a microwave. For the sugar, we recommend using the granulated sugar – we haven’t tested an alternative.
Easy to follow. You made everythings so clear and I made up my mind to do that last weekend.
Finally I did it. Turn out greater than I expect!
I’m glad they worked out for you!
That looks so yummy and pretty! My favorite flavors are green tea and mango. I love mochi ice cream 🙂
those are some of my favorite ones too
Is it possible to substitute another starch for the potato starch? I am all out right now but really want to make these, can I use tapioca starch or corn starch instead? Will either of those negatively affect the mochi too much?
I haven’t tried with another starch but I think cornstarch should be okay
Ok here I go! I’m giving it a go! Expecting a disaster from reading thru all the comments etc! Lol! But I’ll give it 3 times before giving up! Just like you said! Cause it’s WAY TOO AMAZINGLY awesome to not try it at home!! Too expensive in stores! Wish me luck!
Thank you!
i hope they turn out for you
Hey so i was about to make this and I was wondering if you could use normal flour instead of cornstarch for the rolling?!
I recommend sticking with cornstarch
Thanks for the recipe! Can I make my own rice flour using brown rice, and will it still work if I rolled it in flour instead of cornstarch?
mochi uses glutinous rice flour which is not the same as regular rice flour, so it will not work with brown rice. You also do not want to roll in regular flour instead of cornstarch because you will taste the flour when you are eating these
Looks like a great recipe! Unfortunately, i only have mochiko. Is it possible to use mochiko to make the ice cream mochi?
no, the recipe needs Shiratamako
Is it possible to prepare the dough without a microwave? I do not own a microwave and have no interest in purchasing one, but would love to be able to make this delicious treat at home.
I have been to Japan several times(and in fact am currently in Japan on vacation visiting someone) and mochi ice cream is a favorite treat that I would love to be able to make at home with my homemade ice creams.
If you could please give directions for preparing on stove top or in the oven it would be greatly appreciated.
Thanks!
-Sage
Unfortunately, I only know the microwave method. I’m sure it can be done on the stove but I don’t know how long it would need to be cooked for.
You can use a steamer, thats actually the tradicional method and it works just fine, you have to let it sit and cool on the steamer longer though, like 10 or 15 minutes
It takes exactly 7 minutes on low heat on my regular stove top 🙂
Yum Yum
I dont want to make it but it looks yummy!
it’s definitely easier to buy than make! haha
A lot of recipes I see call for shiratamako over mochiko, stating that the the quality of the shiratamako dough is better and easier to work with. Are there any times or recipes in which mochiko would be preferable?
I usually use mochiko for making mochi cake as it requires a lot more mochi flour.
Man, you are awesome!!! The best I can do is buy a box already made. That’s why I am here. I finally tried Mochi Ice Cream Balls-Green Tea. Whoa! I feel like I’ve spent a lifetime being cheated out of these delicious, soft, cold and lightly sweet treat. If I ever reach your level of skill in the kitchen, I will use your recipe. All I can do now is just sit and drool. Then grab a pre-made out of the freezer.
Thank you for sharing your knowledge with those of us in Internetland. You are someone to be in awe of! Never lose your gifts and never stop amazing beginner cooks like me.
thanks for all the kind words! While I loved learning how to make things and am happy to say I accomplished it, it is so much easier just to buy them! I buy the pre-made ones all the time!
These look awesome!! Going to have to see if I can track down this flour in Canada to give it a try. Just out of curiosity, did you use the flour for regular mochi? If so, did you notice any differences between this kind and the finer type?
I’ve used the flour for regular mochi to make regular mochi before. It’s much harder to roll out to thin wrappers and it also loses some of it’s chewiness once in the fridge and freezer, which is why I don’t think it works as well for mochi ice cream.