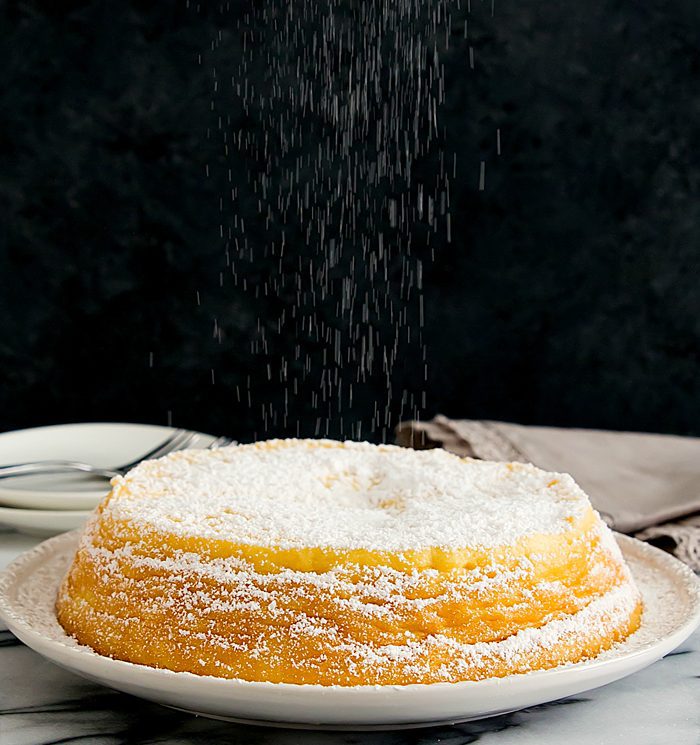
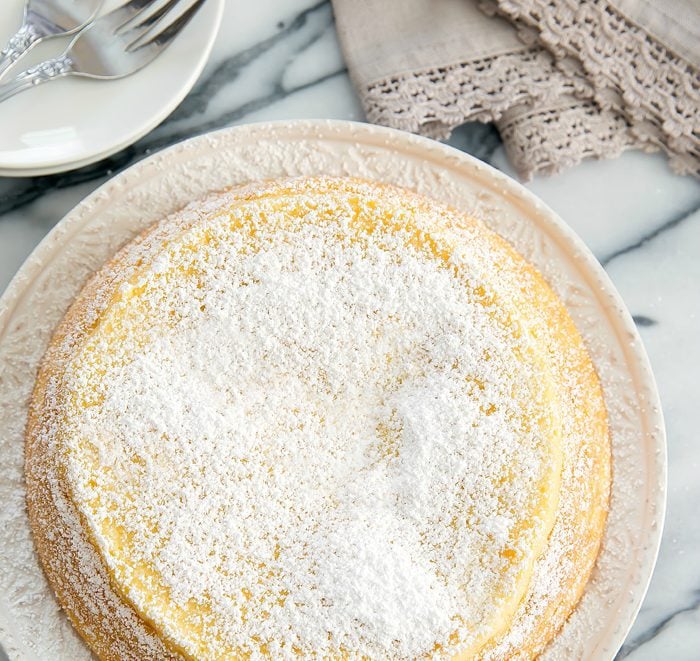
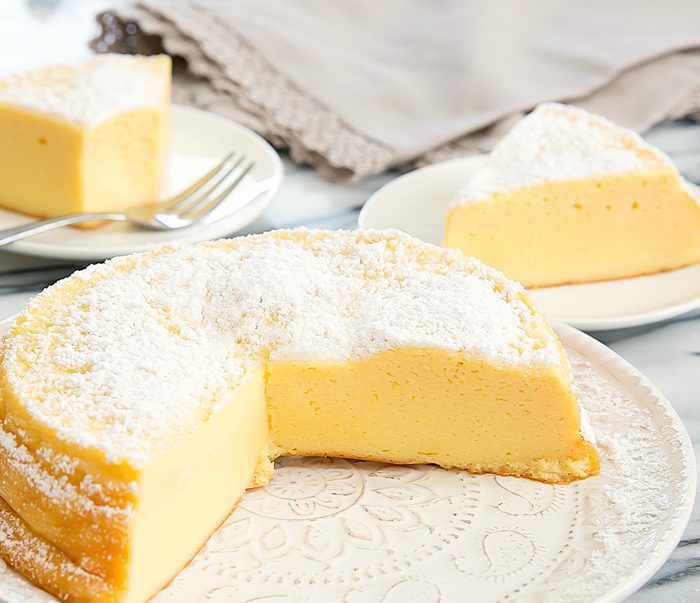
3 Ingredient Japanese Cheesecake
This Japanese-style souffle cheesecake is just three ingredients. It’s light, fluffy, and a shortcut version of the traditional Japanese cheesecake.
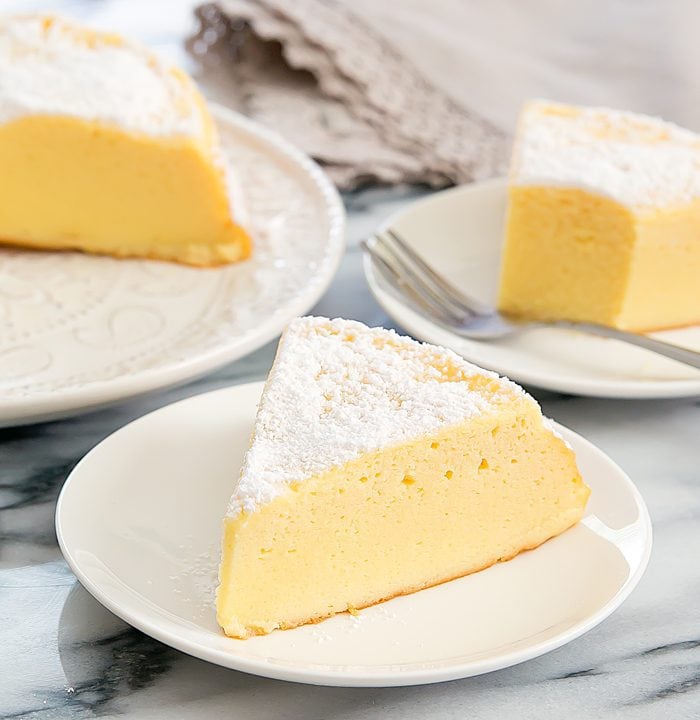
I love Japanese cheesecake. It’s airy, cottony soft and tastes like a cheese flavored souffle cake. I could probably eat almost a whole cake in one sitting. Not that I have…
I’ve made Japanese cheesecake before but it’s time-consuming and if you don’t make it just right, it collapses. So I was really excited when I came across a 3 Ingredient Japanese Cheesecake recipe. A three ingredient recipe is much more manageable!
Ingredients
- Large eggs
- White Chocolate Chips
- Softened cream cheese
The recipe actually was an internet sensation back when it was first published, but I somehow missed out.
So this past weekend I set about making my cheesecake. It didn’t go quite as planned. The first three attempts were complete fails.
I wasted 18 eggs, 3 blocks of cream cheese and 2 bags of chocolate to have soggy, eggy cakes that were barely edible. Of course, my husband took this moment to comment that he didn’t think that the recipe would work. Because that’s what you want to hear when you pull out your third failed attempt.
However, I regrouped, did some more research and finally got it to work. Turns out, I should have tried the original recipe first instead of trying modified versions that were published after because the original one is the one that ended up working best for me.
This cake came out quite lovely. I don’t think it’s better than the classic version, but it is a tasty quicker version and I’d make it again.
More Dessert Recipes
- Basque Burnt Cheesecake
- 3 Ingredient Sponge Cake
- Cornstarch Chocolate Chip Cookies
- 3 Ingredient Yogurt Cake
3 Ingredient Japanese Cheesecake
Ingredients
- 3 large eggs
- 4 oz white chocolate chips, I used Nestle chips for easy melting
- 4 oz full fat cream cheese, softened to room temperature
Instructions
- Preheat oven to 338°F. Grease and line a 6 inch round cake pan. I recommend using a one piece round cake pan (no removeable bottom) because this cake needs to be cooked in a water bath. Create 4 parchment paper handles that will allow you to lift the finished cake out easily (basically two long strips of parchment paper that will run down inside one side of the pan, across the bottom and up the opposite side of the pan. The two strips should cross and form an "X' in the at the bottom center of the pan. The strips should be placed underneath the parchment paper being used to line the cake. This way when your cake is finished, you can grip the four handles and lift your cake. I
- Separate your eggs. Keep the egg whites in the fridge until ready to use. Make sure your egg whites do not touch any oil, water or other ingredients or they will not whip up properly.
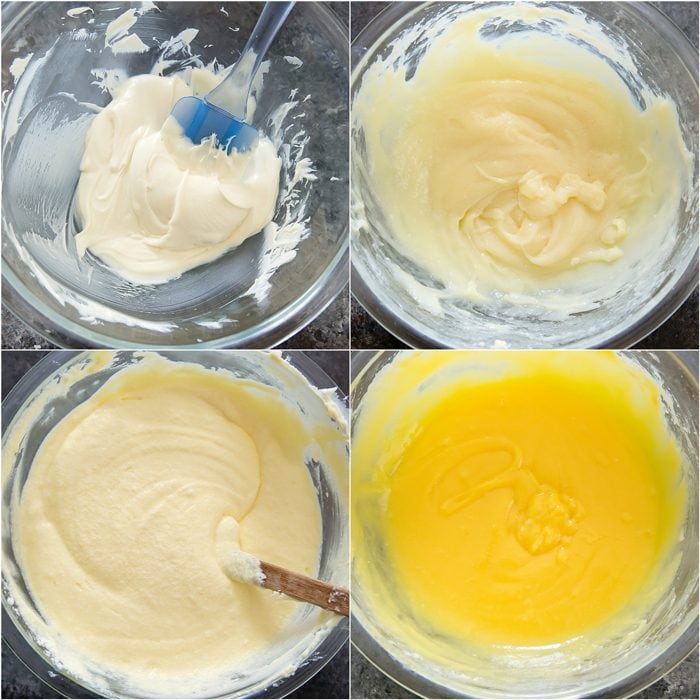
- Melt chocolate either over the stove or the microwave. For the stove you can use a double boiler, or melt the chocolate in a large glass bowl sitting on top of a simmering small pot of water. For the microwave method, microwave at 20 second intervals, stirring in between, until chocolate is completely melted and smooth.
- Add in the cream cheese and whisk until smooth. Add in the egg yolks and whisk until smooth.
- Beat your egg whites on high speed with an electric mixer until glossy, stiff peaks form. You should be able to hold your mixing bowl upside down without any of the meringue falling or dripping out.
- Add one third of the egg whites to your yellow batter. Gently fold in the egg whites with a spatula until just incorporated and there are no white streaks. Fold in another one-third. Fold in the final one-third.
- Pour batter into prepared cake pan. Tap the bottom of the pan a few times against a hard surface to get rid of air pockets.
- Create a water bath. To do this, find a pan that is slightly larger than your cake pan (like an 8 x 8 inch pan). Put your cake inside. Add 1/2 inch of water into a larger baking pan. Make sure your water level is not higher than 1/2 inch (use a ruler if possible).
- Place cake with the water bath into the oven. Bake for 15 minutes at 338F. Turn the heat down to 320F and cook for another 15 minutes. Turn off heat but leave the cake in the oven to cook for a final 30 minutes. Remove cake from oven and allow it to cool. Cake will shrink slightly while cooling. It can be served right away but it is best to let it set in the fridge for several hours to allow the cheese flavor and sweetness to fully develop. When the cake is first out of the oven, it will have a stronger egg flavor.
Notes
- Recipe slightly adapted from ochikeron.

I made thelis recipe ( chocolate Japanese cheesecake)..I tweaked it a tad. I used Splenda sweetened baking choco chips both dark and white but about 3/1..After reading earlier and tasting batter I decided to go a tad sweeter with about 3 packs of Splenda and about 1/2 teaspoon of vanilla… I only had a 9 inch ( standard) glass cake pan. So it was quite flat..I monitored the time it took longer than expected..I also threw in white ) dark chips on top. It came out looking like a big cchoco vip cookie. And actually better than expected mousey rich.and the chips are a nice added sweetness if you like Choco and fun looking for kids ??
We’re glad it worked for you! Thanks for sharing your experience.
I had made this a long time ago but lost my recipe. Very glad to find this same recipe again. Extremely simple, the white choc makes all the difference. My original recipe was somewhat lacking regarding cooking time and temp, so I used the trial and error method, but this recipe is spot on, gives excellent and clear directions for both making and cooking the cheesecake. Thanks so much. Back on the family favourites list, just in time for Christmas.
We’re so glad you loved it! Thanks for sharing your experience.
I love this recipe. I used a less sugar version of chocolate chips and added a little bit of vanilla. Came out great.
We’re so glad you enjoyed it!
Where is sugar free Link
Sorry, but not sure what you’re asking?
Thanks
I am confused. Which version works best? The one with white chocolate or the one with condensed milk.
They both work well.
Hi, I was wondering if you have tried this in a larger size such as an 8 in or 9 inch round pan. And if you did, how did you adjust the recipe ingredients, temp and baking time?
Thanks
I have not tried in a larger size
This tastes amazing, my husband loves it
I’m so glad you both enjoyed!
Can you make this in the Instapot like your chocolate version? Hoping for a Mother’s Day dessert delight! 🙂
https://kirbiecravings.com/instant-pot-3-ingredient-japanese-cheesecake/
Is it possible to use regular milk chocolate chips? That’s all I have in hand.
that may work but I won’t know without testing it
This recipe looked and smelled really good while it baked, then in the oven-off stage it all collapsed. I was very careful not to disturb it, and my oven doesn’t have a fan function, so I don’t know what went wrong. Nothing about the Pan’s position changed. If my oven cooled too quickly, then it will be worse to pull it out of the oven instead the next time I try this. I want to try this again, though, and get it right. Do you have any idea what might have happened?
Hi there, it sounds like you may need to bake a little longer before the oven-off stage. I recommend letting the cake bake until it basically looks done (it’s puffy and the surface is a medium golden brown) and then let it finish cooking in the oven with the oven off.
Has anyone successfully doubled this recipe? My first attempt was a huge hit but would like a bigger dessert for guests.
Yes I have doubled it and used an 8 inch cake pan.
Thanks!
Hi!
Did you increase baking time also?
Thanks!
yes about 10 more minutes at each baking stage. So 25 min at 338F, 25 min at 320F and 25 minutes with oven off.
Can I add Lemon Juice, or vanilla to add more flavor?
I love this site
yes that should be fine. thank you!
Yes, it collapsed while baking and I guess it happened in the last 15 minutes of baking. Did you bake this cake without the fanfunction or with it? I used the program with upper and lower heating + fan. Maybe next time I’ll try without the fan.
i used a conventional electric oven with no fan. I think you may need to adjust if you are using a different type of oven. You may need to keep the heat on rather than turning it off the last 15 minutes.
Hey!
I tried this recipe on Wednesday and in first 20 minutes in the oven it looked like a perfect success but then it suddenly collapsed and we ended up eating a flat pancake. A delicious, juicy pancake if I may say. 🙂 No problem, I’ll just try again or maybe even try the original recipe that takes a lot more time.
Thank you for writing this blog, I get a lot of ideas from your recipes and there is some drooling inolved while reading about your restaurat visits.
Greetings from Slovenia!
Katja
Hi, I’m sorry yours collapsed. Did yours collapse while it was still baking? I wonder if maybe your oven cooled too quickly during the last 15 minutes.