This shortcut sourdough bread tastes like regular sourdough bread but doesn’t need a traditional sourdough starter or yeast. The bread loaf is crusty on the outside and soft, chewy and tangy on the inside. It is just 2 ingredients and easier to make than traditional sourdough.
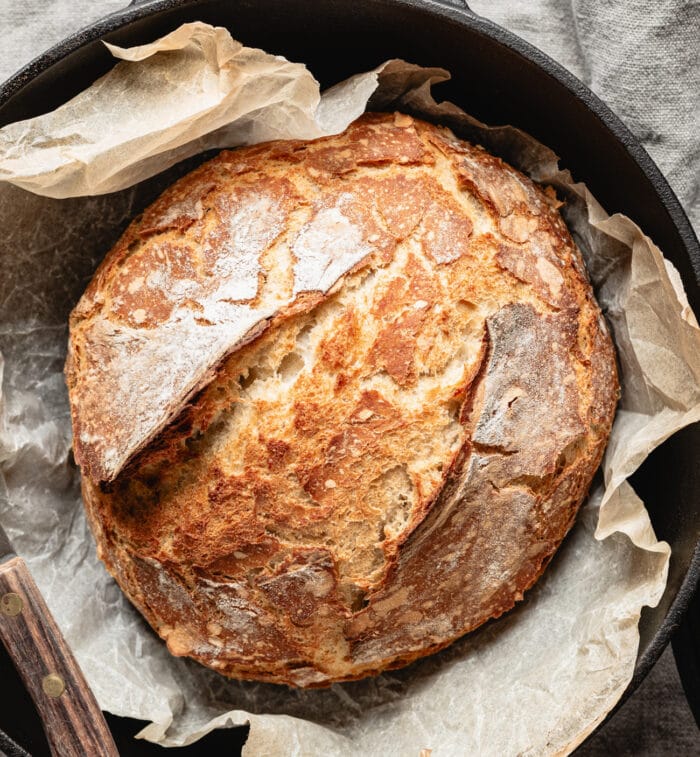
This is not classic sourdough bread but it tastes very similar to sourdough bread without all the work. There is no need to feed your starter or keep it alive for days or weeks, which can be quite intimidating.
Ingredients
- Self-rising flour
- Plain Kefir
Self-rising flour: This bread uses self-rising flour which is flour that is already premixed with baking powder and salt. The bread relies on the baking powder to rise since there is no yeast.
Plain Kefir: I used low fat plain kefir to make this bread. Kefir is a very popular probiotic drink. It is a fermented milk that is made from kefir grains. The consistency is like a thin yogurt and it has a tangy flavor like yogurt. Kefir is the key to this bread tasting like sourdough. Similar to a sourdough starter, this bread uses a fermented ingredient, which gives the bread a tangy flavor like sourdough.
How to Make Easy Sourdough Bread
- The flour and kefir are mixed together in a large mixing bowl until a dough forms. The dough is then covered with plastic wrap and placed into the fridge for several hours until ready.
- When your dough is almost ready, add a dutch oven to your oven and preheat your oven with the dutch oven inside. Roll your dough into a ball. When the oven is ready, place your dough into the hot dutch oven and keep it covered. Let the bread bake for about 30 minutes with the lid closed. Using a dutch oven is key to the bread rising properly and developing it’s crusty exterior.
- Remove the lid and continue to bake until the bread is fully cooked and browned on the surface. Let bread cool fully before slicing and serving.
Bread Texture and Taste
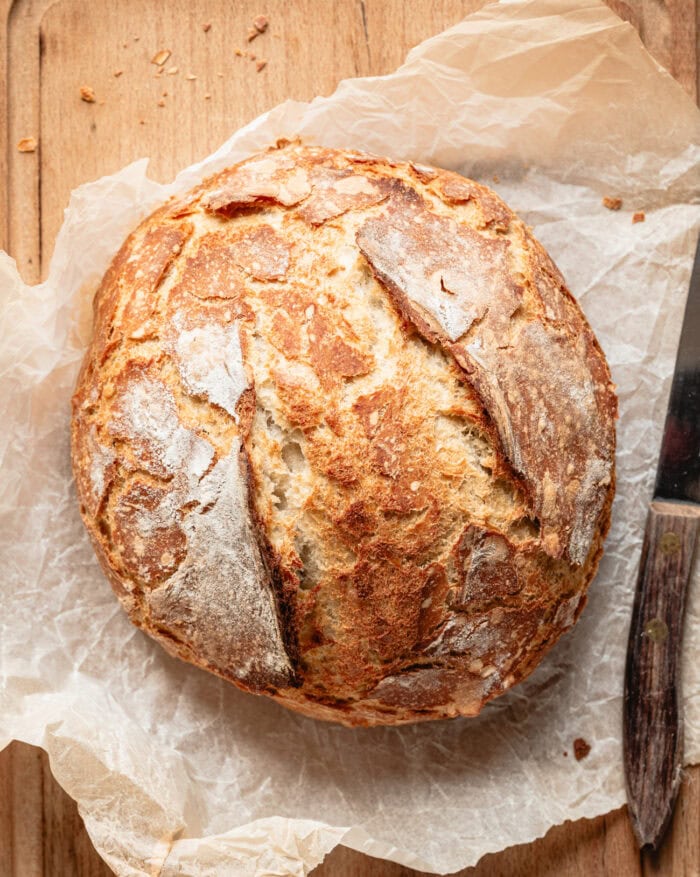
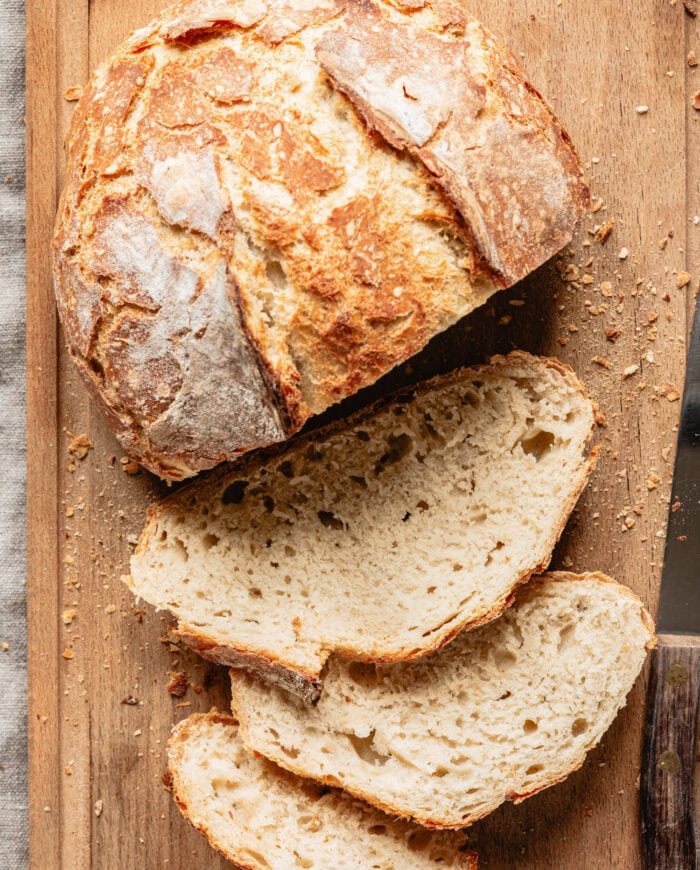
This bread has a very crusty exterior and a soft and chewy interior. The interior of the bread does not have as many large holes as you’ll see with traditional sourdough bread but the texture and taste is still very similar to sourdough bread.
More Easy Bread Recipes
2 Ingredient Sourdough Bread
Ingredients
- 4 cups (519 g) self-rising flour see note before starting
- 2 cups (16 fl oz/473 ml) lowfat plain kefir
Instructions
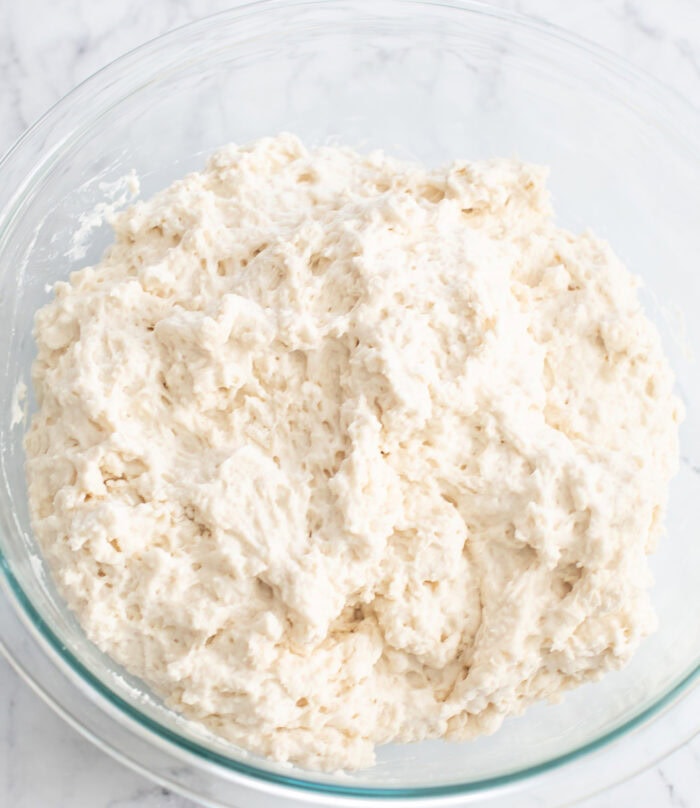
- In a large glass mixing bowl, combine the flour and kefir. Mix well with a spatula until a shaggy dough forms. The dough will be sticky and wet.
- Tightly cover the bowl with plastic wrap and place it into the fridge. Let the dough rest and proof for 4-6 hours (up to 12 hours). The longer the dough rests, the better the flavor will be but the dough will also be wetter and harder to work with if rested too long.
- About 30 minutes before baking, preheat your oven to 450°F (232°C). Place a large Dutch oven (4.3 quarts or bigger) with its lid on in the oven while it preheats. This is important. The dutch oven needs to preheat before adding the bread.
- After the dough has rested, wet your hands with some water. Grab one side of the dough, stretch it upward, and then fold it over the center of the dough. Repeat this process from all eight sides of the dough.
- Lightly flour a work surface with self-rising flour. Carefully turn the dough out onto the floured surface, seam side down. Use a bench scraper or lightly floured hands to rotate and drag the dough towards yourself on the floured surface, until you form a round, taut ball.
- Place the shaped dough, seam side down, onto a piece of parchment paper.
- Remove the preheated Dutch oven from the oven. Remove the lid and carefully transfer the parchment paper with the dough into the hot Dutch oven.
- Put the lid back on and place it back into the oven to bake covered for 30 minutes.
- After 30 minutes, remove the lid and continue baking the bread for another 15-20 minutes or until the bread is browned on the surface and sounds hollow when tapped on the bottom.
- Let bread cool fully before cutting and serving.
Notes
- The bread needs to be baked in a Dutch oven in order for it to rise properly and develop it's crusty exterior.
- Self-rising flour: There are 2 main kinds of self-rising flour sold in the US. One that is a lower protein (2 grams per 1/4 cup (30g)) flour and one that has a regular amount of protein (3 grams per 1/4 cup (30 g)). Brands like King Arthur Flour and White Lily make the low protein flour. Brands like Gold Medal and most store/generic brands contain a regular protein amount. The amount of protein affects how much liquid is absorbed. For this recipe, you want a flour with a regular amount of protein. Please use a self-rising flour with 3 grams of protein per 1/4 cup (30 g). Or make your own self-rising flour with the recipe below.
- The self-rising flour brands we made this bread with successfully are Gold Medal* and Amazon Fresh.*
- Homemade self-rising flour: Combine 4 cups of all purpose flour, 2 tbsp baking powder and 2 tsp salt. Whisk to evenly combine. Make sure the all purpose flour you are using contains 3 grams of protein per 1/4 cup. Most brands in the US contain this amount but there are some brands with higher protein (4 grams per 1/4 cup) such as King Arthur Flour and Bob's Red Mill. You do not want a high protein flour for this bread. It will be dense and dry.
- I used Lifeway plain low-fat kefir.*
- *This product link is an affiliate link. This means I earn a commission from qualifying purchases.
Nutrition
The nutrition information provided are only estimates based on an online nutritional calculator. I am not a certified nutritionist. Please consult a professional nutritionist or doctor for accurate information and any dietary restrictions and concerns you may have.




Hi, do you have any videos ?
Hello! We do not have a video for this recipe yet! We do have a video for a similar bread: https://kirbiecravings.com/2-ingredient-no-yeast-artisan-bread/
I’ve tried this 3 times. The first time was a disaster. The second time, it was delicious but it didn’t rise as it should have. The third attempt is just out of the oven and, again, didn’t rise into the proper boule.
I’m wondering if you can include a video to show the process after the proofing – the forming into a ball etc.
Hi, can you share the brands of flour and kefir you are using? It sounds like one of those may be the issue. We don’t yet have a video for this recipe, but you can see how the bread is shaped in one of our other bread recipes: https://kirbiecravings.com/2-ingredient-no-yeast-artisan-bread/
To be honest though, even if you shape the bread incorrectly it should still rise properly.
Hi. I make this bread every 2 weeks, one for me and one for my daughter. I use Gold Medal Self Rising Flour and Lifeway Kefir (Plain unsweetened, 1% fat). The only time I didn’t feel it turned out as good as usual, I mixed it too much. I used my Danish dough whisk, which works for other types of dough. Not so great for this one. It works with a spatula as directed. I do let it rest and proof for a long time—usually 10-11 hours. It does have better flavor leaving it longer imo. Then bake as directed!
Thank you for sharing your experience!
can i use GF flour in this recipe?
Sorry, we have not tested this recipe with a gluten free flour!
This sounds so simple
It really is! Much easier to make than easier to make than traditional sourdough.
What should the dough look like when it’s ready to come out of the fridge?
Or,how do I tell when it’s ready to bake?
The bread dough should be a little expanded and more wet than when it went in the fridge. And if you check the bottom of the glass bowl you should see some air pockets in the dough. You shouldn’t worry too much about how the bread dough looks. As long as it has had a few hours to rest, it should be fine. The resting allows the dough to ferment and give it more flavor and add some air to the dough.
I made this bread today and it was amazing! I love how simple the recipe is and it had a lovely crunch to the crust. I had to try a piece as soon as it came out of the oven! I will be using this recipe frequently. Thankyou so much!
We’re so glad you loved this recipe!!
It looked pretty, but tasted awful. It went in the trash. $4.00 for the kefir besides my time. Don’t waste your $ and time
Hi Pam! We’re sorry to hear you did not like the taste. The bread should taste like sourdough and if you don’t like the flavor of sourdough it may not be for you! Many readers have made this and enjoyed it!
Our second try! We only have a cast iron Dutch oven and it still seems to not be fully done on the middle. Any suggestions without over baking? Please…
We haven’t baked with a cast iron Dutch oven before. My guess is that the seal may not be as tight as a regular Dutch oven lid so you could try baking a little longer with the lid closed (maybe 5-10 minutes more) before opening up the lid for the last part of baking. I’m also not sure if a cast iron might be cooking the bottom of the bread faster. If you are still having issues, you could also try reducing the baking temp slightly so that you can cook the bread longer.
I really enjoyed this recipe! The bread has a great crust and flavor. Thank you so much for sharing.
I’m so glad you liked the recipe!
l have made a lot of bread in the last few years but this was the stickiest mess l ever came across (rested for 12 hours in fridge) stuck to everything ! hands marble counter top silicone scrapers and parchment papers ! never did get it into a taunt ball…what did l do wrong ????
After the dough has rested, wet your hands with some water before stretching and folding it! Also, be sure to lightly flour a work surface with self-rising flour and you could also put a little flour on your hands before touching the dough!
You may have also added too much kefir. The amount to add needs to be very precise. We tested a version that had only a few extra tbsp of kefir and the dough was too wet to work with so you may have just added slightly too much in which case we recommend adding more self-rising flour to the dough.
I can’t believe how easy this isI i hapoened to have some leftover kefir that no one wanted to drink. I let my dough proof for about 12 hours. The bread is so crunchy and It has a nice sour flavor.
I’m glad you found the bread easy!
I made this to the letter. Proofed for 5 hours. It looks gorgeous but has no taste, no flavor.
It is dense with no open crumb at all. I am wondering if I let the next loaf proof longer if that will remedy the flavor and crumb. WHAT DO YOU THINK.
This is the first loaf I have attempted that actually rose into a boule, which I am thrilled about… but the lack of flavor deflated that victory.
I’m surprised that you are finding it had no flavor. At the very least, you should taste the sour flavor from the kefir. What brand of kefir are you using? Does it have a good sour flavor to it? If you proof longer it should increase the flavor. As for the crumb being dense, you may have added too much flour to your dough.
This is just soda bread… I know that’s normally made with baking soda, but that’s effectively what’s in self raising bread.
It’s not soda bread. Soda bread is a quick bread. This bread needs to proof for several hours before baking and needs to cook in a dutch oven. Just because the bread doesn’t use yeast doesn’t make it a soda bread. There are many types of breads that use baking powder or baking soda instead of yeast but they are not all soda breads
To be sure, your comment regarding flour protein content isn’t correct. King Arthur AP is 11.7% while Gold Medal AP is only 10.5%. In an ideal world, you’d just recommend folks use bread flour. White Lily is intentionally low protein (nearly to the level of cake flour). To be critical, KAF Bread flour is 4g protein per 1/4 vs. Amazon Fresh Bread flour at 3g protein per 1/4 cup. Yes, the kefir option is nice, but do your research before your state false claims on brands and ingredients please.
If you carefully re-read my notes you’ll see that I am discussing the protein content in self-rising flour brands not AP flour. Yes King Arthur AP flour has a higher protein content than Gold Medal AP. But King Arthur Self-rising flour has a very low protein content (though their website displays an incorrect nutrition label), similar to White Lily, so that is more like cake flour. I did in fact do my research. I purchased all of these flours and tested all of these flours, before stating these claims. I suggest you read carefully before telling someone they are making false claims.
This is actually a basic soda bread, and it is rather misleading to use the sourdough label.
It’s not a basic soda bread. Soda bread is a quick bread. This bread needs to proof for several hours before baking. Just because the bread doesn’t use yeast doesn’t make it a soda bread. There are many types of breads that use baking powder or baking soda instead of yeast but they are not all soda breads.
I’m finding conventional flour more and more difficult to consume. I think it’s the Gluten. Would you have a non Gluten and non dairy similar bread recipe that I could try please.
David Enright, live at Scór Mór, Elphin, Co.Roscommon. Ireland.
Kind Regards,
David
Sorry, we haven’t tried this recipe with gluten free flour! We do have quite a few gluten free bread recipes if you search “gluten free bread” on the blog!
Looking forward to try your recipes
Happy to hear that Lucille!!
Your recipes look like they could be made gluten free without too much effort which is why I am extremely interested, I have three coelics in my family and we’re always on alert for recipes.
Hi Helen! Most recipes can be made gluten free and we have a ton of gluten free recipes!
This looks easy, will try it soon.
Hope you like it!
Hi, can this bread be made with gluten free flour?
Sorry we haven’t tried with gluten free flour
Hi there thanks for sharing your recipe but what is the second ingredient that you add to the recipe please let me know thanks so much
the second ingredient is kefir
I can’t wait to try this!
Hope you enjoy!
So interesting
Hope you try it!