

Korean Sesame Tapioca Bread
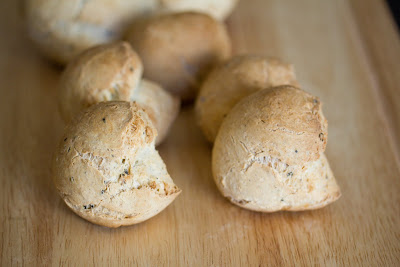
Earlier this year, I discovered a Korean sesame tapioca bread that I totally fell in love with. The first one I tried was at Paris Baguette. They seemed super popular, so I grabbed one to try. The bread is light and airy and very, very chewy. It’s like a cross between the chewy crusty French breads and a mochi. The bread is not really sweet. The toasted sesame seeds add a great flavor and keep the bread from getting boring. Normally I’m not a fan of black sesame, but the addition of the black sesame seeds is perfect for the bread
Since I love almost all things chewy, I really liked this bread. The use of tapioca flour is what makes it so chewy, similar to the tapioca balls served in the milk tea drinks. Since then, I’ve been on the hunt for this tapioca bread. I’ve found at various bakeries.
In the Bay Area, I’ve also found the bread at the Sogo bakery (10889 S. Blaney Avenue
Cupertino, CA 95014). Theirs is one of my favorites because it’s really big and only costs $1. I’ve also seen it at the Mitsuwa bakery in Costa Mesa, though they are called “mochi bread” even though there isn’t any mochi flour in the bread that I know of. I’ve seen it at the Tous Les Jours bakery located inside H Mart in Irvine. I saw it once at the Zion Market bakery in San Diego, but on subsequent visits, I wasn’t able to find it.
Since it’s been so hard for me to find these breads, I thought about trying to make my own. I searched the internet for recipes. But I couldn’t find any. All I found was one poor girl’s attempt to find the recipe also. She posted on quite a few forums trying to find a recipe. The only answer was that some Korean markets sell a mix you can use to make them.
So then, I began searching for the mix. I checked every Korean market I passed, but couldn’t find it for the longest time. Finally, on my last trip home, my mom and I were out shopping and picking my favorite chewy noodles when I suddenly saw the mix on display. I was so ecstatic and I immediately bought a box. Since then, I’ve now seen the mix sold at Zion Market in San Diego.
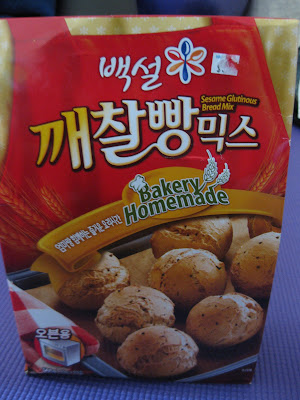
I was so excited about finding the mix, that I didn’t even realize that the direction was in Korean until much later. After I realized my dilemma, I immediately tried to think of what friends I had who could translate the instructions for me. I realized there was no one around me who could. And then I thought of the foodie community. And immediately through of one of my favorite bloggers, Rosa from Dining with the Catty Critic.
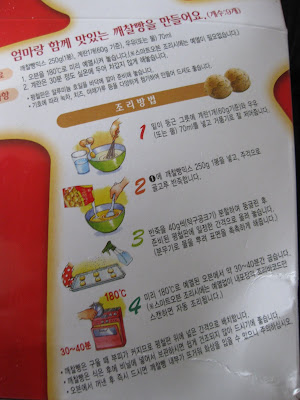
After some twitter exchanges, she told me that she couldn’t translate, but that her mom could. So I snapped a picture, sent it over, and a few days later, I got my translation thanks to Rosa and her mom. Thank you, Rosa and Rosa’s Mom!
I made the balls this weekend. I was a little bit worried at how dry the dough was even after I added the egg and milk. But it was wet enough to form dough balls. It was quite easy to make. Each box contains two packages of mix. I took one package, poured it out, added an egg and the milk and then worked the dough with my hands until it came together.

Then I put ping pong ball size dough balls onto a baking sheet and put some water to keep them moist. Thirty minutes later, they were done! I think I might have overbaked them a bit because they seemed slightly too hard on the outside. Or perhaps my dough balls should have been bigger.
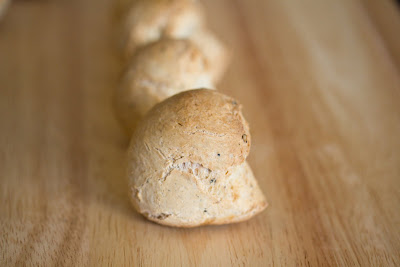
The ones I’ve bought in the bakery always have cracks and aren’t completely circular. Mine had cracks, but all look like little pacmen. I’m not sure why they turned out this way. They were circular balls when I put them in to bake. I’m playing around with my next mix to see if I can create a less pacman-like look. But I’m super excited I can now make these whenever I feel like eating one.
Instructions (Courtesy of Catty Critic’s Mom)
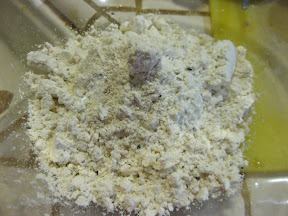
1. Put 1 egg (60g), Milk or Water 70ml, in mixing bowl and mix well with the Mixer.
2 Put 1 pack of Kechal bread mix (250g) in the bowl, and knead well.
3. Place a ping pong ball sized bit of dough on baking pan with some distance.
(Spray with water on the face with sprayer for moisture).
4. In preheated oven, 180’c, bake about for 30-40 minutes. (I think next time I will reduce the baking time since mine seemed a bit hard at 30 minutes)
.When the Kechal bread bakes, they grow big so need distance from each other.
.It is better to store them in a vinyl bag after cooling.
.Be careful when eating right away out of oven; it is very hot inside of it.
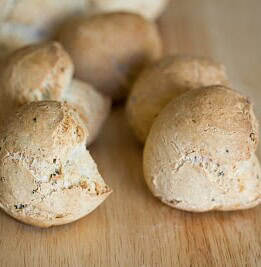
Korean Sesame Tapioca Bread
Ingredients
- 1 (60 g) egg
- 70 ml milk, or water
- 1 (250 g) package of kechal bread mix
Instructions
- Preheat the oven to 320°F (160°C).
- In a large bowl, mix the egg and milk until combined. Add the bread mix and, using your hands, mix the flour with the wet ingredients until combined.
- Form balls approximately the size of a ping pong ball and place them on a baking sheet spaced a few inches apart from each other. Spritz the balls with some water to ensure they stay moist while baking.
- Bake the balls for 30 to 40 minutes or until they are baked through. Cool the balls before serving and store leftovers in a vinyl bag.
I think that I have just quite successful in baking this Korean bread. Earlier, I used a multi-function cooking machine called Thermomix to blend together the mixture of 1 egg, 85ml water, 38.5g unsalted butter and 200g Farina pre-mixed flour and 10g cocoa powder. Unfortunately, during mixing up all the ingredients, i accidentally set the mixing time for too long; thereafter, the batter became nearly as wet as the Choux batter. I had to use piping bag to pipe it onto the baking sheet. I baked it for about 30min at 180degree Celcius with water spray applied every 10min. The bread came out pufffing up 1.5times bigger than before going in the oven. And, the inner part of the bread was chewy and tender just like a mochi and the whole bread was airy and soft so this strikes me that i must be quite close to the success. However, i had also tried this Korean black sesame bread made by a local supermarket chain; the bread there was hollow and all the mochi-like inner part was so thin that it stuck to the outside crust thus, making the crust chewy. Since this recipe requires no grain of yeast or baking powder, i wonder if the mechanism behind the puffing is based on the water evaporation just like the Choux. If this is true, would the addition of more water break a path towards the aforementioned bread?
I’m sorry but I haven’t experimented enough making Korean tapioca bread to know the answer
Marc,
That looks like the best recipe (closest to a premix) that i have seen. I have all of the ingrediants, however can you please post the instructions? I would really love to make the recipe you shared:) Thanks!!
Hi Kirbie,
I usually had this in a Korean bakery in Queens, NYC, but it’s out of business. I personally think the one I just mentioned tasted so much better than Paris’s one. And I always wanted to try to make my own one until I came across your website. Thanks so much even though my first batch was a totally disaster. Anyways, I used your Brazilian cheese ball cross over with the original receipe FYI:
1.5 cup tapioca flour
1.5 cup high gluten flour
1.5 tsp rapid yeast
1 cup milk (I used soy milk as I cannot take milk)
3 tbsp creamer/ milk powder
0.5 cup water
0.25 cup sesame oil
0.25 cup grape seed or any veggie oil
2 tsp sugar (or brown sugar)
2 tsp soy sauce (I used Kam Lan or Lee Kam Kee’s premium)
0.5 cup of Japanese roasted black sesame
3 tbsp organic pumpkin seed
3 tbsp organic sunflower seed
Let me know after you made your batch!
Thanks!! I actually tried making the black sesame one based on the Brazilian cheese ones and it was a disaster. But your recipe looks promising. I’m excited to try it!
Ooh fantastic…thanks!
Omg thank you so much for posting this! I just had this tapioca bread from Paris Baguette today and it was SO GOOD. I’ve seen those mixes before at the Korean market & always wondered…now maybe I’ll try it myself! love your blog by the way. 🙂
Oh yeah, I love this stuff! Actually after finding the mix, I ended up finding recipe from scratch and it’s sooo easy! Actually I’ve only made the cheese ones from scratch, which are actually a Brazilian bread, but you can easily substitute for black sesame to make the black sesame one. Here is the recipe from scratch if you are curious: https://kirbiecravings.com/2011/04/brazilian-cheese-bread-balls.html
If you’d like to make them from scratch, try using the Brazilian recipe for the tapioca cheese balls – leave out the cheese, add 1/2 C of sesame seeds (instead of 1 C of cheese) and about 1 tsp of sesame oil. Just made some myself! 😀
Thanks for the tip. Actually I have made them from scratch since this post! I found the Brazilian recipe a few months ago and made them from scratch and did the cheese version. Delicious and easy!
Oh that is too bad. My korean market wasn’t carrying it for the longest time, and then suddenly they just started carrying it. Maybe yours will too soon.
I’ve been searching for the bread mix for the longest time in Singapore. Too bad the korean supermarts here dun carry them. 🙁
Thanks, Kirbie!
Good luck on your search!
I think they are more likely to be available in the morning. When I go in the afternoon, they tend to be gone. It’s usually displayed at the cash register table, near the end of it (on your right if you are facing the cashier)
Yes, you should definitely try it! I’m surprised you haven’t before.
I found them once at Zion and then couldn’t find them for a while. But then, just this past Sunday there were a ton of them when I went. So I guess it depends on the time of day you maybe.
You should give it a try next time if you see them at a bakery. They have them at Zion sometime.
I wish they kept well longer. They seem to lose their chewiness quite quickly.
I’m glad too. Or else I probably would have ended up with some messed up bread.
Lovely bread! I got to find that package!
These sound good! Never tried them before but I’m going to look for it next time I’m at Zion.
Oooooh, I’m going to have to find this and try it out! The mix between crusty French and mochi sounds intriguing…
You’re welcome! Anytime you need translation help, let me know. 🙂
I just tried it at Zion, they still have them! Limited though. I wonder if they just come out with a funny shape because of the tapioca flour. The ones at Zion’s bakery weren’t too round either.
Looks yummy! I haven’t tried this before.
I love these breads! I always get at least a few when I go to the korean bakery.
That looks great and glad Rosa was able to help you with the translations 🙂