3 Ingredient Yogurt Cheesecake (No Flour, Butter or Oil)
This yogurt cheesecake is soft, creamy and high protein. It needs just 3 ingredients and doesn’t require any flour, butter or oil. The cake takes only a few minutes to prepare and stores well.
This yogurt cheesecake is a lighter version of classic cheesecake that is also high protein. It is so soft, creamy, and light.
Ingredients
- Icelandic yogurt
- Eggs
- White chocolate
Icelandic yogurt: This recipe works best with a thick high protein yogurt like Icelandic skyr yogurt. The recipe will probably work with Greek yogurt, but your cheesecake will be a little wetter. You can use plain Icelandic yogurt if you want the cheesecake to be less sweet. You can also use vanilla Icelandic yogurt for more sweetness and flavor. I used nonfat Icelandic yogurt to make the cheesecake lighter, but you can also use whole milk Icelandic yogurt.
Eggs: Eggs are used to create the structure for the cake.
White chocolate: White chocolate is used to sweeten the cheesecake and provide structure. If you are not a fan of white chocolate, the cake does not have an obvious white chocolate flavor. Instead, the cake is using the ingredients that are in white chocolate to create structure for the cake.
How to Make Yogurt Cheesecake
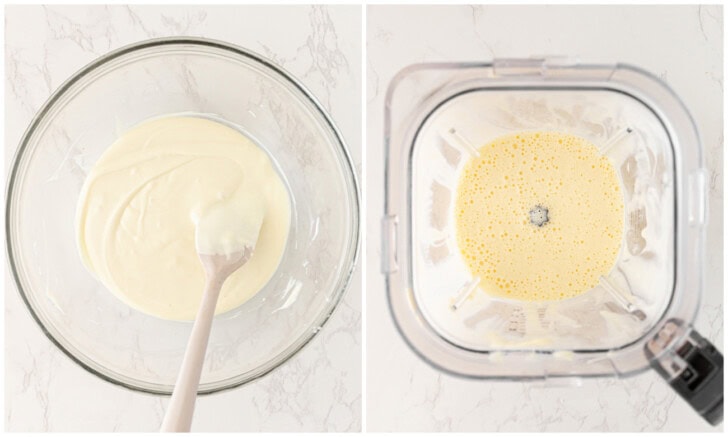
- The yogurt and eggs are mixed together in a blender. The white chocolate is melted until smooth and then mixed in.

- Pour the batter into your prepared cake pan.
- Bake the cake until the center is set. You can bake it in a water bath or without a water bath.
- Allow the cake to cool fully. I also recommend letting it set more in the fridge for a few hours. You can frost the cake before serving.
Texture
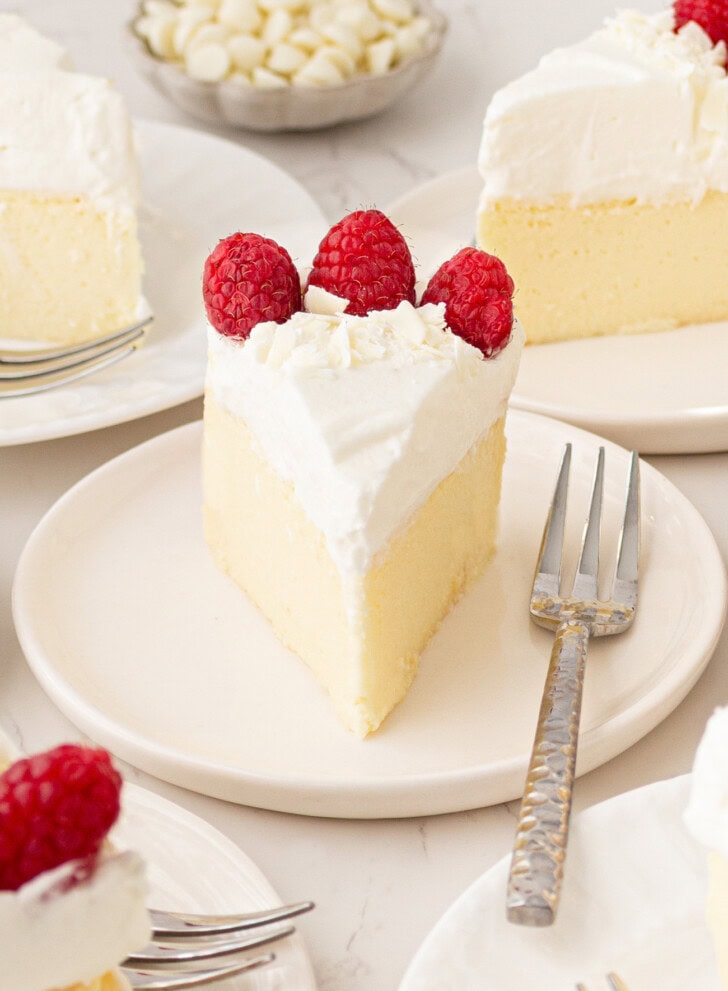
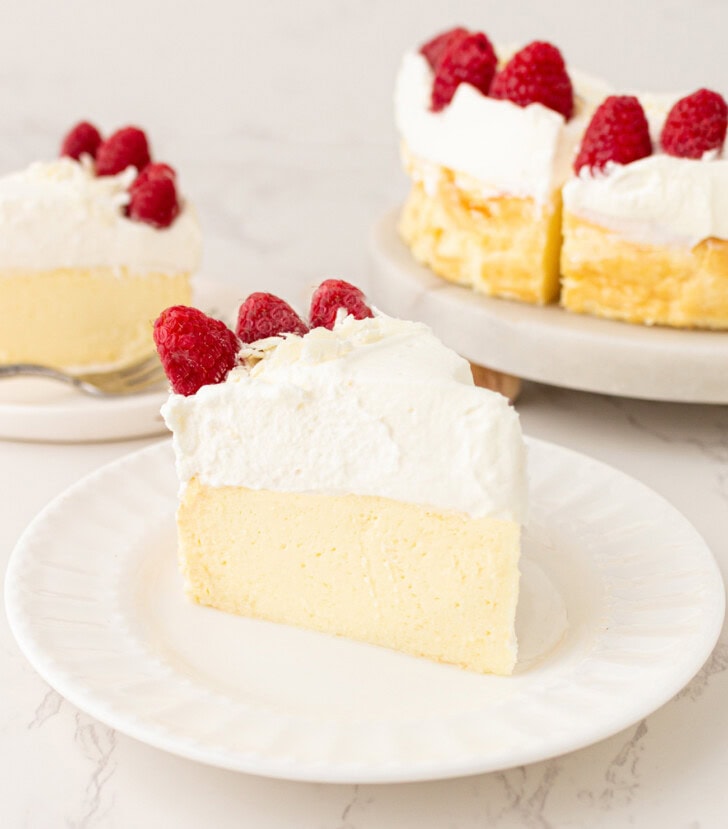
The cake has a light and creamy texture. It is like a cross between a souffle cake and traditional cheesecake. The cake is lightly sweet and a little tangy from the yogurt. If you use vanilla yogurt, the cake will be a little sweeter.

Expert Tips
- An optional step is to bake the cake in a water bath. Baking in a water bath will produce a smoother, creamier cake with a more even surface. The cake won’t rise that much, but will be more similar to traditional cheesecake (minus the crust).
- You can also bake the cake without a water bath. Without the water bath, the cake will bake up higher and have a fluffier texture. However, it will also collapse a little as it cools. If you make this version, I would recommend leveling off the surface and covering it with frosting before serving. The version in the photos is baked without the water bath.
- If you prefer a little sweeter cheesecake, use vanilla Icelandic yogurt instead of plain.
More Cheesecake Recipes
- 2 Ingredient No Bake Yogurt Cheesecake
- 4 Ingredient No Bake Cloud Cheesecake
- 3 Ingredient Cottage Cheesecake
3 Ingredient Yogurt Cheesecake
Ingredients
- 1 1/3 cups (315g) nonfat plain or vanilla Icelandic skyr yogurt, brought to room temperature
- 4 large eggs, brought to room temperature
- 1 cup (170g) white chocolate chips
Instructions
- Preheat the oven to 350°F (177°C). Grease the interior of a 6-inch round cake pan. Make sure to use a one-piece one and not a springform pan. The cake batter is very thin and will leak in a springform pan. Try to use a pan that is 3 inches tall. Line the bottom with a parchment round. You don’t need to line the sides but make sure they are well greased.
- Add yogurt and eggs to a blender and blend until smooth and there are no egg streaks. Make sure your yogurt and eggs are brought to room temperature before blending. If they are still cold, when you add in the melted chocolate, it will cause the chocolate to seize.
- Add chocolate chips to a microwave-safe bowl and heat in 20 second intervals, stirring in between with a spatula, until the chocolate is smooth. Let the chocolate cool slightly, about 3 minutes.
- Add melted chocolate to the blender and blend until you have a smooth batter that is uniform in color, scraping down the sides of the blender as needed to help everything blend evenly.
- Transfer the batter to your prepared cake pan. Optional step: You can bake the cake in a water bath which will produce a smoother, creamier texture. See note section for the difference between baking in water bath and no water bath. If baking in water bath: Place the cake pan in a slightly larger baking pan, such as a 9 inch square pan. Fill the outer pan with room temperature water until it reaches halfway up the sides of the cake batter, creating a water bath for the cake.
- Bake the cake for about 50-55 minutes or until cake is no longer wobbly or jiggly in the center. If the cake is baked in a water bath it will remain pale and won't really brown much. If it is baked without the water bath, it will lightly brown across the surface.
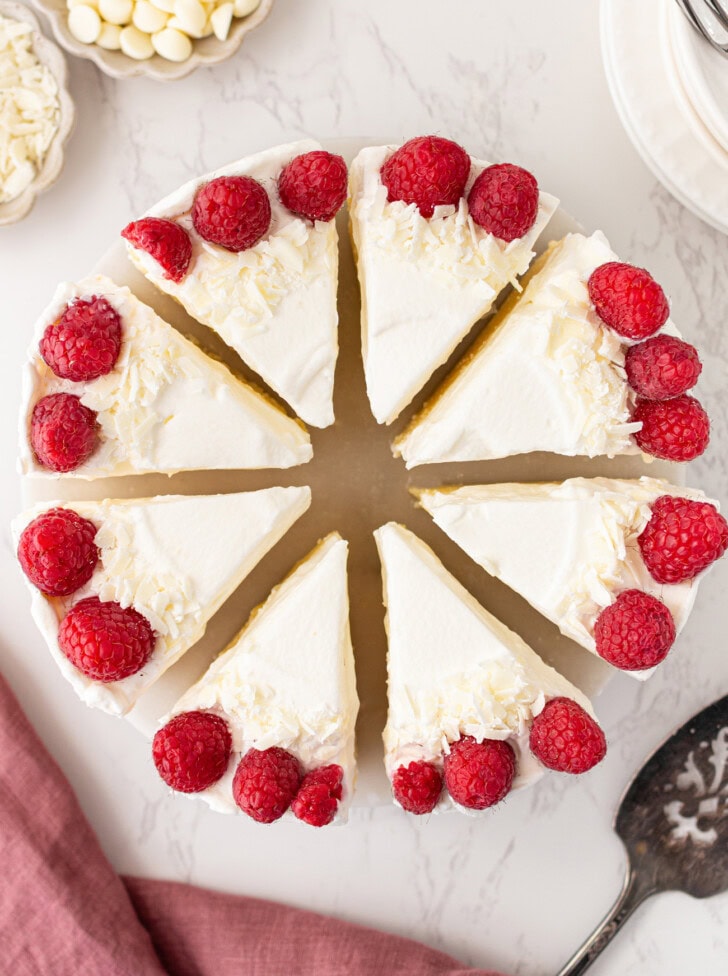
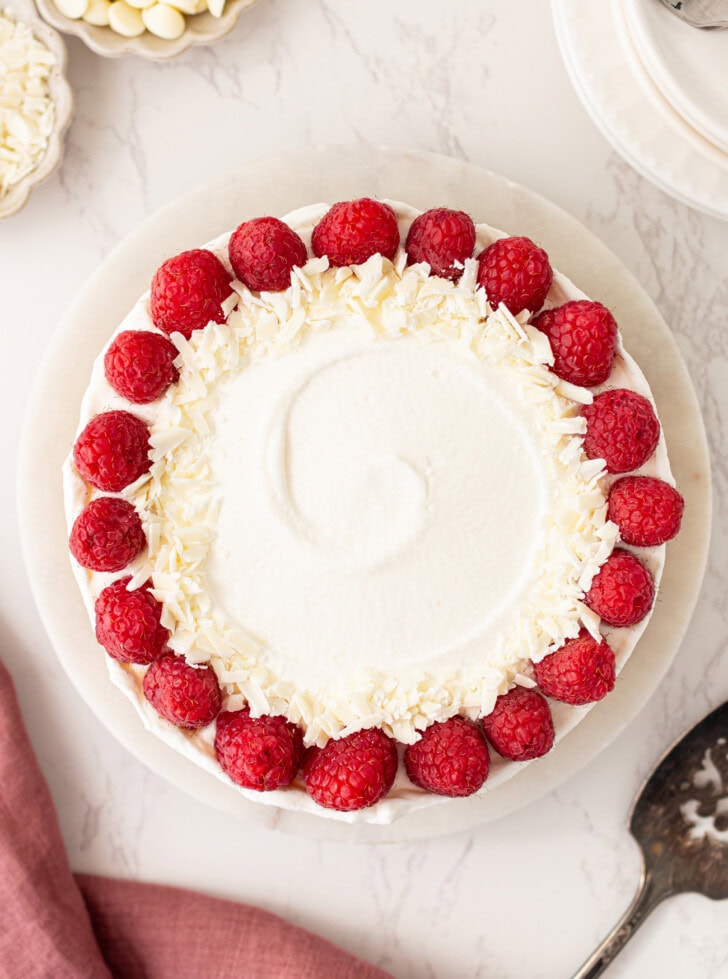
- Remove the cake from the oven and allow it to cool completely. If baked without water bath, it will deflate a little as it cools. Place the cake in the fridge for several hours to set. I also recommend letting it sit in the fridge for a few hours to help the flavors develop better. To remove cake from the pan, gently loosen the sides with a thin spatula. Then carefully flip the cake pan upside down onto a plate and the cake should slide out. Then flip the cake onto another plate to make it right side up again. If desired, frost and decorate the cake before serving. Cut the cake with a sharp knife. Store uneaten cake in an airtight container in the fridge or freezer.
Notes
- Water bath note: Baking in the water bath will produce a smoother, creamier cake with a more even surface. The cake won't rise that much, but will be more similar to traditional cheesecake (minus the crust). Without the water bath, the cake will bake up higher and have a fluffier texture, similar to a souffle cheesecake. However, it will also collapse a little as it cools, so it won't look quite as nice unless you level off the top and cover it in frosting.
- Yogurt note: I used Siggi Icelandic yogurt. I tested with both plain and vanilla. I tested with nonfat version but I think the cake should also work with whole milk version. The cake should also work with a thick high protein Greek yogurt but I prefer using Icelandic skyr because it is thicker and higher in protein.
- White chocolate note: Use a premium brand and a fresh new bag because some of the cheaper brands and older white baking chips do not melt well. I used Nestle white baking chips.*
- *These product links are affiliate links. This means I earn a commission from qualifying purchases.
- Optional whipped cream frosting:
- 1 cup heavy cream
- 2-3 tbsp sugar
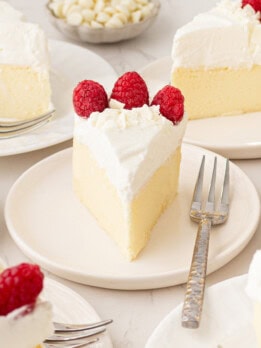
- Add heavy cream and sugar to a mixer and mixer on high speed until soft peaks form. Spread frosting over surface of the cake. You can also garnish with white chocolate shavings and fresh berries.
- Estimated nutrition does not include optional frosting.
Great concept for a cheesecake and minimal ingredients, I feel that this thing tastes way to “eggy”
You could try to use a vanilla Icelandic yogurt for more sweetness and flavor if you didn’t try it the first time!
Can i just add vanillla extract to the.plim yogirt to mske it taste better
We haven’t tried that with this recipe but it should be ok to add vanilla. We do recommend the Icelandic skyr yogurt! Keep in mind that vanilla Icelandic yogurt isn’t just adding vanilla–it also has sugar added. So your cake will be sweeter if you use vanilla Icelandic
Very good
Thank you!
You say to use a 6″ interior cake Pan. But how high does said cake pan need to be?
Try to use a pan that is 3 inches tall.
Very tasty and easy to make cheesecakes.
Thank you! We’re so glad you enjoy this recipe!
My granddaughter is diabetic. Can I use sugar free white chocolate and can I substitute plain yogurt sweetened with monkfruit sweetener instead of using vanilla yogurt?
The recipe won’t work with regular yogurt–it needs to be Greek style or Icelandic because they are thicker types of yogurt. It most likely can be made with sugar-free white chocolate.
Is it possible to add a graham cracker crust to it?
Sorry, we haven’t tested that with this recipe!
I give it a 10. It seems to be very easy to make.
Thank you! We’re so glad you enjoy the recipe!