

4 Ingredient Crispy Candy Bars (No Flour, Eggs, Refined Sugar, Dairy, Butter or Oil)
These chocolate candy bars have a crunchy, crispy and chewy center. They only need 4 ingredients and don’t require any flour, eggs, refined sugar, dairy, butter or oil. The bars store well, can be made ahead of time and don’t require any special molds to make them.
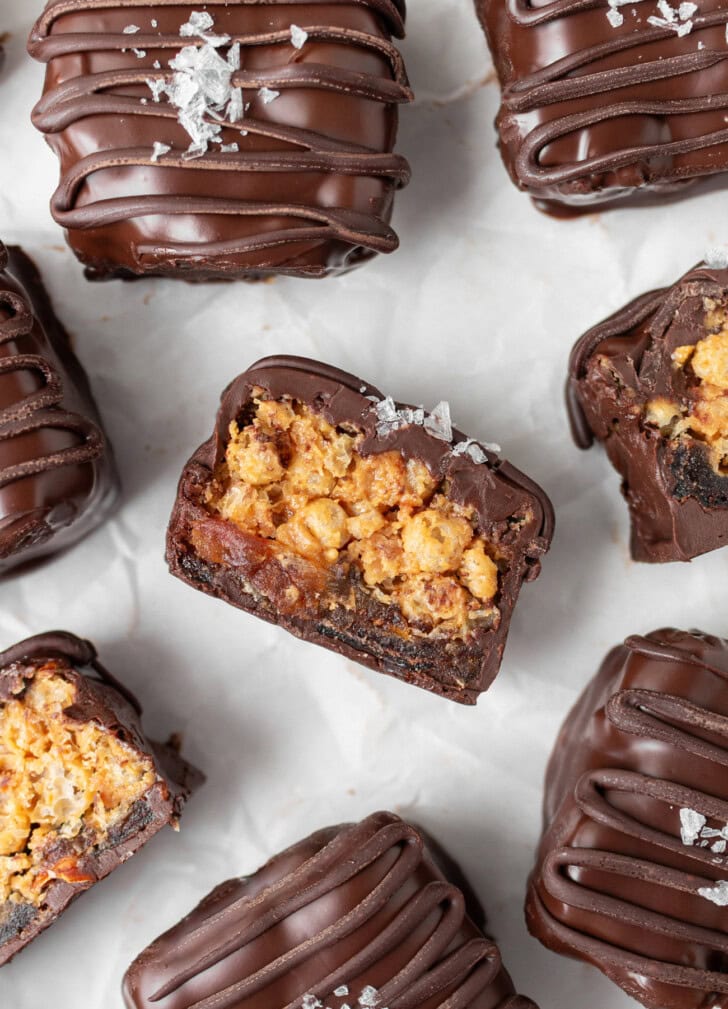
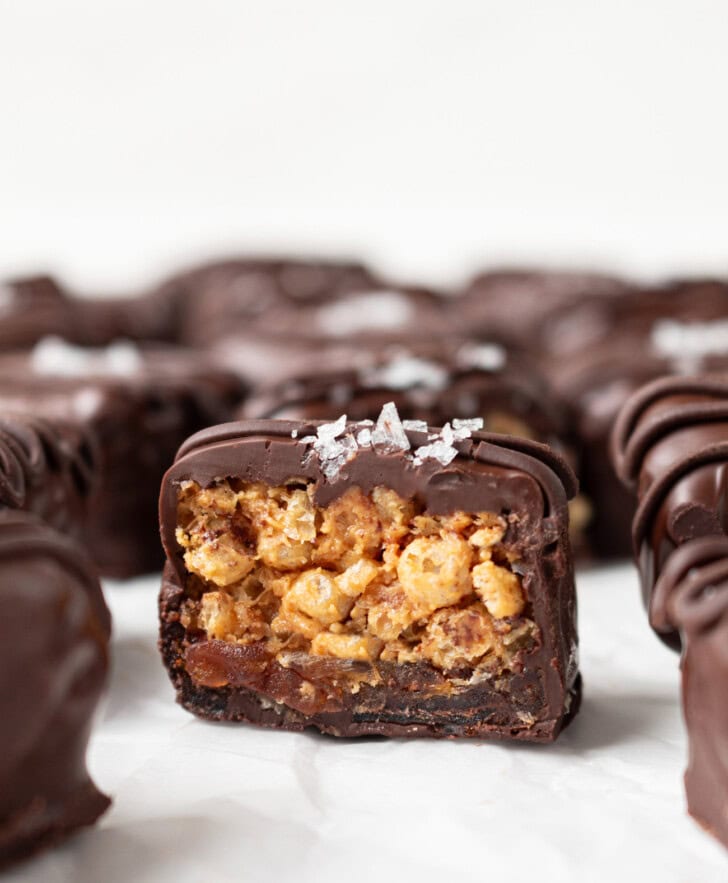
These healthier chocolate candy bars have all the textures I love in a classic candy bar: they are crunchy, nutty, and have a chewy caramel-like layer. These are great for a quick dessert or for gifting to others.
Ingredients
- Dates
- Puffed quinoa
- Peanut butter
- Dark chocolate
Dates: Medjool dates are used for the caramel layer. Medjool dates have a caramel flavor to them and have a chewy texture that mimics the chewy caramel layer in candy bars.
Puffed quinoa: Puffed quinoa is very crispy and adds a crunchy layer to these candy bars. You can use store bought puffed quinoa or make your own.
Peanut butter: Peanut butter adds nutty flavor and creaminess to the bars. I used natural peanut butter with no added oils.
Dark chocolate: The bars are coated in melted dark chocolate chips. You can use other types of chocolate, but I prefer dark chocolate to keep these bars healthier. If you need the bars to be dairy-free, make sure to use dairy-free chocolate. If you need the bars to be refined sugar-free, make sure to use chocolate sweetened with unrefined sugar or a sugar substitute.
How to Make Crispy Candy Bars
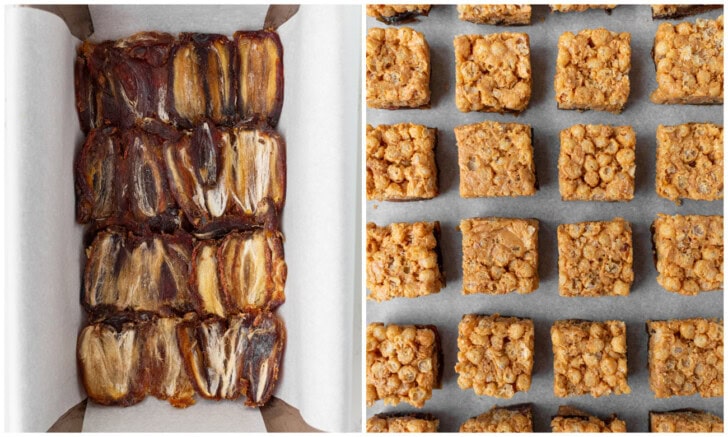
- Place the date halves split side up into your prepared loaf pan, overlapping slightly to ensure they stick together. Continue until you have 4 total rows. Place a piece of parchment on top and use a cup or bowl to flatten the dates slightly.

- Mix the peanut butter and puffed quinoa until evenly combined.
- Spread the peanut butter mixture over the date layer and spread into an even layer. Press and smooth the surface. Put in the freezer for about 30-60 minutes to harden.
- Once the filling is firm enough to cut, use a sharp knife to cut the filling into approximate 1 inch squares. Place the squares back into the freezer for about 10 minutes to firm up again.
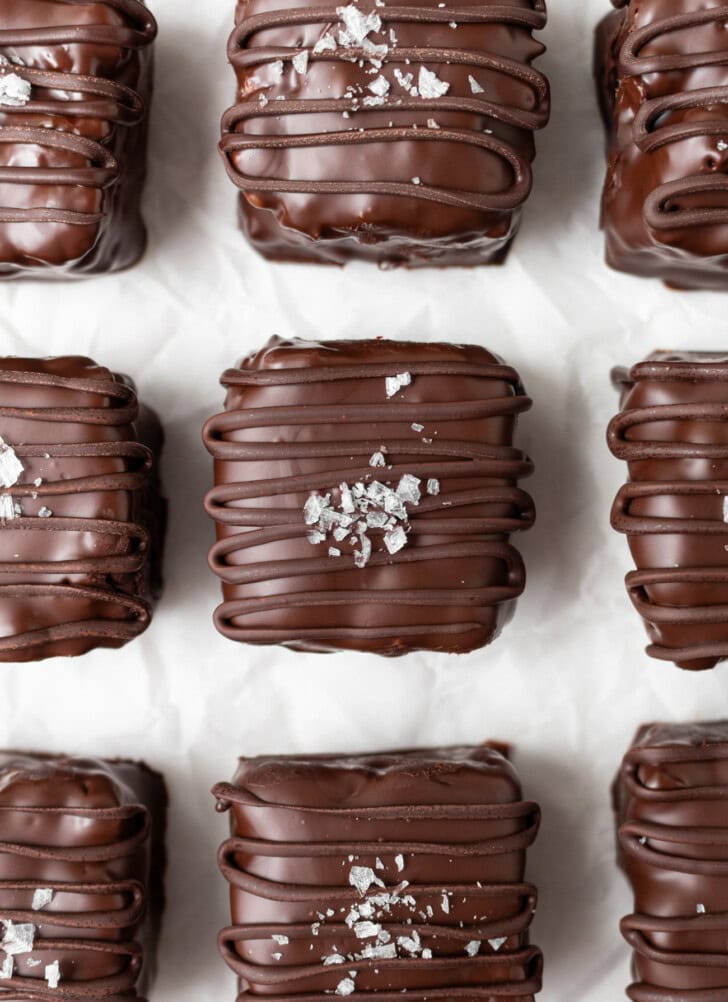
- Add the chocolate chips to a microwave-safe bowl. Microwave in 30-second intervals, stirring between each, until fully melted and smooth. Dip or coat each square in the melted chocolate, letting any excess drip off, then place on a parchment-lined tray. If desired, you can add chocolate drizzles and/or coarse salt for garnish. Place the chocolate bars back into the fridge until the chocolate is set.
Expert Tips
- Using store bought puffed quinoa saves time, but you can also make your own. If using store bought, there are a few different kinds available and you want to use the type that are small pieces, about the same size as uncooked quinoa. They are sometimes referred to as quinoa crispies. While the larger type also works, they are not as crunchy and don’t stay crunchy for a long time.
- You can use other types of chocolate for the chocolate coating. I used dark chocolate to keep the bars healthier and because I prefer bittersweet dark chocolate. You can also use candy melts for easier coating, though they are not as healthy.
More Candy Recipes
- 4 Ingredient Crunchy Peanut Butter Cups
- 3 Ingredient Coconut Candy Bars
- 3 Ingredient Healthier Chocolate Bars
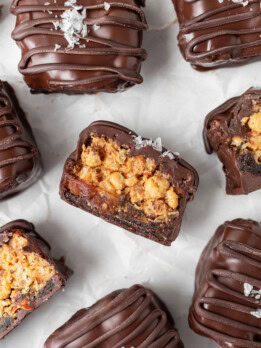
4 Ingredient Crispy Candy Bars
Ingredients
- 8 large Medjool dates, about 200 grams
- 3/4 cup (48g) puffed quinoa, see note before starting
- 5 1/2 tbsp (79g) unsweetened natural peanut butter with no added oils
- 2 cups (332g) dark chocolate chips, see note before starting
Instructions
- Line a 9 x 5-inch loaf pan with parchment paper.
- Split the dates in half, remove pits, and press split side up into loaf pan in rows of 4, overlapping slightly to ensure they stick together. Continue until you have 4 total rows. See photo in post for reference.
- Place a piece of parchment on top of the dates and use a cup or bowl to flatten the dates slightly. Set aside.
- In a medium bowl, mix the peanut butter and puffed quinoa until evenly combined. Add more peanut butter if needed to make sure the quinoa is coated.
- Spread the peanut butter mixture over the date layer and spread into an even layer. Place a parchment paper over the pb mixture and use your hands or back of a spoon to flatten and smooth the peanut butter layer and also press the layer so that it sticks to the date layer. Remove the top sheet of parchment paper. Put in the freezer for about 30-60 minutes to harden.
- Once the peanut butter is firm enough to cut, use a sharp knife to cut the filling into approximate 1 inch squares. Place the squares back into the freezer for about 10 minutes to firm up again.
- Add the chocolate chips to a microwave-safe bowl. Microwave in 30-second intervals, stirring between each, until fully melted and smooth.
- Dip or coat each square in the melted chocolate, letting any excess drip off, then place on a parchment paper-lined tray. If desired, add thin chocolate drizzles or coarse salt for garnish. Place the bars into the fridge until the chocolate layer is set. The bars are then ready to serve. Store any uneaten bars in an airtight container in the fridge or freezer.
Notes
- Dark chocolate note: You can use other types of chocolate chips such as semisweet or milk chocolate chips. If you need the bark to be dairy-free, make sure to use dairy-free chocolate chips. If you need the bark to be refined sugar-free, make sure to use chocolate chips sweetened with unrefined sugars such as coconut or date sugar. I like using Hu dark chocolate chips.*
- Puffed quinoa note: I use store bought puffed quinoa to save time and because they are more evenly golden. It is a little pricey but one package contains a lot and should last a while. You can also make your own puffed quinoa, with the recipe below. If buying store bought, we recommend using the puffed quinoa that are very tiny pieces (no bigger than the size of uncooked quinoa). They are sometimes called quinoa crispies. I like using Cereausly quinoa crispies.* There are some brands of puffed quinoa (like La Purita brand) that look more like round balls, which are not as crunchy and don't store as well. Please note that the bars in the photos do use the larger type of puffed quinoa, but after further testing, we found the smaller ones to be a better option.
- *These product links are affiliate links. This means I earn a commission from qualifying purchases.
- Homemade puffed quinoa:
- 1 cup raw quinoa
- Heat a 10-inch nonstick skillet over medium heat. Working in batches, add 3–4 tablespoons of quinoa in a single layer. Let cook for 1-2 minutes, shaking the pan constantly, until the quinoa starts to pop and puff. Once most of the grains are puffed and lightly golden, transfer to a bowl. Repeat with the remaining quinoa. Let the puffed quinoa cool completely to room temperature before using.
- Please note that homemade puffed quinoa will not be as perfectly golden brown as store bought puffed quinoa.
- The quinoa burns quickly, so it’s important to constantly be shaking and stirring the pan.
- It works better if you preheat your pan before adding the quinoa - they will start popping right away which helps avoid burning.
- Estimated nutrition assumes 1 1/2 cups of chocolate used because not all of the chocolate ends up on the bars.