
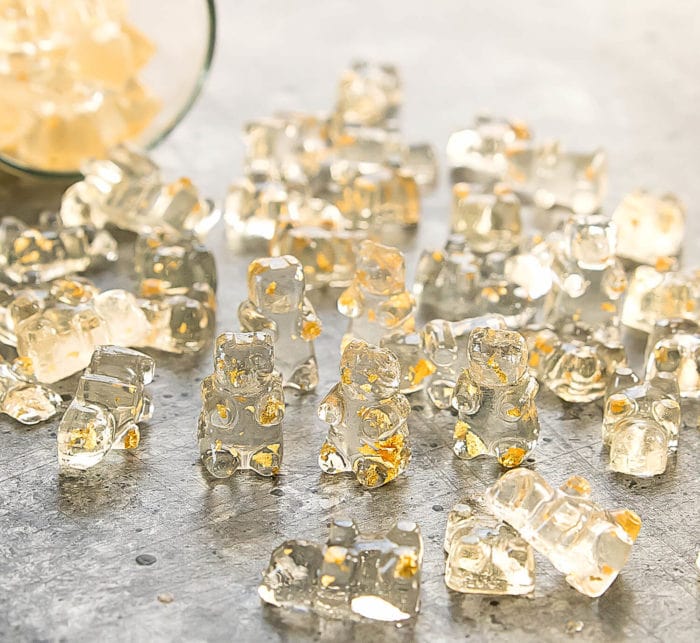
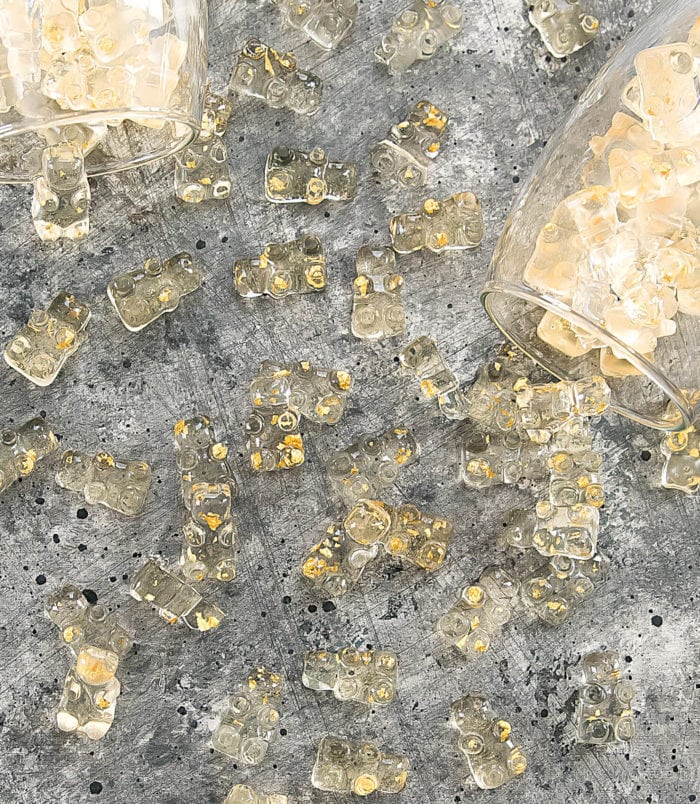
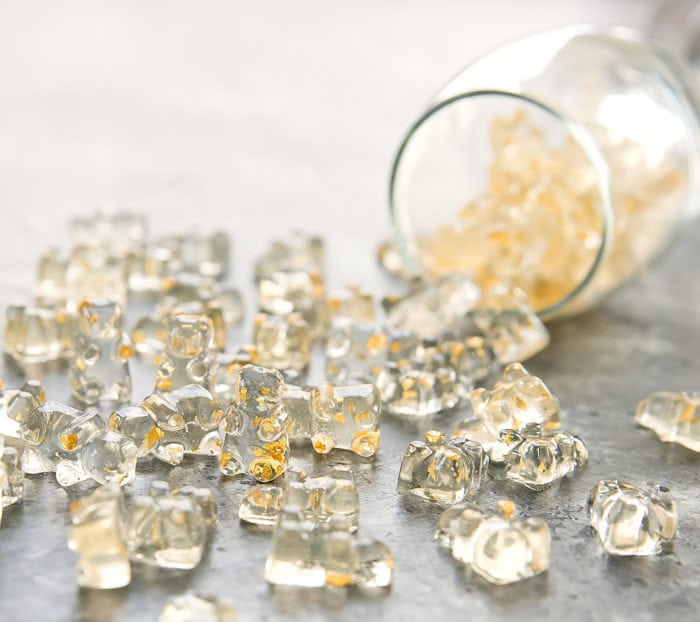
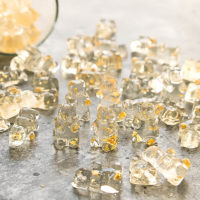
Homemade champagne gummy bears made with edible gold flakes. These are the perfect party favor for holidays, weddings, and other celebrations. I’m sharing tips for the best champagne gummy bears that have the best chewy texture and flavor!
Every year for the holidays I try to come up with a new homemade food gift in addition to cookies. This year I am making champagne gummy bears!
I was inspired to make them after seeing them in a gourmet food store. They were pretty pricey and since I already know how to make gummy bears, so I figured champagne gummies would be easy to make, too.
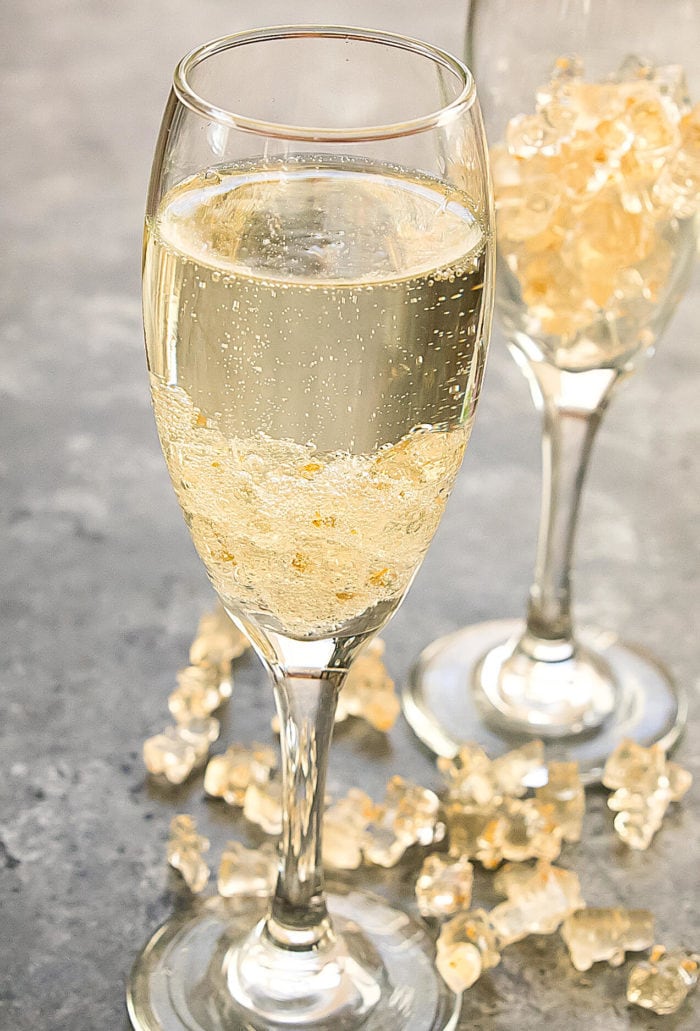
I dressed them up with some little gold flecks which makes them look so much better. They keep well for several days which makes them perfect for gifting or for weddings, New Year’s Eve, or other celebrations. You can even drop a few into a glass of champagne!
Ingredients
- Champagne – or any sparkling wine like prosecco.
- Unflavored gelatin
- Granulated sugar
Edible gold flakes for drinks – I use this edible gold.* One small bottle of the edible gold for drinks is enough for the entire recipe with a little leftover. However, if you plan on making a large batch it may be better to get the 6-pack rather than buying several 1-packs.
Champagne extract – this is optional but it does enhance the fizzy champagne flavor.
You will also need gummy bear molds*. These are the most commonly sold ones I have found. They aren’t too expensive and are easy to use but they make gummy bears that are about half the size of gummy bears you usually buy at the store. So if you plan on making these for gifting or for a large party, you may need to double/triple/quadruple the recipe.
How to Make Them
Open the edible gold bottle and fill it with a little champagne until it reaches the fill line. Put the rubber stopper back in and secure the cap. Shake the bottle vigorously until the gold breaks down into very small flecks. Put a few drops of gold flecks into each gummy bear mold cavity.
Pour the champagne into a small saucepan. Sprinkle the gelatin over the top and then whisk it into the champagne until it dissolves. The champagne will thicken to a slurry-like consistency. Whisk in the sugar.
Once the gelatin is completely dissolved, warm the mixture over low heat until the mixture melts into a liquid consistency. Don’t let it boil and whisk continuously so the gelatin doesn’t form lumps.
When the mixture is liquid, turn off the heat and leave the saucepan on the burner. Add the champagne extract and stir. Your mixture may have a layer of foam on top which is okay.
Use the droppers included with the molds to fill each gummy bear mold with the champagne gelatin mixture. Try to fill the eyedropper below the foam layer so you only get the liquid. This will prevent air bubbles in your gummy bears.
Place the molds in the refrigerator for about 30 minutes to an hour or until the champagne gummy bears are set. Remove them from the molds and allow them to warm to room temperature before eating.
Storage
Homemade gummy bears will keep well in an airtight container at room temperature for up to five days.
You can store them in the refrigerator, too, but they will be firmer. If you do this, allow them to sit at room temperature to soften.
Recipe Tips
The gold flecks are edible but are optional. I think the gummy bears look a little plain without it.
I use more gelatin in this recipe because the bears are so tiny. They are firm and chewy once they are set. If you are using a bigger silicone mold you can reduce the gelatin for softer gummy bears. Please see the notes section in the recipe for more information about this.
It’s important that the champagne and gelatin liquid stays warm, so if you are making several batches you might want to make one batch and once it’s in the fridge, make another batch. If the gelatin cools it will firm up and you won’t be able to fill the molds.
I love how these turned out and can’t wait to make them again for gifts. I love chewy candy and making it homemade is a really fun kitchen project. I hope you try them!
More Gummy Bear Recipes
*Some of the links contained in this post are affiliate links. Much like referral codes, this means I earn a small commission if you purchase a product I referred (at no extra charge to you).
Gold Champagne Gummy Bears
Ingredients
- 1 cup champagne + additional for the edible gold
- 5 tbsp unflavored gelatin (see note)
- 1/2 cup granulated white sugar
- edible gold flakes for drinks (see note)
- 6 drops champagne extract optional (see note)
Instructions
- Remove cap and rubber stopper from edible gold bottle. Fill with a little champagne until it reaches the fill line. Put rubber stopper back in and screw on cap. Shake bottle vigorously until the gold breaks down into very small flecks. Put a few drops of gold flecks into each gummy bear mold cavity.
- In a small saucepan, add champagne. Sprinkle gelatin over champagne. Whisk the gelatin to dissolve it into wine. The gelatin will cause the wine to thicken up, to a slurry-like consistency. Continue to whisk until all the gelatin powder has been dissolved into the wine. Add in sugar and whisk until it is completely dissolved into the slurry.
- Bring saucepan to low heat, and stir continuously until wine melts back down to a liquid consistency. You do not want the mixture to come to a boil. Make sure you stir continuously as the wine is melting back down because you don't want any gelatin to clump up. There will likely be a white bubbly foam layer than forms on top, which is okay.
- Once wine is in a liquid state again, turn off heat but leave saucepan on stove to keep gelatin warm. If using champagne extract, add and stir into mixture.
- Using the eyedropper provided, fill your gummy bear cavities with the gelatin mixture. Make sure to push your eyedropper underneath the layer of foam so that you only get the liquid and try to avoid air bubbles (The foam layer is edible but it is very sticky and will affect the clarity of your gummy bears. I usually just keep using the liquid below the foam and them rinse the foam out when washing the pan.) If you are using the gummy bear molds, you will likely need 4 trays and you need to fill them all at once, otherwise your gelatin mixture will solidify once it cools down. Place gummy bear molds into fridge until gummy bears solidify, about 30 minutes to 1 hour. Pop out the gummy bears once they are ready. Allow them to come to room temperature before eating. Gummy bears eaten straight out of the fridge will be a little firmer. Once that are at room temperature will be chewier and softer. Store uneaten gummy bears in the fridge.
Notes
- These gummy bear molds* I use are the most commonly sold ones I have found. They aren't too expensive and are easy to use but they make gummy bears that about half the size of gummy bears you usually buy at the store. So if you plan on making these for gifting or for a large party, you may need to double/triple/quadruple the recipe.
- I found that for the tiny size of these gummies, it is better to go with more gelatin which is why this recipe has 5 tbsp of gelatin. The bears are chewy but also firm enough that they pop out of the molds easily. If you plan on making these gummies in bigger silicone molds, you can reduce the gelatin to 3 tbsp for a softer gummy as you may find the gummies to be too chewy when they are bigger in size. The softer gummy is harder to pop out of the tiny bear molds so I don't recommend reducing the gelatin for small gummy bears.
- I used this edible gold.* One small bottle of the edible gold for drinks is enough for the entire recipe with a little leftover. However, if you plan on making a large batch it may be better to get the 6-pack rather than buying several 1-packs.
- The champagne extract is optional, but it does enhance the fizzy champagne flavor.
- *Some of the links contained in this post are affiliate links. Much like referral codes, this means I earn a small commission if you purchase a product I referred (at no extra charge to you).
The nutrition information provided are only estimates based on an online nutritional calculator. I am not a certified nutritionist. Please consult a professional nutritionist or doctor for accurate information and any dietary restrictions and concerns you may have.


which Champagne Extract did you use for the gold champagne gummies?
We use LorAnn Oils – hope that helps!
sooo yummy
We’re glad you enjoyed them!
Thanks for sharing with us this homemade champagne gummy bear with edible gold flakes. If you are working with gummy making machine, it would be easier!
Hi kirbie, I’m not sure you will see this but I wanted to inform you that a lot of people with the MLM company it works are using your photos to advertise their products. You may be able to send a cease and desist letter to the company or threaten legal action for them using your property to advertise a harmful product.
Thanks for letting us know – we will look into it!
Hi Kirbie,
I feel like you should know there’s at least 1 MLM person out there using your gold champagne gummy bear images to represent and shill their supposed weight-loss gummy products on Facebook. 🙁
Thanks for letting us know!
For the gold, is this the one to use?
https://www.amazon.com/Edible-Genuine-Gold-Leaf-Drinks/dp/B074J79VPK/ref=sr_1_2?dchild=1&keywords=edible+gold+leaf+for+drinks&qid=1590715688&s=home-garden&sr=1-2
yes! Not sure what happened to my link to them, but those are it
I can’t wait to try these! If I substitute the gelatin for agar agar, would the measurement still be 5 tbsp?
It’s not a 1:1 substitute and without testing it we can’t say for sure how it will need to be adjusted.
This looks amazing!!! Will give this a try later this month!! thank you!