
Fluffy, Japanese-style cheesecake cooked in a rice cooker. It’s especially great for when you don’t have access to or don’t want to use the oven.
I am always fascinated by recipes that Japanese people like to make in their rice cookers. I’ve done the rice cooker pancake and now I’m sharing with you a rice cooker cheesecake.
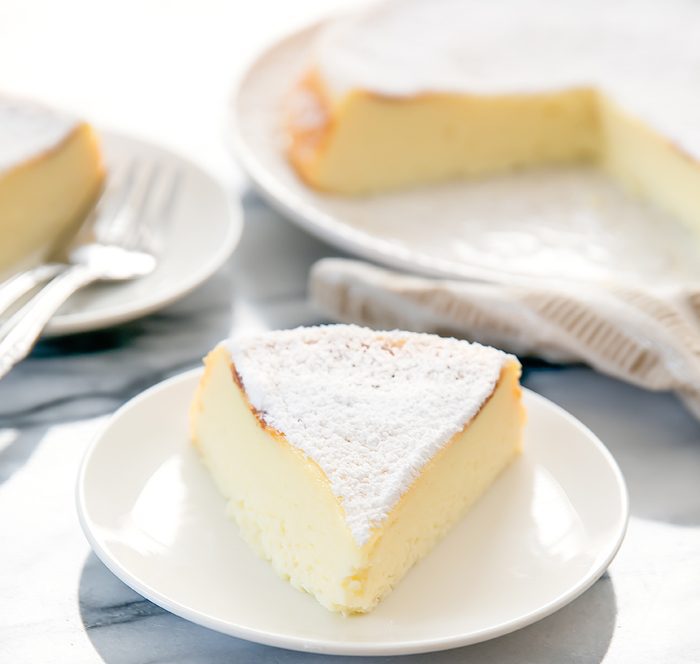
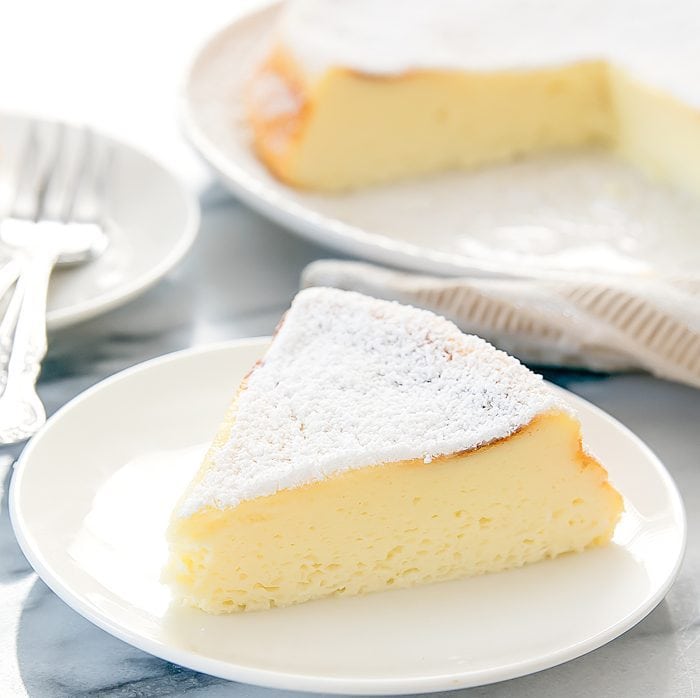
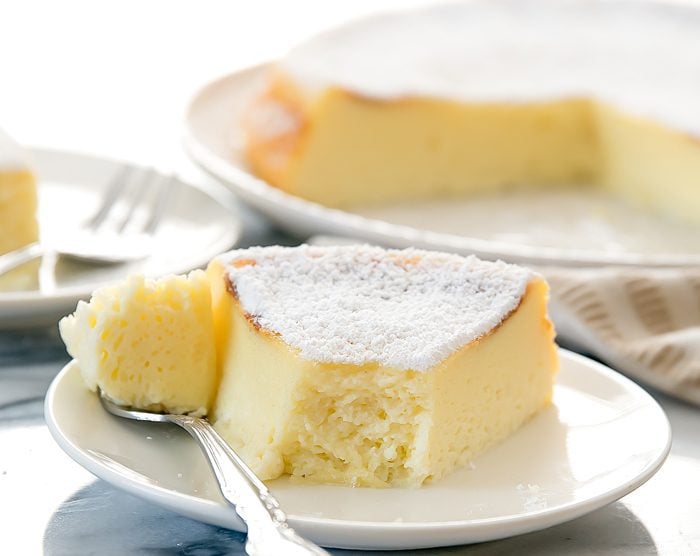
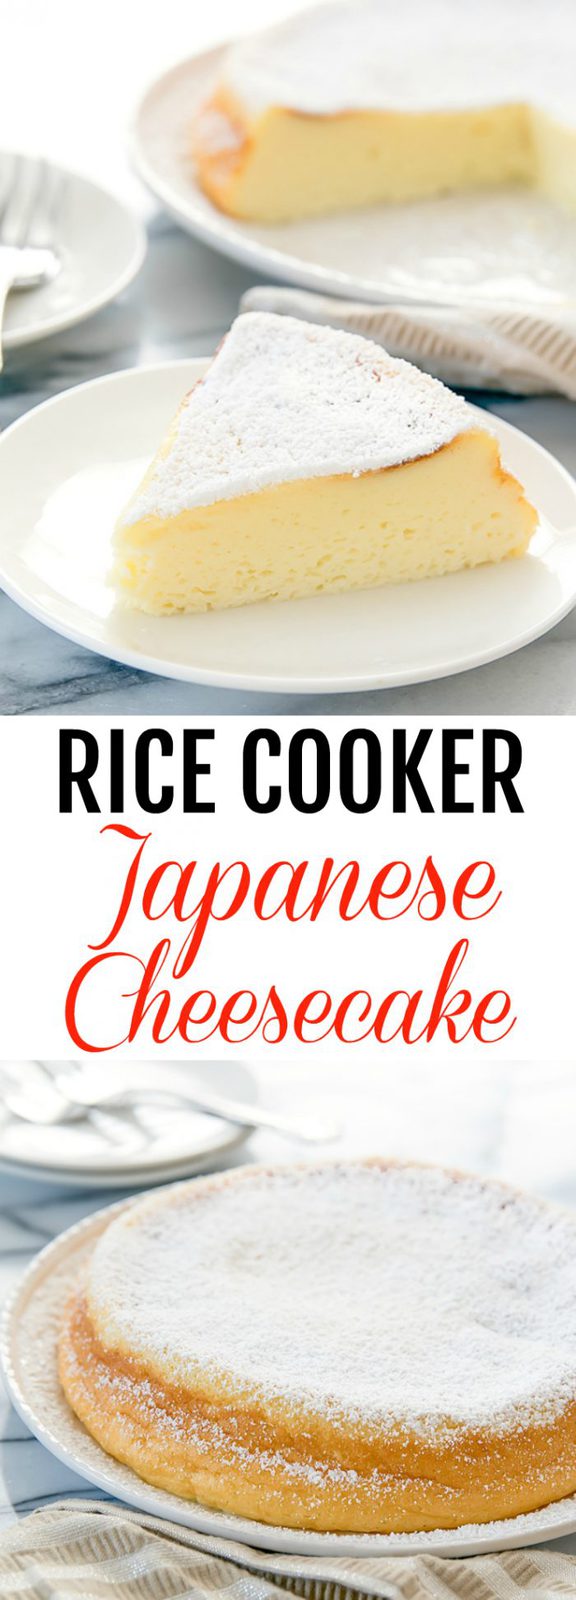
If you aren’t familiar with Japanese-style cheesecakes, they are much lighter compared to American cheesecake. They are more like a sweet cheese flavored souffle cake. I love the light, cottony texture.
I went through quite a few failed batches before figuring this one out. I do love how it tastes though and I’m happy I didn’t have to turn on my oven as this rice cooker uses less electricity and doesn’t heat up my kitchen.
I do have several notes and detailed instructions so that hopefully your first attempt will be successful. A few things to keep in mind:
– This works best with multi-functional rice cookers, ideally one that has a cake setting and uses a non-stick pot. I used my 5.5 cup fuzzy logic rice cooker. If you have one that only has a button to turn it on, it can theoretically be used but the results aren’t as great and you have to keep pressing the button down as it will pop up every few minutes thinking your “rice” is done.
– Allow the cake to cool in the fridge for about an hour before eating. When it is first finished, it will have a strong egg flavor and you won’t really taste the cheese. Once it sets in the fridge, you’ll find the cake is sweeter with a stronger cheese flavor.
– I have some more tips stated in the recipe instructions based on what I learned from my failed attempts. Please read through them all before starting.
You might like my 3 Ingredient Fluffy Chocolate Cheesecake, too!

Rice Cooker Japanese Cheesecake
Ingredients
- 227 grams (8-oz block) cream cheese softened
- 2 large eggs whites and yolks separated
- 80 grams granulated sugar approximately 6 1/2 tbsp
- 2 tbsp lemon juice
- 40 grams cake flour approximately 5 tbsp
- 200 ml skim milk I made it with skim milk, but I think it should also work with low fat or whole
- powdered sugar for dusting on top of the cake
Instructions
- In a large glass mixing bowl, add cream cheese. Your cream cheese needs to be very soft, otherwise it will not mix into the batter properly and you will end up with little lumps of cream cheese. I recommend heating it in the microwave (cover top of bowl with paper towel because sometimes it does splatter) at 10 second intervals, until you can whisk the cream cheese to look like a smooth frosting.
- Once cream cheese is whisked to a smooth state, add egg yolks. Whisk until batter is smooth. I found from my attempts that it is important to mix everything until smooth after each additional new ingredient, otherwise it will be too hard to remove the lumps later. Add in sugar and whisk until batter is smooth. Add in lemon juice and whisk until batter is smooth.
- Sift cake flour into the batter. The sifting is important. If you just add it in, the flour remains clumped up (I even tried beating it with an electric mixer and it didn't smooth out the flour lumps.) However, if you sift it in, you only need to whisk a few times for it to be easily blended into the batter. I do not own a flour sifter, so I simply pour the flour into a sieve and lightly tap the sieve against my other hand (the one not holding the sieve) until all the flour is sifted through. After flour is sifted in, whisk batter until smooth.
- Add in milk and gently whisk into batter until smooth.
- In a clean bowl of a stand mixer, add egg whites. Make sure your eggs whites and bowl did not come into contact with any oils, otherwise the egg whites will not whip properly. Whip the egg whites on high speed until stiff peaks form.
- Add the egg whites to your batter in 3 batches. After each addition, gently fold in the egg whites as you do not want to beat out all the air that you whipped into the egg whites. It's okay if the egg whites do not completely mix in. There should still be a few small lumps and streaks of egg white remaining once the egg whites are folded into the batter.
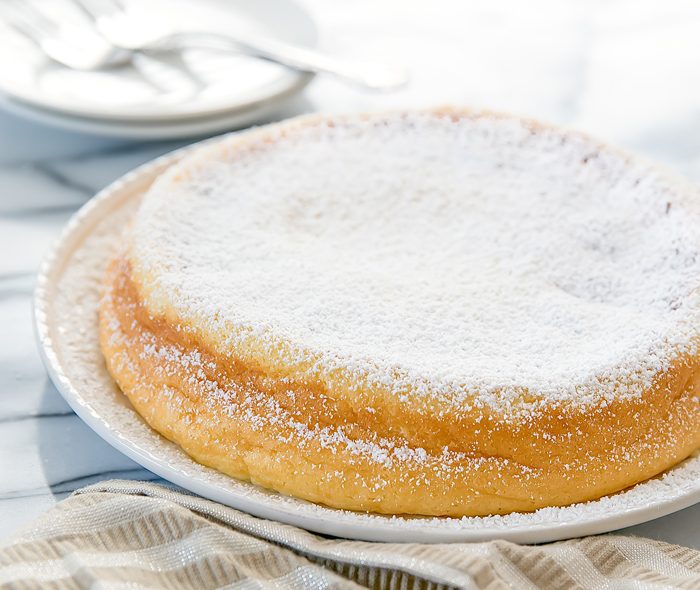
- Thoroughly grease the interior of your rice cooker pot. I used a 5 1/2 cup rice cooker for this recipe. Pour batter into the pot. Close rice cooker and press "cake" function and start. If your rice cooker does not have a cake function, choose the white rice option and you may need to press for a second cycle after the first cycle finishes. Cook cake for about 40 minutes. You can open your rice cooker towards the end of cooking time to check progress of cake. The cake should be pulling away from the sides of the rice cooker, the surface should have an even cooked color and the cake should bounce back when you touch it. Cooking time will vary depending on the size of your rice cooker as well.
- Place a plate on top of your rice cooker pot and carefully invert. The cake should slide down onto the plate. Place cake in the fridge for at least one hour to set and for the cheese flavor to fully develop. If you attempt to eat it right away, the cake will taste eggy and not very sweet. Once it is set, it is much sweeter and you can taste the cheese flavor. Dust with powdered sugar before serving. Store uneaten cake in fridge.
Notes
- This works best with multi-functional rice cookers, ideally one that has a cake setting and uses a non-stick pot. I used my 5.5 cup fuzzy logic rice cooker. If you have one that only has a button to turn it on, it can theoretically be used but the results aren't as great and you have to keep pressing the button down as it will pop up every few minutes thinking your "rice" is done.
- If you do try to use a rice cooker that only has a button to turn it on, it will take longer to cook and the cake does collapse more. I did attempt it in a very basic, one button, 3 cup rice cooker. After 10 minutes, the cook button popped back up. I would then have to wait about 5 minutes before I could press it down again. And then it would pop up after another 5-8 minutes. The cake did continue to cook in the heated pot even when it was off so it does work but it is annoying to have to continuously turn it back on every 10 minutes. Also because this was a 3 cup rice cooker, the cake took longer to cook.
The nutrition information provided are only estimates based on an online nutritional calculator. I am not a certified nutritionist. Please consult a professional nutritionist or doctor for accurate information and any dietary restrictions and concerns you may have.


I was wondering if you have pictures of what it looked like as it cooked in the rice cooker? Thanks
Sorry, but we don’t have those pictures.
This recipe is very on point comparing to other recipes using the rice cooker. Thank you for a wonderful recipe. I own a 5.5 cup Zojirushi micom rice cooker. The cake setting is 45 minutes on this rice cooker. I remove the inner pot right after the 45 minutes is up. Then I leave the cake to cool down in the pot for 30 minutes before moving it to a plate. The cake is lukewarm but firm. I don’t find it eggy at this point. The lemon juice and the sugar amount are just right. Balance sweetness and sourness. I put the leftover in the fridge. It still tastes good after 3 days. I made this recipe 3 times before writing this review. Thank you again for sharing the recipe.
We’re so happy you love the recipe! Thanks for sharing your experience.
I tried this tonight and turned out better than expected! That is, given how I’m the worst baker alive.
Now the first batch of batter I actually tossed because after adding the milk it was just extremely liquid-y and I was sure that it would just not firm up at all. But maybe I was wrong to do that? I’d be interested to hear how that went for others, because the second attempt I used 50ml of milk (already halved the recipe for my tiny rice cooker) but it turned out really dense. Sort of like the texture of traditional cheesecake?
Should the batter be really liquidy after the milk is added or not? Might try it out again that way if that’s the case, but wanna make sure beforehand 🙂
The batter shouldn’t be thick – it should be pourable but not so thin that it’s like liquid. Did you sift the flour before or after you sifted it? You should measure it first and then sift it – if you did it the other way, there might not have been enough flour. We’re glad you got it to work for you, though!
Same issue, should’ve used waaay less milk. I’m throwing it in for another run but I’m ready to call this a failure 🙁
As we said with the other comment, how did you sift and measure the flour? The order in how you do this matters.
I really wanted a Cheesecake but didn’t want to go through so much hassle. Then came across your recipe and tried it. It was such a success! I’m loving it and definitely will be making it over and over from now on! Thank you for such a simple recipe!
So glad you enjoyed it!
Mine was a complete fail. We have a induction zojirushi (no cake setting but I used the white rice setting). So being induction I would think that it would get equally cooked from all sides like our rice. But when the time was up it was pulling away from the sides and Iput the plate on top and inverted it like the instructions say and the top was burnt and it collapsed into an ugly pile ?
Sorry to hear it didn’t work for you. As we say in the post, this works best with multi-functional rice cookers, ideally one that has a cake setting and uses a non-stick pot. I used my 5.5 cup fuzzy logic rice cooker.
This recipe is AMAZING. I’ve never made cheesecake before and it came out perfectly- just as good as store/restaurant bought. Thank you for sharing!!
I’m so happy it turned out well for you!
Wow! Halved all the ingredients as I only have a one-function 5-cup pot, and whipped the white with a plastic fork, but it turned out pretty good. Like if a soufflé and creamy custard had a baby. Almost reminds me of a cheesecake chain called Uncle Tetsu, but lighter. Thank you!
I’m glad you enjoyed it!
Really want to try this! Do I need to reduce the ingredient portions for a 3.5 cup rice cooker?
Thanks!
Sorry I’m not sure
Hi!
The manual of my 3.5 cups rice cooker says not to put in more than 300 g of cake batter.
That’s maybe half the recipe. You should better check that first.
My batter was so runny ? I followed the instructions exactly as stated. It was more like a liquid pancake batter, so runny that I couldn’t even fold in my egg whites properly..
Did you make any changes to the ingredients?
When do you put sugar in?
Step 2. It’s in the directions
Hi Kirbie
Thanks for sharing this cool recipe.
Is it ok to use self-raising flour instead of cake flour?
cake flour is much lighter than self raising ap flour so the results won’t be the same.
Hi! this recipe looks good! can i check if i could use self-raising flour instead of cake flour? Thank you!
I have not tried it with self raising flour
Hi there! May I confirm that sugar is not needed when I whisk the egg white?
correct
I had the same issue as Berry; cooked for three cycles instead of two but the cake still partially collapsed on itself. My guess is the airiness of the cake could not support the actual weight. Next time I may try to wait until the cake has completely cooled before inverting. Also, I noticed that your batter has significantly more milk than other Japanese cheesecake recipes. Any idea if using less would be helpful?
I’m sorry you had issues. It may be collapsing because your rice cooker is stopping and then starting up again. The recipe works best in a rice cooker that allows for a cake function and longer cooking time. I don’t think reducing the milk will help but you can experiment. There is more milk than a classic Japanese cheesecake because this one is designed to cook in a rice cooker
Hello. Thank you for sharing the recipe and your experiences. I just made this. Mine needed 2 cycles of white rice cooking (close to an hour). When I stuck a knife in, it turned out clean but when I inverted it onto a plate, it broke/collapsed? So I’ve “flopped” the broken cake back into the rice cooker to be cooked again. Would you know what went wrong? ?
But I must say it smells and tastes great! (I stole a little taste from a tiny broken bit).
Sorry to hear that. I’m guessing it needed to be cooked longer if it collapsed after you took it out
Hello Kirbie,
First of all, thanks for the recipe! I tried this using my Tefal multicolored with cake function a few weeks back, but it ended up to be just like normal cheesecake instead of the light Japanese cheesecake. It’s actually my first attempt making a cake and I don’t cook normally, so I really can’t figure out how to change the menu or my ways to make the same as yours? Any advice? I’d really love to make a successful one.
Thank you!!
I’m sorry you weren’t successful on your first attempt. Were you able to cook it on cake function?
Yes, I can.. But it just turned out to be normal cheesecake and not the fluffy Japanese cheesecake.
Hi, I have a (fairly old) 10 cup neuro fuzzy rice cooker with lots of settings, but none for cake. Would the white rice setting work for that? And could I double the recipe? Thanks 🙂
Please review step 7 which discusses alternatives for no cake setting. It would be difficult to double this recipe because it will take a lot longer to cook all the way through and parts of the cheesecake may get overcooked in the process
the Recipe looks great!If I wanted to do this in oven, would it work? I don’t have a rice cooker…
this recipe is designed for the rice cooker. It won’t work if you bake it directly. Unfortunately, I do not have an oven version at this time.
how many times do I have to push down the button or how long do I have to “cook” the cake until it is done using the rice cooker that only has one button?
it will vary greatly depending on the size of your rice cooker, how long the button stays down before needing to be pushed back down, etc. Unfortunately you will just need to keep checking on it every time the button pops up to see how close it is to done, but you can use the 40 minute as a rough estimate.
My rice cooker only has “cook” and then automatically clicks to “warm”. After 2 minutes it went to “warm” so I manually held it “cook” for another 8 minutes and then checked it. It was severely burned and blackened so probably best to try with a multifunctional rice cooker.
I’m sorry to hear that. I do think it works best with the multifunctional rice cooker but I did make it successfully in a ricer cooker that only has cook/warm and it still worked, I just had to keep holding it down and it didn’t burn.
Mine turned out well, but a little “too soft” or maybe it should be like that, haha! I have used just regular flour though, so cheesecake didn’t hold together that well. But overall, I am happy with the result! Thank you!
the cheesecake should be very soft/fluffy, but perhaps it needed a bit longer cooking if you think it was too soft
This came out great! But fell apart getting it out of the bottom of the rice cooker. How to fix, more grease on the cooker?
Hi, did it stick to the bottom when you tried to turn the cake upside down to get it to come out? If so you may need to grease the bottom more or you may need to reduce the cooking time slightly. it may have overcooked a little which would also cause it to stick
I made this exact recipe for thanksgiving this year. With your tips, everything turned out very well. I couldn’t find our automatic egg beater so I vigorously hand wisked it and I used 3 eggs instead of 2, but overall it turned out amazingly well. I just used a normal rice cooker and pressed white rice… waited 40 mins and voila! My mom and sisters loved the dish. My sisters did say— this isnt cheesecake. Because it was lighter than normal. I prefer it, in fact, and see myself making it more often in the future.
I’m so glad it worked out for you! And I’m impressed with your whisking skills!
I’m gonna try this recipe next weekend! I have Zojirushi ricecooker, I think i try the white rice setting for this cheesecake. Yours looks great, hopefully mine too.
i hope it works out for you! does your rice cooker have a cake setting? if so, that is an even better option!
how do I adapt the rice cooker cheesecake recipe to the instant pot?
https://kirbiecravings.com/2017/05/instant-pot-3-ingredient-japanese-cheesecake.html
May I know what is the difference between the instant pot Japanese cheesecake versus this Rice cooker Japanese cheesecake?
Which has a better texture and taste?
the Instant Pot is a 3 ingredient version. It’s basically a shortcut cheesecake that tastes like a Japanese cheesecake but it’s not going to be quite the same as a traditional one because it is only 3 ingredients. This rice cooker version is more like the traditional Japanese cheesecakes so it will have a better texture and it is also taller and bigger too. Both are good though!
Cheesecake in a rice cooker!? What kind of rock have I been living under!? This looks amaze.
aww, thanks!
The button on my one-button rice cooker is broken, so as soon as I plug it in, it turns on… I bet I could make it work. 😀
haha, that’s one way to do it!