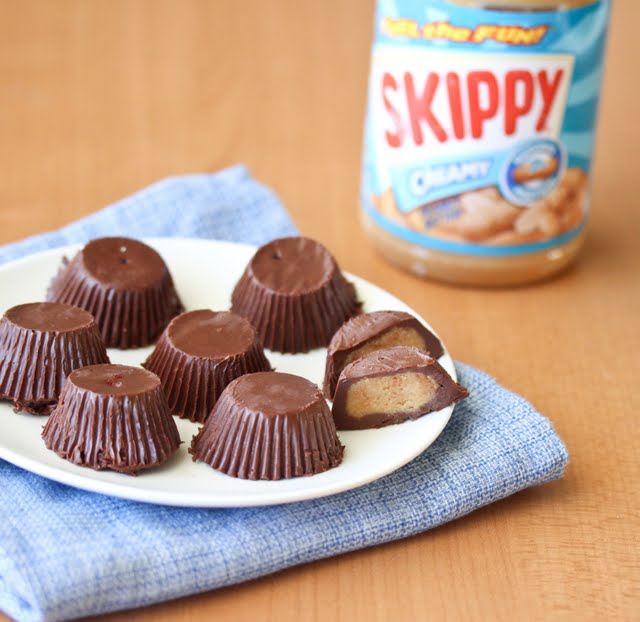
These peanut butter cups are very similar to Reese’s peanut butter cups, but they’re made with familiar ingredients (no weird additives!). They’re very easy to make with a few simple ingredients and you can customize them with your favorite kind of chocolate.
I’ve always loved peanut butter cups and after I made a version with a pure peanut butter center, I decided I wanted to try making a version similar to Reese’s peanut butter cups. So, the filling for these is more like a paste. They’re not exactly like store-bought peanut butter cups, but they’re delicious and also don’t have a bunch of unnecessary ingredients in them.
I love candy and making it at home is always fun. I’ve made Homemade Butterfingers and Homemade Chocolate Crunch Bars, too!
Peanut Butter Filling
To create the filling, you will need a few ingredients:
- Melted butter
- Graham cracker crumbs
- Confectioner’s sugar
- Peanut butter
All you do is mix them all together in a bowl and the filling is ready to go
Chocolate
For the chocolate cups, you will need 16 ounces of chocolate and the kind you use is up to you! I used semi-sweet chocolate chips, but you could also use milk chocolate or bittersweet chocolate.
The easiest way to melt the chocolate is in the microwave. I just heat the chips for 30 seconds and then give them a stir. I then heat them again for 30 seconds and stir again. Usually, they are melted at that point, but you can do a few more 30-second intervals if needed.
How to Make Peanut Butter Cups
I used a mini muffin pan lined with paper liners to make my peanut butter cups. You can use a standard muffin pan if you want bigger peanut butter cups, but you won’t get as many in the batch.
Spoon some melted chocolate into the bottom of each muffin liner. You want enough chocolate to fully cover the bottom, but not so thick that you can’t add the peanut butter filling.
Use the back of the spoon to smooth some more chocolate up the sides of the liners. Once the liners are coated with chocolate transfer the muffin pan to the refrigerator. Chill the chocolate for 20 minutes or until the chocolate has hardened.
Place a small spoonful of the peanut butter filling into each chocolate cup. Top the peanut butter with melted chocolate adding enough chocolate so you can see the filling. To settle the chocolate and create a smooth surface for your peanut butter cups, rap the bottom of the muffin pan against the counter a couple of times.
Chill the peanut butter cups for 20 minutes or until the chocolate has hardened.
We had such a heatwave when I tried to unwrap and photograph my peanut butter cups. They were melting like crazy! On a normal day though, these stay pretty sturdy, though it’s best to keep them in the fridge until they are ready to be eaten.
If you like this recipe you might like my 2-Ingredient Peanut Butter Cup Cookies, too!
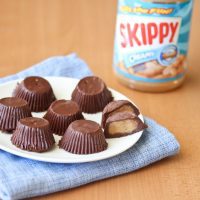
Mini Peanut Butter Cups
Ingredients
- 16 oz chocolate chips of your choice I used semisweet, but you can use milk chocolate or bittersweet chocolate
- 1/2 cup unsalted butter melted
- 1 cup graham cracker crumbs grind them in a food processor
- 1 cup confectioners’ sugar
- 1 cup peanut butter
Instructions
- In a medium bowl, mix together the melted butter, graham cracker crumbs, confectioners’ sugar, and peanut butter until well blended.
- Line mini muffin pan with candy liners. Put chocolate chips into a microwave safe bowl and microwave for about 60 seconds. Mix with large wooden spoon. Microwave again for 30 seconds. Stir again. if chocolate is not yet completely melted and smooth, repeat at 30 second intervals.
- Take a small spoon and scoop some melted chocolate into the bottom of each cupcake liner so that it completely lines the bottom (you want it thick enough to hold in the filling but not too thick so that you don't have room for filling the cups). Take the back of the spoon and dip into chocolate and line the inner sides of the cupcake liners with chocolate as well. Repeat with all cupcake liners. Once the inside of the cupcake liners has been completely coated with chocolate, put in the refrigerator to harden, for about 20 minutes.
- Remove liners from fridge after the chocolate has hardened. Take a small spoonful of peanut butter mixture and place into each chocolate cup. Take a spoonful of the remaining melted chocolate and pour on top of peanut butter filling until you can no longer see the peanut butter. Repeat with remaining cups. To smooth and level out the tops of the chocolate cups, tap the bottom of the muffin pan against hard surface (like the counter) which will settle the chocolate. Place cups in fridge for another 20 minutes until chocolate is hardened. Serve straight out of fridge. Keep remaining in refrigerator or freezer.
Notes
The nutrition information provided are only estimates based on an online nutritional calculator. I am not a certified nutritionist. Please consult a professional nutritionist or doctor for accurate information and any dietary restrictions and concerns you may have.






This recipe will great for Christmas, and I’m anxious to try and make it.
We hope you love it!
Just perfect ! Nice and easy and look delicious!