

3 Ingredient Blueberry Bread (No Eggs or Yeast)
This blueberry bread is soft, lightly sweet and studded with blueberries. The bread needs just 3 ingredients and doesn’t require any eggs or yeast. It also doesn’t require any kneading. The bread dough is easy to prepare.
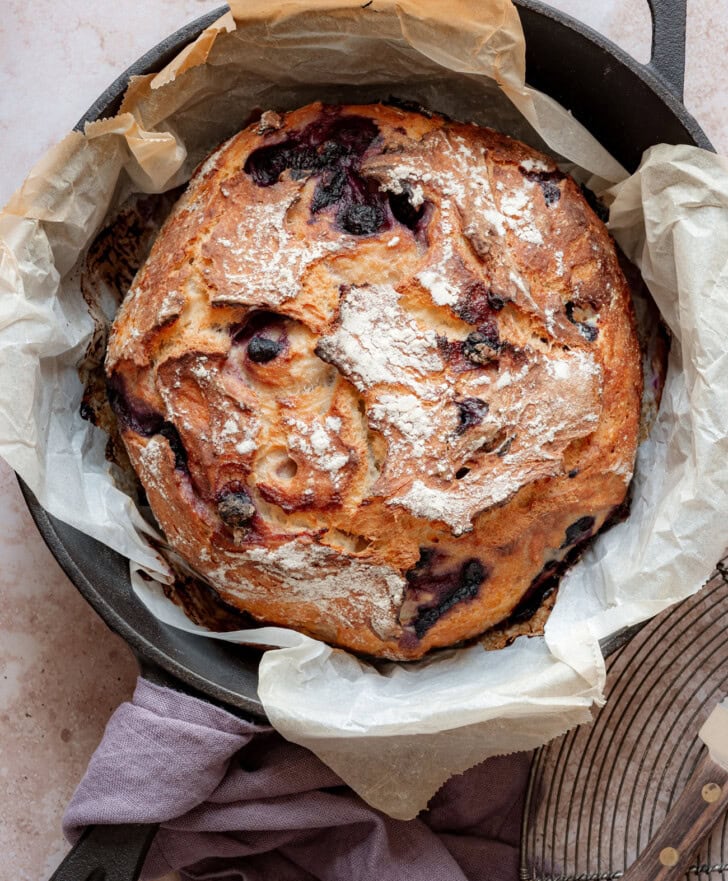
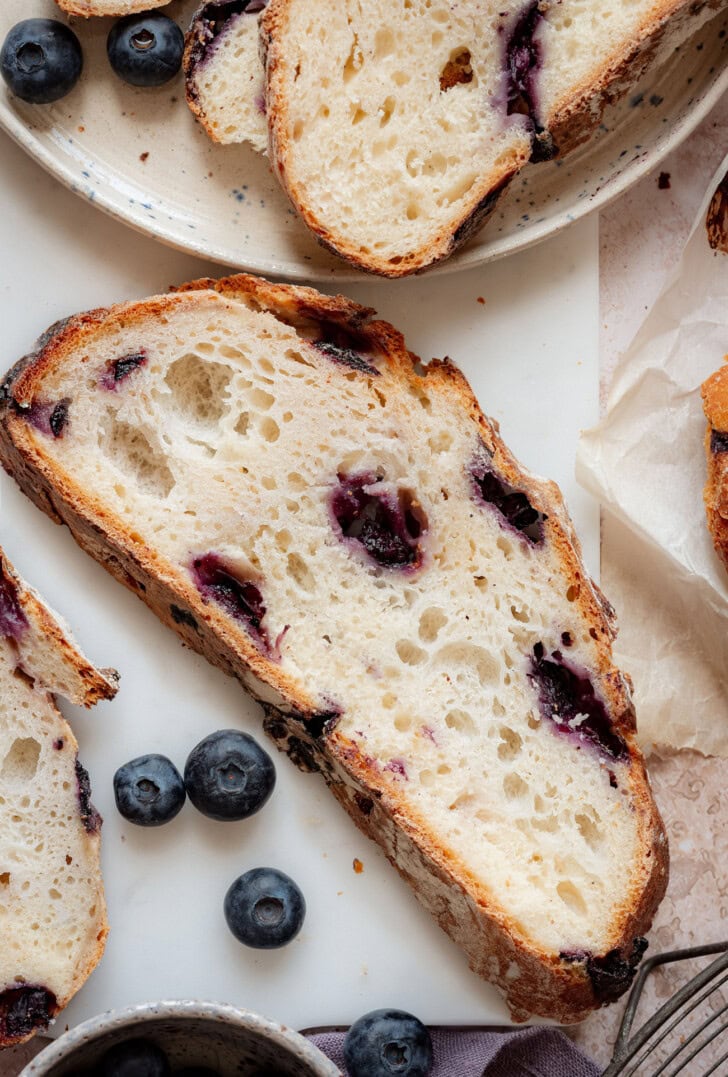
This bread doesn’t contain any yeast but has a texture like a yeast bread without all of the work. No kneading required.
Ingredients
- Frozen blueberries
- Vanilla yogurt
- Self-rising flour
Frozen blueberries: This recipe works best with frozen blueberries because they are easier to work with. You can mix them in the dough without having the berries get crushed.
Vanilla yogurt: Make sure to use regular yogurt and not Greek yogurt which will make the dough too dense. Vanilla yogurt adds a little bit of sweetness to the dough.
Self-rising flour: Self-rising flour is a flour blend that already includes a leavening agent and sodium. Since the dough does not contain yeast, it relies on the self-rising flour to rise. If you don’t have self-rising flour on hand, you can make a homemade blend using all purpose flour, baking powder and salt.
How to Make Blueberry Bread
- The blueberries and yogurt are mixed together. The flour is then mixed in until a dough forms.
- Cover your bowl tightly or transfer to a proofing container. Let the dough rest at room temperature for about 3 hours or in the refrigerator for 6-12 hours.
- When the dough is ready, bring it to room temperature. Place a large Dutch oven in the oven and preheat your oven.
- Lightly flour your surface and transfer your dough to the prepared surface. Rotate and drag the dough towards you until it forms a taut ball. Place the dough onto a sheet of parchment paper and transfer it to the Dutch oven once the oven is preheated.
- Bake the bread for 45 minutes covered and about 10-15 minutes uncovered until cooked through and browned on the surface. Allow the bread to cool before cutting and serving.
- The bread can be enjoyed plain or with your favorite spread.
Expert Tips
- I recommend using vanilla yogurt and not plain yogurt because vanilla yogurt adds a light sweetness to the bread.
- This recipe works best with frozen blueberries. If using fresh blueberries, they are more likely to break or get crushed when mixing the dough, resulting in a dough that is very sticky to work with.
- If you want to reduce the amount of sodium in this bread, you can make a homemade self-rising flour blend and use half the amount of salt.
- It is best to bake this bread in the lower half of the oven to prevent the surface of the bread from getting too dark.
More Bread Recipes
- 3 Ingredient Cottage Cheese Bread
- 3 Ingredient Blueberry Bread (Dairy-Free)
- 2 Ingredient Bread Rolls
3 Ingredient Blueberry Bread
Ingredients
- 2 cups (466g) whole milk vanilla yogurt , (regular yogurt, not Greek)
- 1 cup (122g) frozen blueberries, keep frozen
- 4 cups (528g) self-rising flour, see note before starting
Instructions
- Add the yogurt and frozen blueberries and mix until the blueberries are evenly combined.
- Add the flour and mix well with a spatula or your hands until a shaggy dough forms. If the dough is too dry, add a splash or two of water until there are no dry spots.
- Tightly cover the bowl with plastic wrap or transfer the dough to a proofing container with a lid. Let the dough rest and proof for 3-4 hours at room temperature or for 6-12 hours in the fridge. The dough should be stickier and wetter than before, larger in size, with some air pockets/bubbles at the bottom of the dough.
- If proofing the dough in the fridge, allow the dough to come to room temperature for 1 hour (still tightly covered). About 20 minutes before baking, preheat your oven to 450°F (232°C). Place a large Dutch oven (4.3 quarts or bigger) with its lid on in the lower half of your oven while it preheats. This is important. The Dutch oven needs to preheat before adding the bread.
- After the dough has rested, wet your hands with some water. Grab one side of the dough, stretch it upward, and then fold it over the center of the dough. Repeat this process from all eight sides of the dough.
- Lightly flour a work surface with self-rising flour. Carefully turn the dough out onto the floured surface, seam side down. Use a bench scraper or lightly floured hands to rotate and drag the dough towards yourself on the floured surface, until you form a round ball.
- Place the shaped dough, seam side down, onto a piece of parchment paper.
- When your oven is ready, remove the preheated Dutch oven from the oven. Remove the lid and carefully transfer the parchment paper with the dough into the hot Dutch oven. Put the lid back on and place it back into the oven to bake covered for 45 minutes.
- After 45 minutes, reduce oven to 425°F (218°C), remove the lid and continue baking the bread for another 10 to 15 minutes or until the bread is browned on the surface and is cooked through. To help determine if the bread is cooked through, it should sound hollow when tapped on the bottom.
- Let bread cool fully before cutting and serving. Store uneaten bread in an airtight container in the fridge or freezer.
Notes
- I used Stonyfield Whole Milk vanilla yogurt.* Make sure to use regular yogurt and not Greek or other types of high protein yogurt.
- Self-rising flour note: There are 2 main kinds of self-rising flour sold in the US. One that is a lower protein (2 grams per 1/4 cup (30g)) flour and one that has a regular amount of protein (3 grams per 1/4 cup (30 g)). The amount of protein affects how much liquid is absorbed. For this recipe, you want a flour with a regular amount of protein. I used Gold Medal*. Please use a self-rising flour with 3 grams of protein per 1/4 cup (30 g). Or make your own self-rising flour with the recipe below.
- *These product links are affiliate links. This means I earn a commission from qualifying purchases.
- Homemade self-rising flour: Combine 4 cups of all purpose flour, 2 tbsp baking powder and 1 tsp salt. Whisk to evenly combine. Make sure your all purpose flour has a regular amount of protein (3 grams per 1/4 cup). Most brands in the US contain this amount but there are some brands with higher protein (4 grams per 1/4 cup) such as King Arthur Flour and Bob's Red Mill. You do not want a high protein flour for this bread. It will be dense and dry.
Unbelievable! I’ve made all kinds of bread, including baguette and sourdough – but hadn’t ever considered yogurt as a source of leavening. This is soft, lightly sweet and delightfully crunchy on the outside, with a beautiful artisan brown crust. My husband loves it – (he’s calling me the devil incarnate). I whipped some butter with cinnamon and a little powdered sugar to spread on it. PERFECT breakfast or treat! I’m wondering if frozen cherries would be a good variation? Thank you so much for posting this!
Thank you for sharing your experience with this recipe! We’re so glad you loved it! We haven’t tested this recipe with frozen cherries.
Can coconut yogurt be used?
Sorry, we haven’t tested this recipe with coconut yogurt so we’re not sure if that would work the same!
Would it be possible to use coconut yogurt to make it dairy free?
Sorry, we haven’t tested this recipe with coconut yogurt so we’re not sure if that would work the same!
I often make bread the traditional way so I’m interested to try this version. I don’t have a Dutch Oven, so what do you suggest instead? Does this bread need to be covered when baking?
Yes, this bread does need to be covered for most of the time it is in the oven. We haven’t tested it with another method.
Could I use Almond Flour for this recipe?
It will not work with almond flour
I like that it’s simple and not too sweet
We’re glad you enjoyed this recipe!
I have on hand Yoplait Light Vanilla yogurt. Will this work okay?
We have only tested this recipe with whole milk vanilla yogurt. We do know that it will not work with Greek or other types of high protein yogurt.