
Chocolate Japanese cheesecake has just 3 ingredients. This cake is cooked in the Instant Pot but can also be baked. The cake is flourless and can be made with sugar or sugar-free for a low carb and keto friendly cake.
A few years ago, I shared with you my Instant Pot 3 Ingredient Japanese Cheesecake. It’s an easy, short-cut version of the popular Japanese souffle cheesecake/cotton cheesecake that tastes pretty darn close to the traditional version. I make it whenever I’m craving Japanese cheesecake.
I wanted to create a low carb chocolate version of the cake, so here it is. All you need are three easy ingredients: milk chocolate, eggs, cream cheese. That’s it!
The recipe is easy but the first time may be a learning experience. Below, I’ve outlined all the tips I learned along the way so hopefully, your first result is a success.
What is Japanese Cheesecake?
Japanese-style cheesecake also referred to as Japanese cotton cheesecake or Japanese-souffle cheesecake is a cross between souffle and traditional American cheesecake. It is made with cream cheese but involves whipping egg whites to give the cake a souffle-like soft and fluffy texture. Like many Japanese desserts, it is not overly sweet. It is often topped with powdered sugar or apricot jam to add more sweetness.
Type of Chocolate to Use
You must use milk chocolate for this recipe. Dark chocolate or semi-sweet chocolate will not work. Ideally, you want to choose a creamy milk chocolate with around 30-35% cacao. This produces the best results. My go-to sugar-free chocolate brand, Lily’s, offers a creamy milk chocolate* that is at 40% cacao. The recipe still works, but I would not go anything higher than 40% cacao. Torras makes a sugar-free milk chocolate* with 34% cacao.
The original recipe is very successful because it uses white chocolate to substitute the other ingredients commonly needed in Japanese cheesecake. Butter, milk, sweetener are all used to make white chocolate and are all ingredients needed to make a Japanese cheesecake.
The reason why you need milk chocolate for this chocolate version is because there is too much cocoa in dark or semi-sweet chocolate and not enough milk product. This will cause the batter to be far too dry. The cake will also not be sweet enough.
During my test trials, I started with 88% and kept working my way down. I could not get the cake to work until I started testing with milk chocolate.

Stiff Peaks
For this recipe, you need to whip the egg whites until they become stiff peaks. Unlike Western recipes, Japanese recipes prefer that the egg whites are cold.
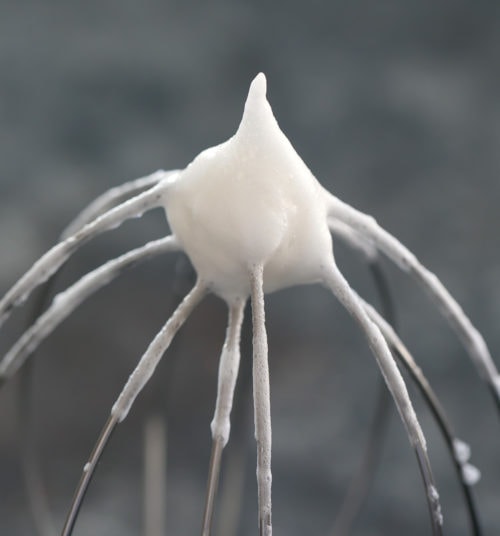
The egg whites should be whisked at the highest speed. If you are using a stand mixer, make sure to use the whisk attachment. When the egg whites are whisked, they will initially become foamy. As it continues to mix, the egg whites will become white in color and fluff up. When you notice that the ridges created by the whisk keep their shape, your egg whites should be ready. To double check, lift your beater and turn it upside down. The peaks should stand straight up. If they flop or bend over slightly, these are only soft peaks and you will need to mix a little longer.
Cake Appearance
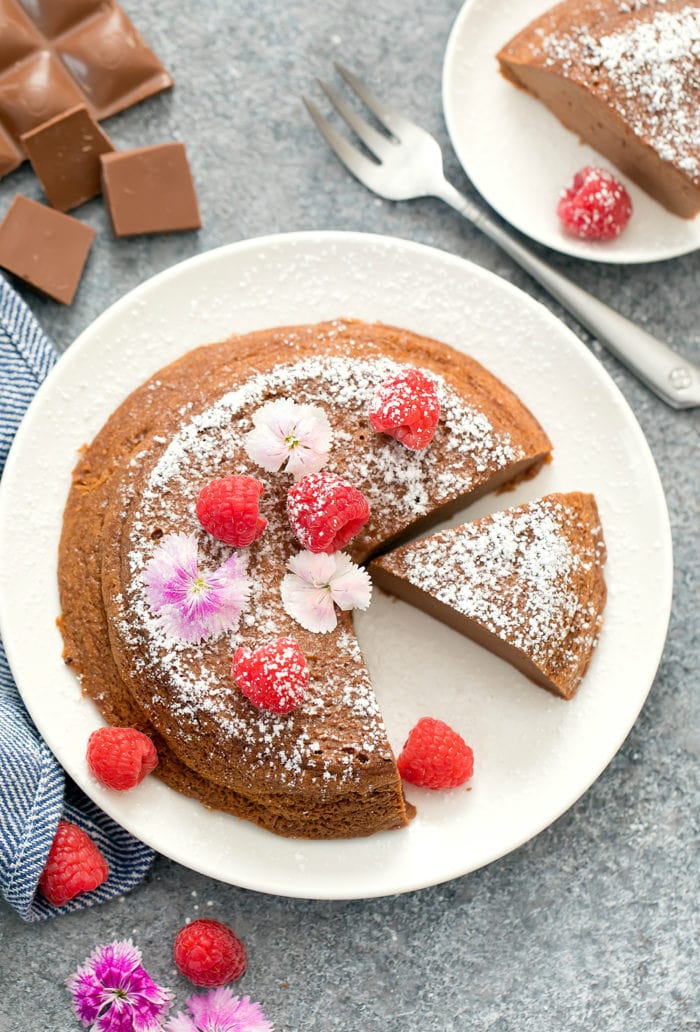
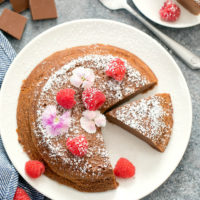
Japanese-style cheesecake is notoriously hard to make perfect. A slight change in temperature can cause the surface to crack. With this cake being only three ingredients, it is even harder to achieve a perfect looking cheesecake. In both the baked and Instant Pot version, this cheesecake surface will have a few flaws but it’s nothing that can’t be covered with a little powdered sugar or fruit.
For the Instant Pot version, the cake has a slight dip in the center. For the oven version, the cake will rise very high initially like a souffle and this will lead to the surface cracking. However, when it is done baking it will gradually sink back down so that the surface is even and the crack is less noticeable.
Instant Pot Versus Oven
I prefer making this cake in the Instant Pot rather than the oven but I know not everyone owns an Instant Pot, so I also tested an oven version.
The Instant Pot version of this cake rises more and comes out very moist and fluffy from the pressurized cooking. It is also more fool-proof than the oven because you don’t have to deal with changing oven temperatures and other factors that could cause your cake to collapse.
The only slight downside of the Instant Pot version is that the top of the cake shrinks a little more than the bottom, so it comes out almost dome-shaped. When you bake it in the oven, the top does not shrink as much so you have a more regular round-shaped cake.
If you do plan on making a baked version, I recommend doubling the recipe and baking it in an 8-inch cake pan instead of the 6-inch used for the Instant Pot. The doubled version gets a better rise.
You will need a water bath for the baked version. This ensures that there is enough moisture as the cake bakes in the oven.
Cake Pans
Cheesecakes are often prepared in a springform cake pan. While this cake can be made in a springform pan, I don’t recommend it. Stick with a round cake pan that doesn’t have a removable bottom. Because of the water bath, you have to cover the bottom of the springform pan to prevent water from leaking through. Even then, I find that the water always cooks the bottom of the cake a little more when I use a springform pan.
I love using Fat Daddio cake pans for my Japanese cheesecakes. They have just about every size imaginable. For the Instant Pot version I use the 6 x 3 inch cake pan.* For the oven version, I use the 8 x 4 inch cake pan.*
I also recommend buying parchment rounds for the bottom of the cake pan. You can cut your own but I don’t like cutting rounds and I don’t like being left with little scraps of parchment paper I cant use.
Additional Baking Tips
- Make sure to fold in the egg whites in 3 batches. If you try to mix too much of the egg whites at once, it will cause you to break down too much of the whipped egg whites. The cake batter becomes easier to fold with each addition of egg whites which is why it is done in three parts.
- You do not need to line the sides of your cake pan with parchment paper, only the bottom. You do need to grease the sides. When the cake cooks, it naturally pulls away from the sides. To remove the cake, I slowly turn the cake pan upside down until the cake comes out and then flip the cake back over onto a plate.
- I highly recommend sticking to Philadelphia brand cream cheese if you live in the US. I have tested Japanese cheesecakes with nearly every other brand of cream cheese available and most of them leave little lumps when you try to cream it with the chocolate. The Philadelphia brand is the only one I’ve come across that is completely smooth and creamy when you mix it.
More Japanese Desserts
*Some of the links contained in this post are affiliate links. Much like referral codes, this means I earn a small commission if you purchase a product I referred (at no extra charge to you).
3 Ingredient Chocolate Japanese Cheesecake
Ingredients
- 3 large eggs egg whites and yolks separated
- 4 oz full fat cream cheese (Philadelphia brand preferred) softened to room temperature
- 4 oz creamy milk chocolate (use sugar free for low carb or keto) between 30%-40% cacao
Instructions
- Grease the sides and bottom of a 6 x 3 inch round cake pan. Line the bottom with parchment paper. Set aside.
- Add egg whites to stand mixer and whisk on high speed until stiff peaks form. When you lift your beater, the egg whites should form stiff peaks that do not bend or flop over. See photo above for reference. Place bowl of whisked egg whites into fridge until ready to use.
- Melt chocolate in a double boiler over low heat. Use a spatula to smooth out the melted chocolate.
- Add in cream cheese and stir with spatula until cream cheese is evenly blended into the chocolate. The chocolate may seize a little when the cream cheese is initially added but it should soften again as you continue to mix. Continue to mix until no white streak remain. The batter will be very thick, like a chocolate frosting. The cocoa butter oils may also separate slightly, but this is okay. They will incorporate back in when you add the eggs. Remove bowl with chocolate from heat. Allow to just a few minutes so that the chocolate mixture is warm but not hot.
- Add in the egg yolks. Whisk until batter is smooth. The batter should be liquid like a cake batter. (See photo above for reference)
- Add in 1/3 of the egg whites and gently fold into batter. Repeat with another 1/3 and then finally the remaining 1/3. Fold until batter is uniformly light brown and no dark streaks remain.
- Pour cake into prepared cake pan. Lift the cake pan up about six inches from the counter and drop 2 times onto counter to remove air pockets.
- Add 1 1/2 cups of water to your Instant Pot. Place trivet inside Instant Pot. Place cake pan on top of trivet. Seal your Instant Pot and set to manual cooking, high pressure, 18 minutes. When cake is done cooking, allow it to perform a natural release. The cake will continue cooking during this time which is why you can't force a quick release.
- When the natural release is done, remove cake from Instant Pot. The surface will be quite moist but it will dry quickly once removed from the Instant Pot. There will likely be a slight dip in the center of the cake. This is normal. See "Cake Appearance" in post for more details.
- To remove the cake, gently tip the cakepan upside down until the cake comes out. Then flip the cake over and place onto plate.
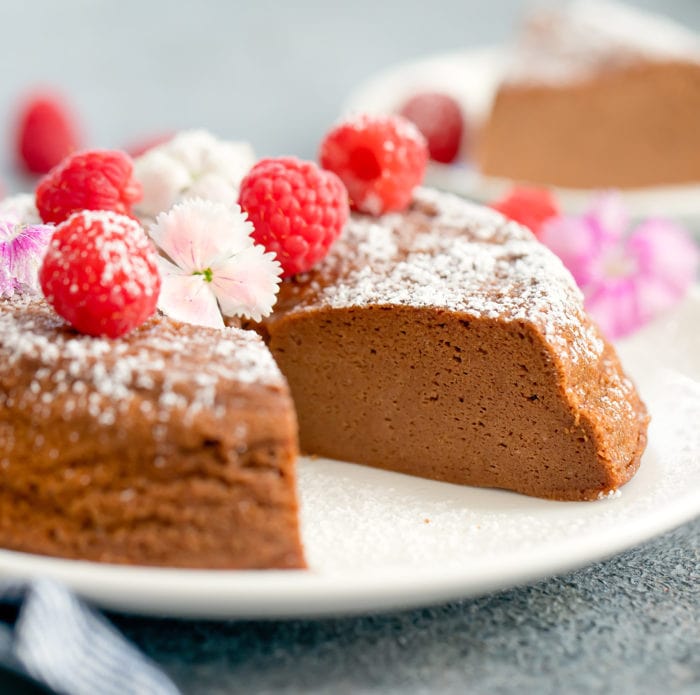
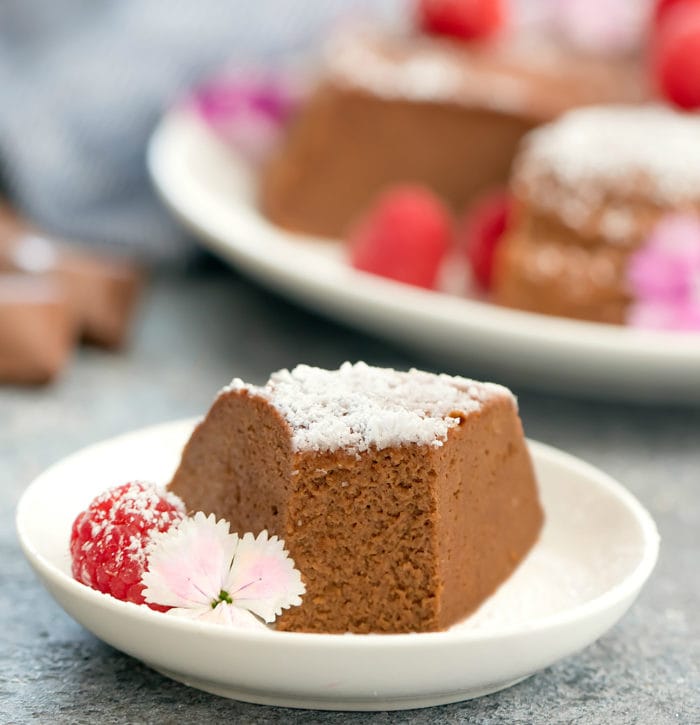
- Allow the cake to cool either at room temperature or in the fridge. Dust with powdered swerve (or powdered sugar if not doing low carb) before cutting and serving. At room temperature the cake will stay very fluffy. It will taste like a light souffle, with a very mild cheese flavor. When placed in the fridge, the cake will become a little more dense but will be sweeter and have a stronger cream cheese flavor.
Oven Version
- For a baked version of this cake, I recommend doubling the ingredients and using a 8 x 4 inch baking pan so the cake has a better rise. The steps for making the cake is the same as the Instant Pot version except for the cooking part. For the oven version, you need to create a water bath by placing a large baking pan into the lower half of your oven and filling it with 1/2 inch water. Place this into the oven as it is preheating so that it is hot when the oven is ready. Preheat your oven to 340F. Place the cake directly into the water bath and cook for 25 minutes at 340F. Then lower the temperature to 320°F and cook for an additional 25 minutes. Turn off the oven but keep the door closed. Let the cake continue to cook for 25 minutes with the oven off.
- You can do the oven version with the same amount of ingredients as the Instant Pot version but the cake will not have as much rise as the Instant Pot version. If you are baking this version, then bake at 340F for 15 minutes, then turn oven to 320F and bake for 15 minutes. Then turn off oven and allow cake to continue to cook for an additional 15 minutes.
Notes
- The cake is made with a 6 Qt 7-in-1 Multi-Use Programmable Instant Pot.* The amount of water needed to bring the pot to pressure and the cooking time may vary on other versions of the Instant Pot.
- I used this 6 x 3 inch round cake pan* for the Instant Pot version and this 8 x 4 inch round cake pan* for the oven version.
- I also purchased 6 inch parchment rounds* and 8 inch parchment rounds.*
- For sugar-free milk chocolate, I recommend Torras* or Lily's.* If using Lily's, the make be not sweet enough for some. You can add about 1/4 cup powdered serve to the batter (add it when melting the chocolate) or dust the cake with powdered swerve while it is still warm (so that the cake absorbs the sugar substitute) and then again when it is cooled and ready to serve.
- If you are not doing a low carb version, use premium milk chocolate. I used Chocolove Milk Chocolate 33% Cacao.*
- You must use creamy milk chocolate for this recipe to work. Please see "Chocolate to Use" in the post for a more detailed explanation.
- If you are living in the US, I highly recommend using Philadelphia brand cream cheese. The other cream cheese brands I've used don't mix as smoothly and always have little lumps even when melted down.
- This cake is not very sweet on its own much like other Japanese desserts. You can also serve with a sugar-free chocolate syrup if you need more sweetness.
- To decorate the cake, I recommend dusting with powdered Swerve* or powdered sugar (if not doing low carb).
- *Some of the links contained in this post are affiliate links. Much like referral codes, this means I earn a small commission if you purchase a product I referred (at no extra charge to you).
Nutrition
The nutrition information provided are only estimates based on an online nutritional calculator. I am not a certified nutritionist. Please consult a professional nutritionist or doctor for accurate information and any dietary restrictions and concerns you may have.


Looks like a fantastic recipe! Lily’s now has lower percentage cacao “milk chocolate” chip options. They also make a mint chocolate and butterscotch “white chocolate” and chocolate salted caramel chips. Will these work? Also, are chips ok or should it be the bar styles?
Looking forward to making these!!
In our testing, the best chocolate is milk chocolate. We tested Lilly’s creamy milk chocolate with 40% cacao and haven’t tried it with the ones with a lower percentage. As far as the other options you mention, we can’t say if they will work without testing them first.
Since discovering this recipe near the start of quarantine, I have made it every single week. This cake is a staple in my fridge, and I have literally not gone without it for 7 months. It is incredibly easy to whip up and has never once let me down, even when I accidentally got some yolk in the egg whites. I make the doubled oven version and use a springform pan. I did experience water seepage every time I tried using a water bath, so now I just take the double boiler pot with the still-simmering water and place it in the oven below the cake pan. This seems to create enough moisture without sogging up the bottom of the cake. I use Lily’s and Philadelphia. When the cake cools, I cut it into 12 slices that each have 176 calories. This cake is the perfect keto treat – filling, substantial, and not too sweet. It feels like food (rather than dessert), meaning that it leaves me feeling nourished and satisfied rather than sluggish or guilty. Bravo, and thank you!!!!!
I’m so glad you are enjoying this recipe and have made it so many times! Thank you for sharing your experience.