
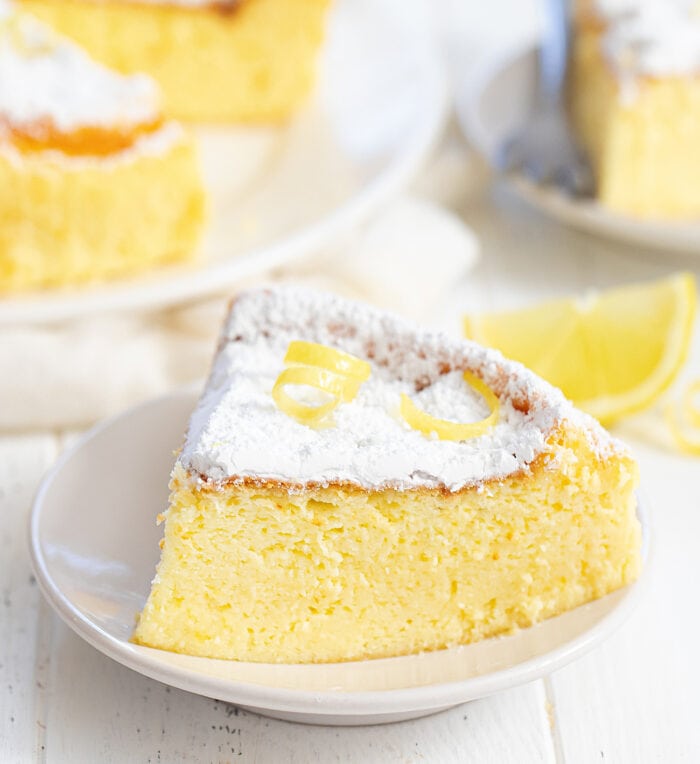
This lemon cheesecake is so light, soft and fluffy. It is just 4 ingredients and doesn’t contain any flour or butter. It is a lemon version of Japanese cheesecake, but it is easier to make than the traditional version. It is a great cake to make for brunch or dessert.
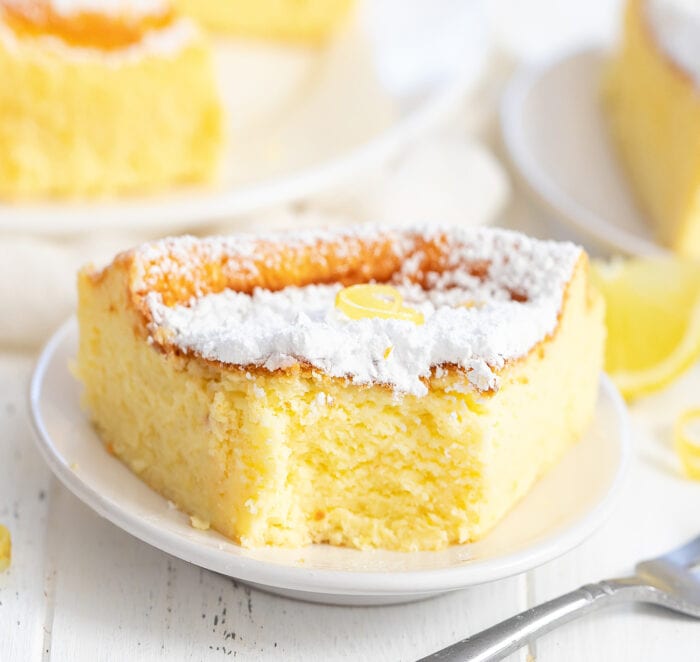
I love making Japanese-style cheesecakes, especially with this shortcut method that requires fewer ingredients than traditional Japanese cheesecake. This lemon-flavored version is bright and refreshing. This cake has such a light and airy texture and is so fun to eat.
Ingredients
- Cream Cheese
- White Chocolate Chips
- Eggs
- Lemon Zest
Cream Cheese: This recipe uses full fat cream cheese. I prefer making it with Philadelphia brand as I have found that it has a very creamy texture and doesn’t leave any lumps.
White Chocolate Chips: You will not taste the white chocolate but it is the key to this recipe working with so few ingredients. The white chocolate adds sweetness to the cake and also helps with the cake structure.
Eggs: Eggs are needed to create the super light and fluffy texture for this cake.
Lemon Zest: Lemon zest adds a nice lemon fragrance to this cake without making the cake taste sour.
How to Make Fluffy Lemon Cheesecake
The white chocolate is first melted until smooth. The cream cheese is then mixed in. Then the egg yolks are whisked in. Lemon zest is then stirred in. The egg whites are beaten until stiff peaks and folded into the batter. The batter is then poured into your prepared cake pan and baked in a water bath until done.
More Lemon Recipes
4 Ingredient Fluffy Lemon Cheesecake
Ingredients
- 4 large eggs, separated straight from the fridge
- 1 1/4 cups (198 g) white chocolate chips
- 7 oz (198 g) cream cheese softened to room temperature
- 1 1/2 tbsp (8 g) lemon zest
Instructions
- Preheat oven to 325°F (163°C). Spray the inside of a 7 inch solid one piece round cake pan (not a springform pan) with cooking oil spray. Line the bottom of the pan with a parchment round. Don’t line the sides but make sure they are well greased.
- Separate egg yolks and whites. Place eggs whites into fridge until ready to use.
- Add chocolate chips to a large mixing bowl. Melt either in the microwave or on the stove (using the double boiler method). I used the microwave. If using microwave, heat chocolate in 15-30 second intervals, stirring in between with a spatula, until chocolate is completely melted and smooth.
- Add in cream cheese. Mix in the cream cheese with spatula or whisk until fully incorporated and no cream cheese streaks remain.
- Add in egg yolks. Using a hand whisk, whisk in the egg yolks until no egg streaks remain and batter is smooth.
- Stir in the lemon zest until evenly incorporated.
- Remove egg whites from fridge. Place into a clean large mixing bowl. Beat at highest speed until stiff peaks form. I prefer to use a stand mixer but you can also use a hand mixer.
- Add one third of the egg white mixture to your egg yolk batter. Fold it in gently with a spatula until no egg white lumps remain (it's okay if there are a few streaks of white in your batter). Make sure you scoop up batter from the very bottom of the bowl each time you fold to make sure all of the batter gets incorporated with the egg whites. Repeat with the next 1/3 and then remaining 1/3.
- Pour batter into prepared cake pan. The cake will be baked in a water bath. To do this, place your cake pan into a slightly larger baking pan, like an 8 or 9 inch square baking pan. Place your cake pan into the bigger pan. Pour just enough cold tap water into the outer pan so that the water level reaches 1/4 inch. Make sure to add the water to the outer pan after you've put the cake in. If you add 1/4 inch of water before, the added weight of the cake pan and cake batter will push up your water level more than 1/4 inch. I recommend sticking in a ruler to measure the water level. It’s difficult to just “eye it” and looking at how far it reaches up the cake pan will also not be accurate. If your water level is too high, the bottom of your cake will cook too much, causing a dense bottom layer.
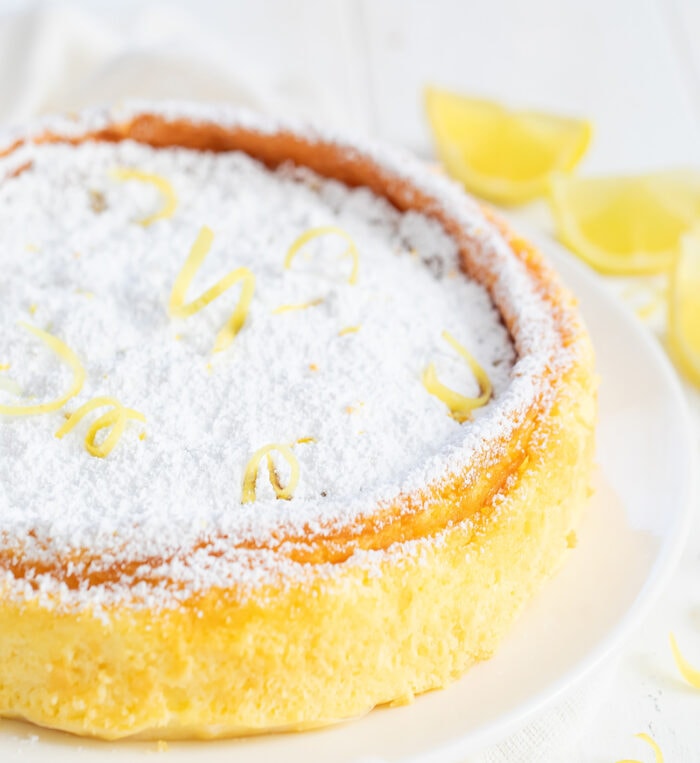
- Place cake with water bath into your oven. Bake for about 40 minutes. Cake should be puffed up and light brown on top. Turn off the oven but do not open the oven door and leave the cake in the oven for one hour. It is important to leave the cake in the oven (unopened) because this allows the cake to finish cooking and the gradual drop in temperature prevents the cake from suddenly collapsing. The cake will shrink down, but it shouldn't completely collapse. After one hour, you can remove the cake from the oven. Let the cake cool to room temperature. While cake can be enjoyed once cooled, the flavors won't be as pronounced and the cake won't be as sweet. For best result, place cake in the fridge for several hours or overnight. If putting it in the fridge, let it come to room temperature before serving. If desired, you can dust top with powdered sugar before serving. I also added some lemon curls for decoration.
Notes
- This cake is best made the day before serving so that it has enough time to rest and let the flavors develop.
- This cake has a light lemon flavor. It's not a zesty cake. You will taste and smell the lemon but it's not super strong. If you try adding lemon juice to the cake, it will cause the cake to crack during baking. If you want a stronger lemon flavor, you can add 1 tsp of lemon extract. Add it when you add the zest.
- I used full fat Philadelphia cream cheese and Nestle white chocolate chips.
- Do not add too much water and do not use a pan bigger than a 9 inch square pan for the water bath because too much water will cause the cake to cook too quickly at the bottom which will cause your cake to separate into two layers.
Nutrition
The nutrition information provided are only estimates based on an online nutritional calculator. I am not a certified nutritionist. Please consult a professional nutritionist or doctor for accurate information and any dietary restrictions and concerns you may have.


Just wondering how to remove the cake from the pan. Do you flip it over onto a serving dish?
You should be able to place a plate on top of the pan, invert the cake pan, and the cake will release onto the plate. You can carefully flip it over again. This will be a lot easier after the cake has chilled. If you try to turn it out warm it might not hold together. Also, be sure to line the pan with parchment as instructed. This will help ensure it doesn’t stick.
260k calories? 260,000 calories per slice? Really??
It’s 260 Calories per slice. The proper unit of measurement for a food calories is kilocalorie. 1 Calorie (uppercase C) is equal to 1 kilocalorie.
Hello…
Love the 4 ingredient Lemon Cheesecake ?
How do you make the lemon curls for garnish?
Thanks!
Joanne
I use a vegetable peeler to shave off the lemon peel, then cut it into thin strips with a knife. Then wrap a thin strip around a chopstick or similar size stick for a few seconds and it will curl.
On the recipe lemon bread, could I make it with gluten free flour?
Do you mean this recipe: https://kirbiecravings.com/3-ingredient-lemon-bread/ ? We haven’t tried it with GF flour – sorry!
Thank you for this recipe. When I watched the video I see you used an instapot which is what I would like to use….in your directions you provide the information for a conventional oven. Is the cooking time the same in an instapot?
This recipe does not use an instant pot. It sounds like you were watching a different cheesecake video of mine that does use an instant pot: https://kirbiecravings.com/instant-pot-3-ingredient-japanese-cheesecake/
Great recipe, thanks!
You’re welcome!
Please let me know what you can use instead of white chocolate I hate white chocolate just knowing I used it I can taste it please help
As mentioned in the post, we can’t taste the white chocolate – it just adds sweetness and texture. We don’t have a substitute, but we have a Fluffy Chocolate Cheesecake you might like to try instead.
Just a quick comment about your title
Love your recipies. Not too sweet for diabetics.
We’re glad you’re enjoying them!
Hi it looks delicious going to make it over the weekend…can you please resend me the peanut butter oats and something receipy…I lost mine. ???? enjoy your day with cookies all around you
Cookie regards
Mari…xoxox
Here’s our healthy peanut butter oatmeal cookies: https://kirbiecravings.com/3-ingredient-healthy-peanut-butter-oatmeal-cookies/
Is that the recipe you’re referring to? If not, you can search “peanut butter oatmeal” in the search box and it will bring up more recipes.