

4 Ingredient No Bake Tiramisu Yogurt Cheesecake
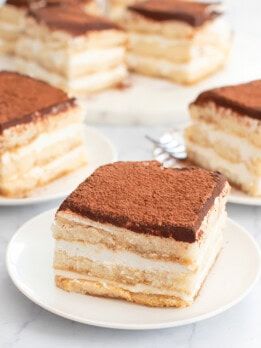
This no bake yogurt cheesecake is a creamy dessert that tastes like tiramisu flavored cheesecake. It needs just 4 ingredients and is easy to prepare. It is high protein and lighter than regular tiramisu or regular cheesecake and also easier to prepare. The dessert can be made ahead of time.
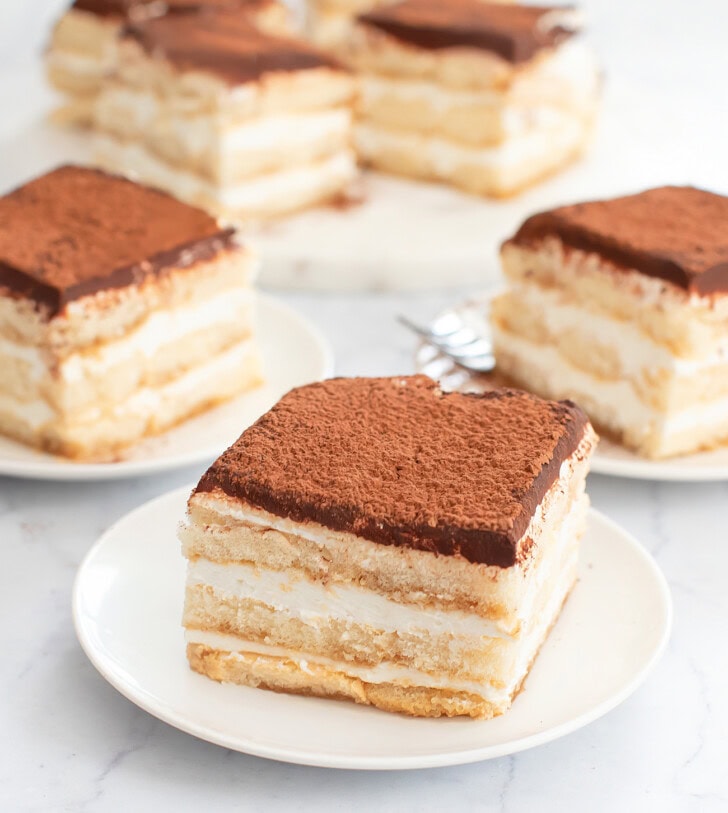
This no bake tiramisu yogurt cheesecake is inspired by the viral Japanese cheesecake made with yogurt and biscuit cookies. This dessert is made with the ingredients usually found in tiramisu for a tiramisu version.
Ingredients
- Icelandic skyr yogurt
- Ladyfingers
- Espresso
- Cocoa powder
Icelandic skyr yogurt: This recipe works best with Icelandic skyr yogurt which is similar to Greek yogurt except it is thicker and higher in protein. The thick texture helps the layers hold up better. You can use plain or vanilla. Vanilla will be sweeter. Plain will be less sweet but you do still get some sweetness from the ladyfingers.
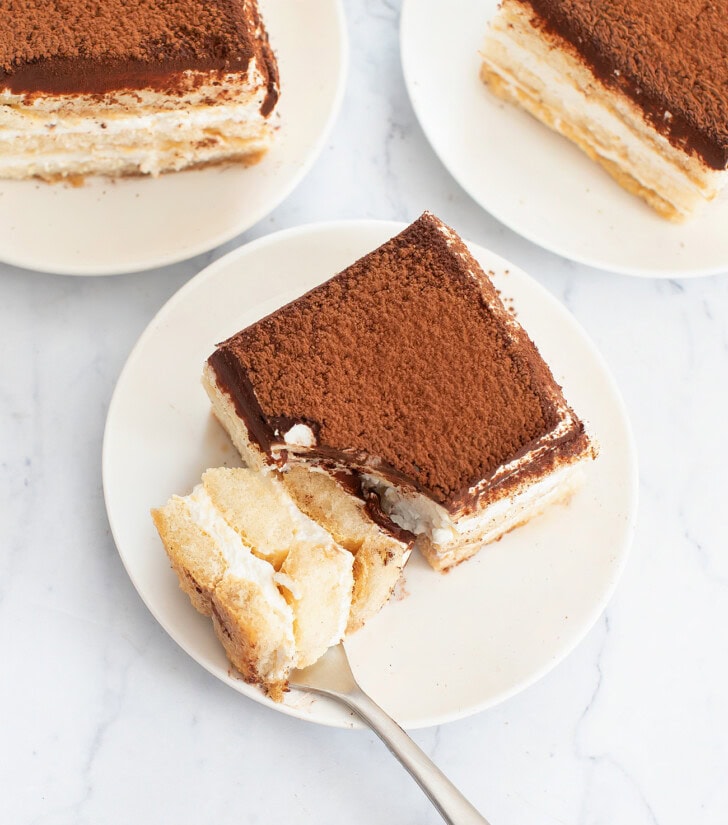
Ladyfingers: The cake is layered with ladyfingers that are lightly soaked in espresso. The ladyfingers soften when they come in contact with the espresso and soak up some of the moisture from the yogurt, turning into a soft cake-like texture.
Espresso: Espresso is used to give the cake it’s coffee flavor. I diluted my espresso with a little water so that the coffee flavor wouldn’t be too strong, but if you like a strong coffee flavor you don’t need to dilute it.
Cocoa powder: Just like tiramisu, the cake is finished off with a dusting of unsweetened cocoa powder right before serving. I highly recommend using Dutch process cocoa powder. Natural cocoa powder is very bitter and has a duller color. Dutch process cocoa powder is less bitter and will also look nicer.
How to Make No Bake Tiramisu Cheesecake
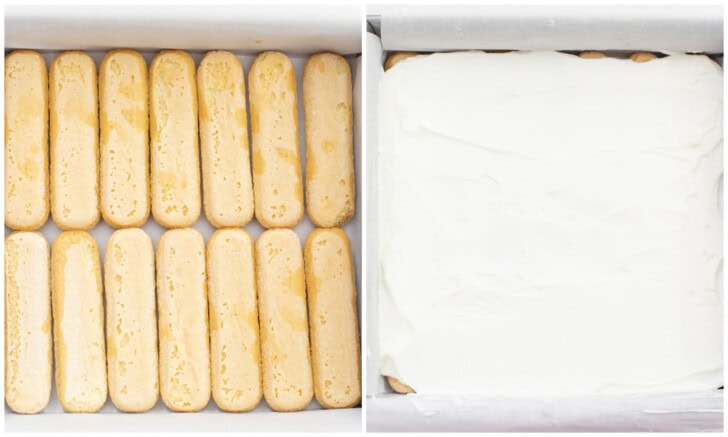
- The ladyfingers are briefly dipped in espresso and then placed into your prepared 9 inch square pan. You should be able to fit about 14 ladyfingers across the bottom.

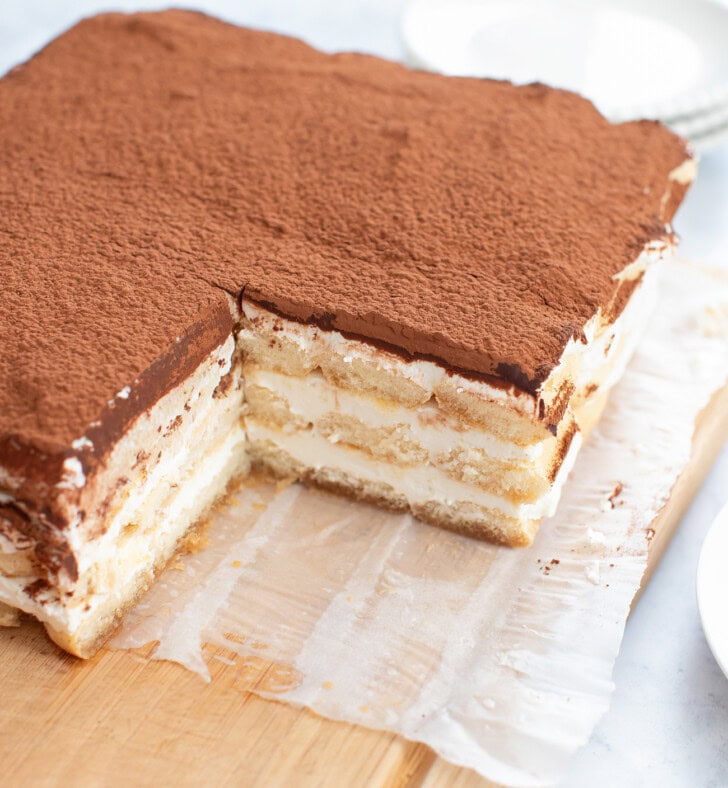
- Spread about 2 cups of yogurt over the ladyfingers. Then repeat with another layer of ladyfingers, yogurt, ladyfingers and yogurt. You should have six layers total. Lightly cover the cake and place into the fridge for a few hours or overnight. This allows the ladyfingers to soften.
- When ready to serve, remove the cake from the fridge. Dust the surface with cocoa powder and then cut the cake with a sharp knife.
Expert Tips
- You can halve the recipe and assemble it into a 9 x 5 inch loaf pan for a smaller cake.
- The cake is not super sweet. You can make it sweeter by choosing a sweeter Icelandic yogurt.
More No Bake Cake Recipes
- 4 Ingredient No Bake Cottage Cheesecake
- 2 Ingredient No Bake Yogurt Cheesecake
- 4 Ingredient No Bake Cloud Cheesecake
4 Ingredient No Bake Tiramisu Yogurt Cheesecake
Ingredients
- 1 cup (8fl oz/237ml) espresso, brought to room temperature, see note
- 42 ladyfingers
- 6 cups (1500g) plain or vanilla nonfat Icelandic skyr yogurt
- 1/4 cup (20g) Dutch process cocoa powder, for dusting on top
Instructions
- Line a 9 x 9 inch pan with parchment paper, leaving some overhang for easy removal later.
- Pour the espresso mixture into a medium mixing bowl, one that is just wide enough for dipping a whole ladyfinger easily (a ladyfinger is around 4 inches, so you’re looking for a bowl around 5 inches wide). With the firmer/sugary side facedown, dip the ladyfinger quickly into the espresso (submerging it about halfway) and remove it right away so it doesn’t become too soft. Place it into the bottom of the baking pan (dipped side facedown onto the pan). Repeat this process, until you have lined the bottom of the baking pan with dipped ladyfingers. You should have about 14 ladyfingers (2 rows of 7).
- Add 2 packed cups (500g) of yogurt over the cookies and use a small offset spatula to spread it evenly across. Try to only spread the yogurt out enough to cover the cookies and not past the cookies. Repeat this process two more times, so you should have a total of 6 layers. The final layer is yogurt. For the final yogurt layer, you can make it a little bit thinner; just enough to generously cover the surface (I used about 400 grams of yogurt for the final top layer). Lightly cover the surface of the baking pan with plastic wrap.
- Place into fridge for about 4 hours or overnight to allow the cookies to soften. Keep the cake in the fridge until ready to serve. Dust the surface with cocoa powder right before cutting and serving. Uneaten cake can be stored in the fridge in an airtight container for up to a few days.
Notes
- You will need about 8 oz of liquid to have enough for dipping. If you like a very strong espresso flavor, you can use 8 oz of just espresso. If you prefer a less strong espresso flavor, you can dilute the espresso with some water. I will usually brew about 4 to 6 oz of espresso and then dilute with water 4 or 2 oz of water (so ending up with 8 oz of liquid total), depending on who I am making the cake for.
- Traditionally, the ladyfingers are fully dipped, but I recommend only dipping halfway and dipping the firmer side in. This is because the yogurt also will soften the ladyfingers and dipping halfway only will prevent the ladyfingers from turning too soft.
- Make sure to wait until right before serving to add the cocoa powder, otherwise the cocoa powder will turn a little wet and clumpy if it sits out as it will absorb the moisture from the yogurt layer.
- I used Forno Bonomi ladyfingers* and Siggi Icelandic yogurt.*
- *These product links are affiliate links. This means I earn a commission from qualifying purchases.
Yum!
Easy,once I worked out a reasonable substitute for the lady fingers. Those are not sold anywhere reasonably close to my small Midwest town. I made a small recipe just for me for my birthday because my husband doesn’t like anything with coffee or coffee flavors.
I did change it up a bit. I could only get vanilla skyr near me. Also, I used graham crackers in place of the lady fingers. On one of the layers, I put a tablespoon of organic seedless blackberry jam with very low sugar before adding the skyr layer. On the top, I lightly sprinkled Trader Joe’s unsweetened grated coconut instead of the cocoa powder. Since I don’t eat sugar like the average American, this was plenty sweet and flavorful.
Thank you for sharing your experience with this recipe! We’re so glad you enjoyed it!
Is there any way to make the easy granola bars without peanut butter allergies dang it
Hello! We do have a ton of granola bar recipes you might like. If you read the posts you can usually substitute a nut butter for something like sunflower seed butter.
Great
Thank you!
I’m looking forward to making this recipe, as tiramousu is my favorite desert. Thank you for putting it out online. Will rate afterwards! Sounds delicious though!
We hope you enjoy it!
Can’t wait to try it
Great! Let us know how you like it!
I would love your the recipe and ingredients thank you
Hello! All of the ingredients and amounts will be listed at the bottom of the post in the recipe card. You can also click the “Jump to Recipe” button at the top and it will take you right there.
Hi my name is Anna Reid
I haven’t made this recipe yet,but l will
I don’t think we can get the same brands of ingredients as you use in your recipe here in Australia.
Hi Anna! We hope you can find the ingredients for this one! Let us know how you like it.
Wonderful recipe absolutely lovit
Thank you! We’re so glad you love it!
Can I use Greek yogurt, regular yogurt or soy yogurt?
We have only tested this recipe with Icelandic skyr yogurt!
Yes I Do
Hi Katrina! We hope you enjoy this recipe!
Fantactic recipy
Thank you! We’re glad you enjoy this one!
It looks delicious!
Thank you!