
This incredibly easy bread recipe is just 2 ingredients and cooks in 30 seconds. It only takes about one minute to prepare. The bread comes out so soft and fluffy. The bread also doesn’t require any yeast, eggs, oil, butter or sugar.
I was in need of an easy bread recipe the other day and I only had a few minutes of spare time. Even though I’ve shared quite a few easy bread recipes, they still require some time for baking and I didn’t have enough time for that. So I decided to pop one in the microwave and hoped for the best. To my surprise, the bread came out just perfect. It was so soft and fluffy and tasted like fresh baked bread.
Ingredients
- Self-Rising Flour (you can also make your own with baking powder, salt and flour)
- Milk (any milk including dairy free milk alternatives will work)
How to Make Microwave Bread
- The two ingredients are stirred together inside a large mug until a dough forms. This should only take a few seconds.
- The bread is then placed in the microwave to cook for about 30 seconds.
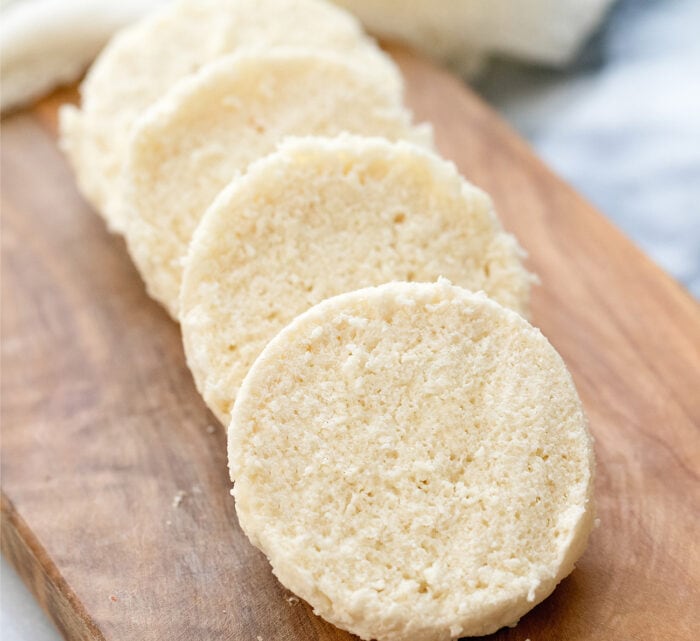
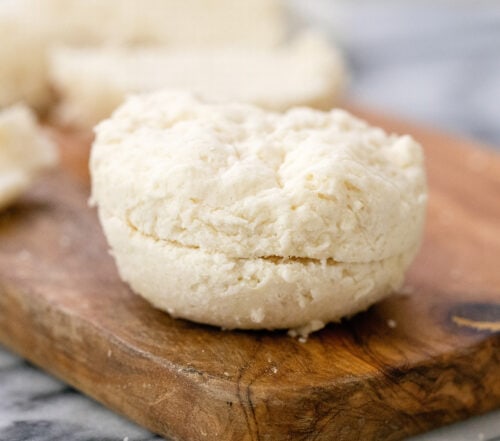
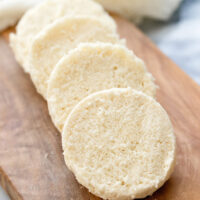
- The bread will rise during baking, but don’t expect it to fill the whole mug. This bread is about the size of an English muffin.

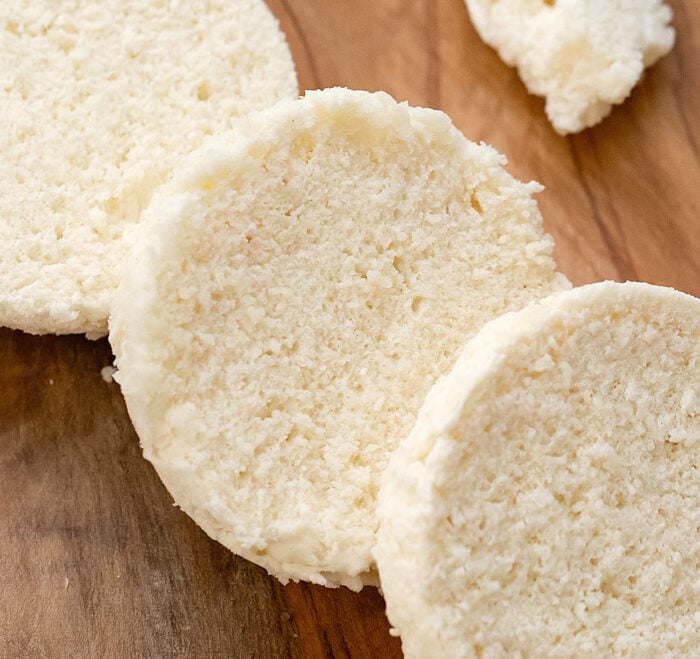
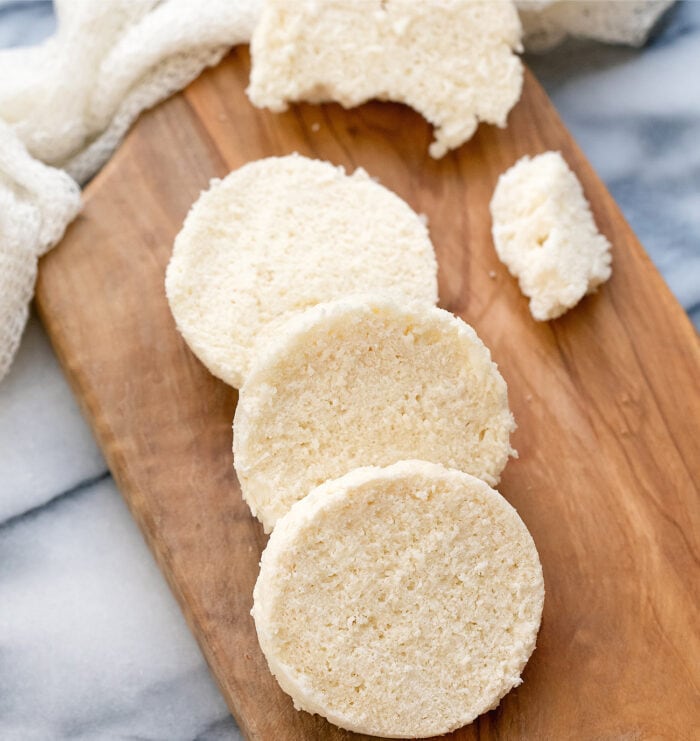
- Use a large spoon to loosen the bread from the edges of your mug and then slide the spoon to the bottom to help scoop the bread out. Slice the bread in half and enjoy as is or with your favorite spread. You can also toast the bread as well.
Mug to Use for Microwave Mug Bread
- I used a mug to make this bread. You can also use a wide ramekin. I prefer using a mug because it’s easy to mix the dough in.
- You want to choose a large oversized microwave-safe mug (something that can hold at least 16 oz of liquid). Try to choose a regular shaped mug. For example, very skinny or wide mugs can cause the bread to cook unevenly. Square base mugs are also not recommended because the dough often gets stuck in the corners and it’s harder to remove the bread. My mug measured a little over 4 inches in height and is about 3 3/4 inches wide.
More Microwave Recipes
Looking for even more microwave recipes? I’ve got a round-up of microwave recipes.
2 Ingredient Microwave Bread
Ingredients
- 4 tbsp (31 g) self-rising flour
- 2 tbsp (1 oz) milk any milk including dairy-free milk will work
Instructions
- In a large oversized microwave-safe mug, add ingredients. Stir with a spoon until flour is completely incorporated and a dough forms. Your dough should be wet and sticky. If your dough is too dry, you can add a tiny splash more of milk. When you are done stirring your dough, it will likely be bunched up in the middle of your mug. Use your spoon to spread the dough out so that it reaches the edges of the mug, filling the bottom of the mug evenly. Try your best to smooth and even out the surface.
- Place your mug in the microwave and cook at full power for about 30 seconds. The bread should be puffy (but will remain pale white in color) and the surface should look cooked.
- Use a large spoon to run across the edges of the bread to loosen the bread from the edges of the mug. Then slide your spoon to the bottom of the bread so that you can use your spoon to lift the entire bread out in one piece. Slice bread in half and enjoy as is or with your favorite spread. You can also toast your bread.
Notes
- Microwave wattages can differ. My microwave is 1100 watts. If your wattage is higher or lower, you may need to adjust cooking time. ( I haven't found noticeable difference when using a 1000 watt versus a 1100 watt but anything higher or lower will likely need a few seconds time adjustment.) Be careful not to overcook the bread. It will make the bread turn hard.
- Please see post for tips on the best type of mug to use.
- To make your own self-rising flour, add 1 cup all purpose flour, 1.5 tsp baking powder and 1/4 tsp salt to a bowl. Whisk to combine. Measure out 4 tbsp (or 1/4 cup) for the recipe.
- 4 tbsp is the same as 1/4 cup. If you prefer to use a 1/4 cup to measure, that is fine. I used tbsp because then you only need to use one measuring spoon for the entire recipe.
- This recipe should work with most milks such as whole milk, low fat milk, almond milk, soy milk, oat milk.
- This recipe yields one bread about the size of an English muffin that can be sliced in half for two small slices of bread. If you need more, I don't recommend doubling the recipe. Instead, make the recipe twice in two separate mugs and cook them separately. Doubling the recipe can lead to the bottom of the bread not cooking properly. It's also not a good idea to try to cook two mugs at the same time because it often leads to uneven cooking.
- If you don't own a microwave, I have a baked version of this bread.
Nutrition
The nutrition information provided are only estimates based on an online nutritional calculator. I am not a certified nutritionist. Please consult a professional nutritionist or doctor for accurate information and any dietary restrictions and concerns you may have.


Excellent! Was sceptical .. but this turned out really well. I could brown it on a frying pan. I added a pinch of salt and 1/3 tsp of sugar to mine. 1 tsp milk powder and 1.5 tbsp water. Do you have other microwave recipes? I’ll check your site
We’re so glad you enjoyed this recipe! We do have other microwave recipes you can find here: Microwave recipes
Mine was rubbery and tasted like flour and milk, not bread.
Be sure to stir until the flour is completely incorporated and a dough forms. Your dough should be wet and sticky. If your dough is too dry, you can add a tiny splash more of milk!
Turned out good I think it’s still cooling but I did it. Thank you for this recipe.
Great! We’re so glad you enjoyed making this recipe!
I’m a 11 year old and i tried your recipe and it was delish!
We’re so glad you loved it!
Thank you; this is yummy! My bread took 40 seconds in the microwave, as it was still just a little too damp at 30 seconds. I thought I’d toast it, but it was excellent without toasting, with butter. Next time I’ll add a bit of garlic powder to the recipe, as it was wonderful with a bit on it after it baked. This is such a great timesaver!
I don’t keep self-rising flower on hand, and I didn’t want to create a cup of it, so I used 2 T of all-purpose flour, 2 T sprouted whole wheat flour, 3/8 t baking powder and 1/16 t salt (estimated). My mug is large, and I decided to use my fingers to spread and flatten the dough, so I put a bit of olive oil on them first. This worked fine.
My pleasure with the results means I’ll try this many times in the future in different formats, such as a larger recipe in a larger, flat, square/rectangular dish and experiment until I get it right (aiming for a square sandwich version). I look forward to the experience. It will be a timesaver and money-saver instead of the sprouted wheat bread I buy, because so far I’ve too-often been less inclined to do the whole time-consuming breadmaking experience with my large store of sprouted whole wheat flour.
We’re glad you liked it! Thanks for sharing all of your tips.
I regret finding this recipe because I can’t stop making it T_T
It’s my go-to recipe when I’m running out of bread/biscuits. Thanks for sharing!
We’re so glad you love it!
I used oat milk, which worked beautifully.
I discovered I was out of baking powder, but I could make my own. For each teaspoon, thoroughly whisk 1/4 tsp baking soda and 5/8 tsp cream of tartar. (The cream of tartar is acidic so it activates the baking soda like vinegar would.)
I wonder if you could use buttermilk and baking soda (1/4 tsp + 1/8 tsp) in this recipe, since buttermilk is acidic (but is there enough of it?). I can’t have buttermilk, so I can’t test it. Might be worth trying for a buttermilk version, though.
Thanks for sharing this!
Brilliant for a roll in a hurry.
As someone else mentioned, my expectations were not very high, but I was very impressed at how it turned out. Almost everything is packed for moving house and I wanted a late night snack so I found the SR flour in a box and off I went. I added a little more milk as I found the dough too dry, so then I had to add 10 seconds to the time. Very satisfying with butter and a drizzle of honey.
We’re happy you liked the recipe!
Made this as bread to dip in soup. I’ll admit I didn’t smooth out the dough which didn’t ruin it but would’ve been better if I had. My microwave is 800w so I guessed at around 90 seconds which worked pretty well, could maybe have done with 10 seconds less. I also added a pinch of salt. All in all a good receipe and would make again, I reckon the same recipe would also make great drop dumplings if dropped in a soup that’s being microwaved.
Thanks for sharing your experience!
I do not use white flour so used wheaten flour with added baking powder and salt,
It needed more liquid so I added water to get the dough texture.
Turned out fairly good bread! But I served it with strong cheddar, country butter and garlic paste.
Country Butter, is made with extra salt.
Garlic is chopped fine, crushed and put into a small glass jar,
Again a little salt and cover with boutique olive oil, this changes to a paste in the fridge.
I serve this garlic on Irish wheaten toasted for breakfast. It is so good for your health.
Since I started garlic about 20 years ago I have not had a cough, cold or flu!!
It boosts immune system that is for sure. ! Also keeps my BP in check.
I was a nurse practitioner, I keep away from drugs and I give credit to the GARLIC. Do try!
Happy to give Irish wheaten recipe which uses baking soda. Made in minutes.
I also make it adding sultanas, apricots prunes and seeds to make a super good tasty loaf,— still made in minutes!!!
My sister says I should be ashamed to call it ‘Irish wheaten!!!’
Jane??
Thanks for sharing your experience!
Nowhere can I find the proper mug to use for this recipe. It says “see post”…….where?
There is a heading in the post (above the recipe card) that says “Mug To Use for Microwave Bread Mug” – all of the info is there.
Hi there,
I tried ur recipe to make some bread for miniature cooking but it didnt work !
I added all the ingrediants and still not working I dont know how u got that much reviews but
its not worth ur recipe.
We’re sorry you’re having trouble with the recipe – can you tell us more about how the bread turned out? Many readers have made it with success, so we’d like to help you figure out what went wrong with yours!
As written, this did not work at all. Not enough liquid. I tried several times. What finally worked? 8 T. flour, 5 T. milk, and a small drizzle of olive oil. Cooked gor snout 2 min., 40 seconds. This is not bread. It’s a biscuit. But it is good. I had to increase the amounts because otherwise it was far too thin.
It’s hard to know what went wrong – you said there wasn’t enough liquid but you increased the ingredient amounts because it was too thin? The dough is thicker just like a regular bread dough, although it’s microwave bread at a smaller scale so of course it won’t be exactly the same.
I followed the directions exactly and it came out great! Like another reader said, its more of a biscuit, but a surprisingly good one. I just tried making it with yogurt and it was a sad thing. Ill stick to the instructions, thanks
Thanks for letting us know!
How Can I Please Cook it With SOUR CREAM instead of milk? (Do add water? Thank you!!:))))
Sorry, but we’re not sure if that will work.
WOW!
I just made this little, very very simple mug bread recipe (made my own self-raising flour thank your for that recipe I never buy it!) Oh I wish I could post a pic here!!!
I can’t imagine anyone having any issues except …I did accidently poor probably an extra teaspoon of milk in….so I added flour until I got a good smooth consistency. I have a lower wattage micro so I cooked it like 10 secs longer till it sprang up at touch and oh my gosh…it was delicious! Butter…grape jelly (my life long fave) and I won’t have to buy those expensive Pillsbury biscuits again! I live alone and this recipe is perfect even for biscuits and gravy! I’m on my second and I made it bigger! I have a nice big mug though. I cooked it for like 50 seconds! Perfect!
Thank you so much for this recipe I will be using it on a regular basis! It’s going on my fridge!!! I’m going to post it on your other sites but it’s sitting here getting cold! Maybe next time I’ll just say it’s very light in color, in some places it’s over an inch thick, other places it is an inch thick, it is soft and springy. As I pulled it from the microwave it was raised then fell a bit. It was perfect!
We are so glad you love the recipe! Thanks so much for your nice review.
This is pretty dang good for how quick and simple it is. I made a couple changes based on what I had on hand. I mixed a tablespoon of non-instant dry milk powder with the self rising flour. Since I didn’t think a non-fat milk would make a good bread, I melted about a teaspoon of unsalted butter in the mug and added the 2 tablespoons of liquid (plain water) to that and stirred in the flour/dry milk mix, It was just as good if not better, then the time before when I used regular milk.
This time I toasted it, that really improved the taste/texture. It’s still just a tad ‘biscuit-y’ – next time I’ll try a bit more butter. One of the things I really like about this is that it doesn’t generate a lot of dirty dishes, just the fork I mixed it with and the small container I mixed the flour and dry milk in (which I then used as a ‘plate’ to hold the finished bread). I reused the mug (without washing) to heat the soup that went with the bread. The dry milk and flour were measured using the measuring spoons that live in the dry milk and flour canisters.
Thanks so much for your rating and sharing your experience!
It would be easier if you mentioned how much flour and milk!!!!
All of the ingredient amounts are in the recipe card.
I loved this! Quick, simple and easy. Just the bit of carbs and comfort food I was craving with my high protein breakfast after a long rough night of crazy blood sugars. It was kind of like a soft drop biscuit. Will definitely make again! I didn’t have self rising flour so following your notes, I added a slightly rounded 1/4 tsp of baking powder and a pinch of salt, came out perfect! Thank You!
We’re glad it worked for you! Thanks for sharing your experience.
This is terrible I put it in for 30 seconds and it did not cook. Then I put it in for another 30 seconds and it burnt.
We’re sorry you had issues – what is your microwave wattage? That can make a difference, which we discuss in the recipe card.
My expectations were low for this recipe. What a wonderful surprise. Love the air fryer tip. I will try that next time, but overall I’m so happy to have this recipe. Bravo!
We’re so glad you loved it!
Amazing recipe, especially considering the ingredients are so basic and seemingly tasteless.
I cut mine in half and popped it in the air fryer at 200°C for a few minutes until it was crispy and brown on top, then slathered it with butter.
An absolute winner!
I wouldn’t miss out crisping it in the air fryer though; it gave it that crispy, homemade bread taste that wasn’t there when it came out of the microwave soft and a bit gloopy.
Thanks for sharing the air fryer tip! We’re glad you loved the recipe.
All of these look great and easy. I’m going to try them all
We hope you love the recipe!
Any suggestions for alternate gluten-free flours? Coconut or almond? I tried but it wasn’t a biscuit. It just became a crumble pile (coconut self rising flour and tripled the milk)
We’ve only tested this recipe with self-rising AP flour.
So quick and easy! I had a stew in the freezer and really fancied it but needed some quick bread to mop up the liquid. This was perfect. And I’ll definitely be using it in the future.
That’s great! So glad you enjoyed the recipe.
Doesn’t work at all for a 750W oven.
I thought it might because I do make nice and fluffy microwave bread ( with yeast) and cakes .
2 attempts following the recipe to the letter.
The first was perhaps too wet and sticky. Didn’t rise at all. Chewy and nasty. I gave it about a minute for the low wattage and then a bit more.
Second attempt less sticky, didn’t rise, gave it even longer. Rock hard. Seeped it in water to unfasten it.
Unbiteable. Now soaking in water. Wait and see if the dog will eat them.
We’re sorry it didn’t work for you – as mentioned in the recipe notes, we use a 1000W microwave for this recipe and it turns out fine. It would need more time in a lower wattage microwave, but without testing ourselves we don’t have a good recommendation.
Ran out of bread – so this was perfect with butter on top for breakfast. The kids devoured it.
I’m so glad it worked out for you!
Well this did not work at all! I followed the recipe exactly too. I had no self-raising flour, but a gluten free mix flour which I used, added baking powder, salt & used almond milk. Came out looking like a piece of rubber. Tastes good, but is definitely not fluffy. Plus the 2 TB of milk was way too little moisture for the 4 TB flour. I had to add more milk to get it all combined into a dough
You didn’t follow the recipe exactly because you used gluten free flour mixture. The reason why your recipe didn’t work is because you used gf flour. Not all recipes can use a gf flour mixture to substitute regular flour.
“I followed the recipe exactly!”
Proceeds to show that she did not in fact follow the recipe and screwed up the most important aspect: the actual flour used.
I’m about to try this for breakfast… So xcited
We hope you love it!
Effective and quick
I’m glad it worked out for you!
I will have to try that
We hope you enjoyed it!
Had to try it. It was great warm. Put some cane syrup on it. Yum Yum!
So glad you liked it!
Hi, Just made this with GF self raising flour and OAT Milk. Took 40seconds in our microwave. Used a very large mug.
Came out great on the 1st attempt. Can’t believe how easy it was and my wife thought it was the inside of a baguette, I had a hard time convincing her it was really GF. Will be doing this a lot from now on.
thank you for sharing! I’m so glad it worked for you using gf flour.
I also used gluten free self-rising flour and used almond milk. Mine took about 90 seconds and turned out like a slightly chewy toasted English muffin, but I liked it.
Thanks for letting us know!
So I followed the instructions to the letter, however it came out wet on the outside and almost but not quite bread like on the inside, I used a 1000w microwave, what time should I have used?
We’ve tested this recipe in an 1100 watt microwave – you may need to add a few seconds to the time if yours is 1000. Sorry, we can’t be more specific!
Great idea.
Sound delicious and easy..
We hope you enjoy it!
Does this work with gluten free self rising flour?
We haven’t tried it – let us know if you do!
Have you tried making this instant bread in a skillet on the stove? I think it may work.will try it and post the end results.Thanks
We’ve only tested in the microwave.
This 2 ingredient mug bread is amazing. After it was done, I put it in the air fryer to toast it. Was delish !!
Thanks for sharing your review – we’re happy you loved the recipe!
Hey! Are there any gf flours that you think would work well with this recipe? Tia!!!!
You could try a cup for cup GF self-rising flour. We haven’t tried it, so let us know if you do!
Sounds like a quick snack
We hope you give it a try!
Can you use almond flour and add baking powder ?
Unfortunately, almond flour can’t be substituted in the same amount. So, without testing the recipe we can’t say how much you would need.