

Homemade DIY Extracts
Homemade extracts are easy to make and are great for gifting. I’m sharing how to make extracts in a variety of flavors as well as how to package them for cute gifts.
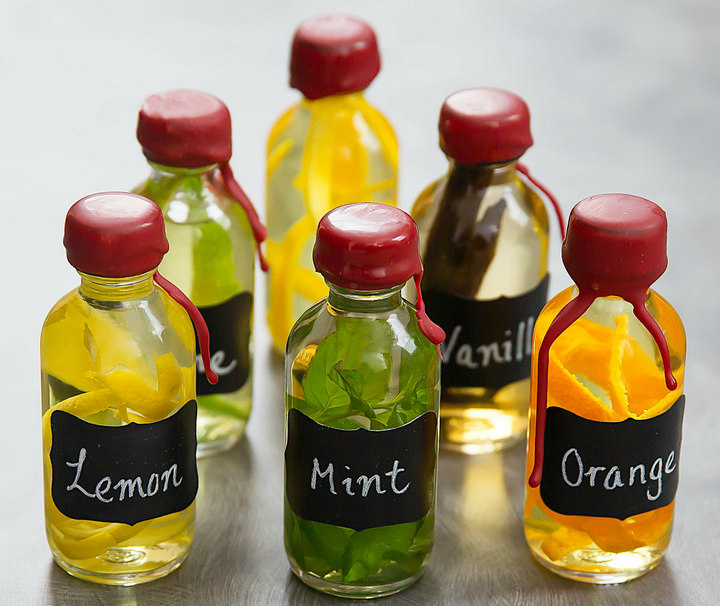
Last year, I shared my first batch of homemade extracts which I made as holiday gifts. This year, I added some other flavors to my line-up and also made wax seals for the bottles.
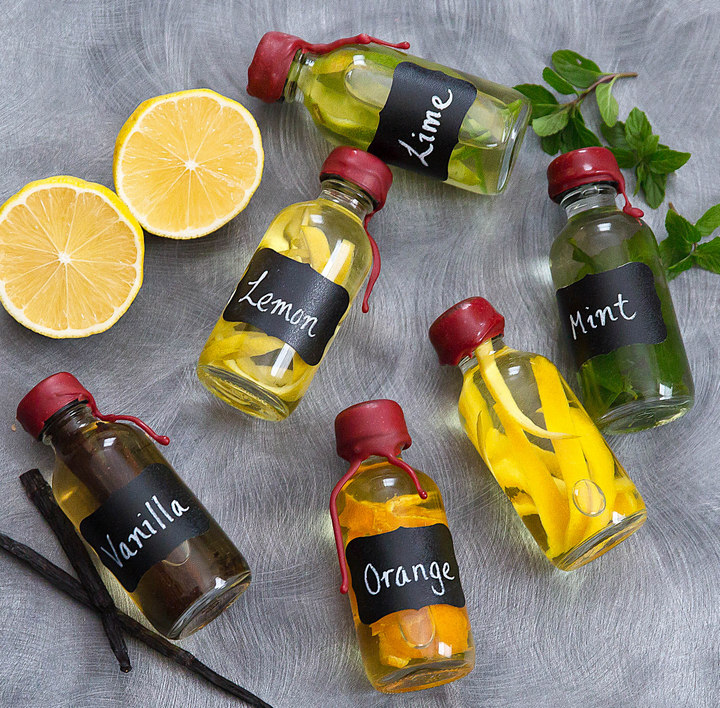
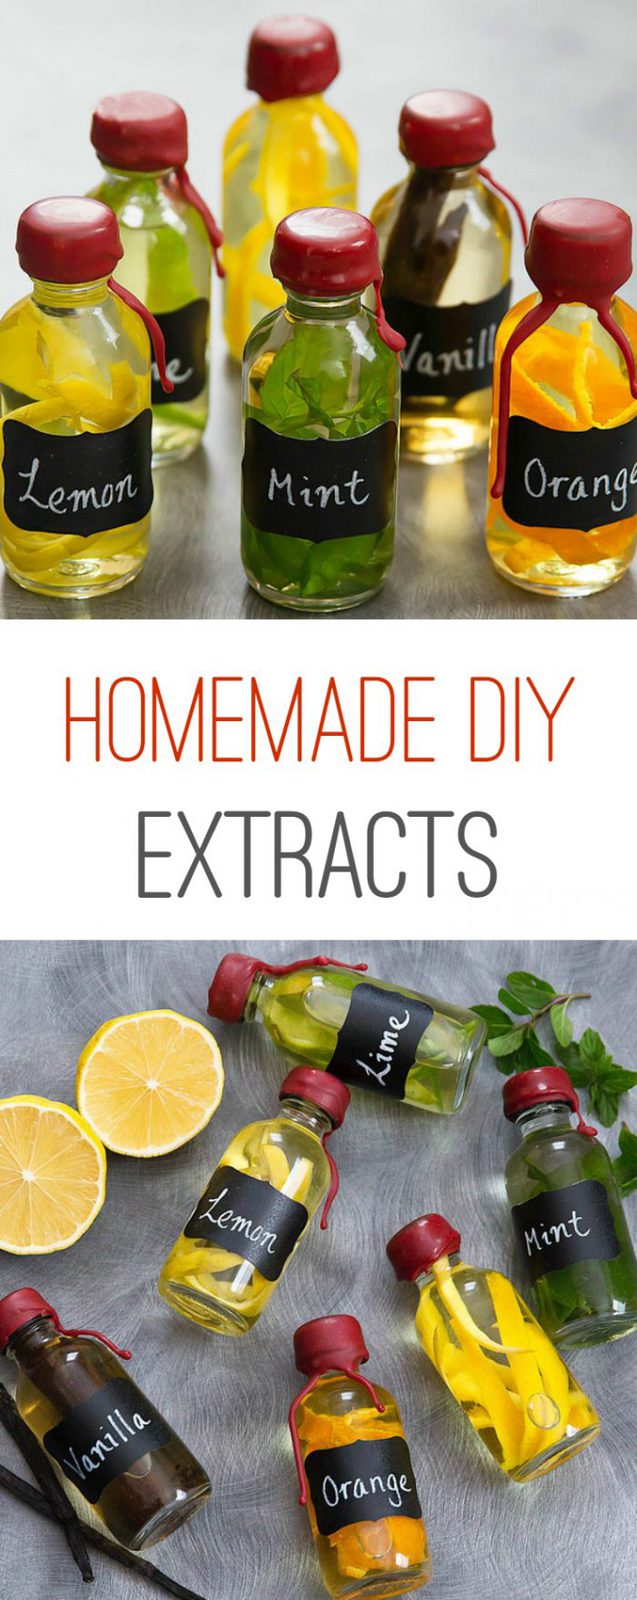
I made vanilla, mint, lemon, lime and orange extracts. The wax seals were a fun touch though it took a few tries to get that one long drip that runs down the edge of the bottle. Luckily, if you don’t like your seal, you can break off the wax and try again.
How to Make Extracts
The extracts are easy to make. Basically, you just add whatever flavor you want to vodka and then let it sit for a few weeks so the flavor develops. So, if you want to make these for holiday gifts you will need to make them about a month in advance.
For each variation, you will need eight ounces of vodka and to it you add your flavoring. I use 16-ounce canning jars* to make my extracts. Here are the different ones I made:
- Vanilla: vodka plus 3 to 4 vanilla beans
- Lemon/Orange/Lime: vodka plus citrus peel (pick your favorite)
- Mint: vodka plus fresh mint with stems removed
Store your extracts in a cool, dark place like a cupboard or pantry. A month later they will be ready. In most cases, you will want to remove the flavoring (i.e. the vanilla pods, mint leave, citrus peels) before transferring the extract to another container. You can add fresh ones when you bottle it and I’ve included specific notes about doing this in the recipe card.
How to Make Wax Seals for Bottles
For gifting, I like to divide the extracts into 2-ounce clear bottles* and make wax seals, which look really cute. So, here are the rest of the materials you will need:
- Chalk labels* for the jars
- Filament tape* which makes it easier to make the wax seal
- Bottle seal wax beads*


You don’t need to do a wax seal but it does make the bottles look a little fancier. Adding the wax is actually pretty easy.
- First, add a little piece of filament tape to the bottle, which makes the wax seal easier to break.
- Melt down wax beads and dip your bottle caps in the seal, dipping a little extra on one side so that it will run down the side.
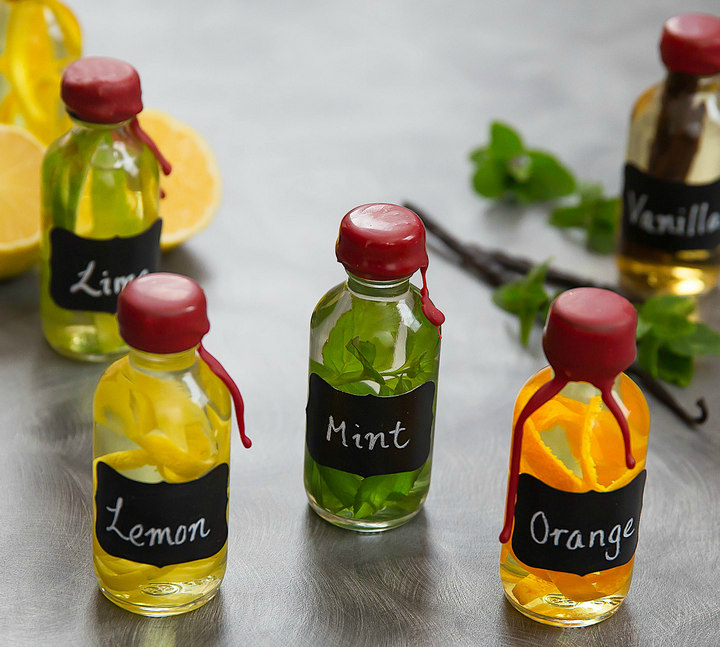
There are so many ways to use these extracts in baking and cooking – you can even add them to drinks for a pop of flavor. They’re great for gifting – I hope you have fun making them!
More DIY Recipes
*Some of the links contained in this post are affiliate links. Much like referral codes, this means I earn a small commission if you purchase a product I referred (at no extra charge to you).
Homemade DIY Extracts
Ingredients
Vanilla Extract
- 3-4 vanilla beans, split beans in half, lengthwise, so that the inside content is completely exposed
- 8 oz vodka
Lemon/Orange/Lime Extract
- 2 large lemons, oranges, or limes
- 8 oz vodka
Mint Extract
- 1 cup mint , stems removed
- 8 oz vodka
Instructions
How to Make the Extracts
- For vanilla extract, add vanilla beans and vodka into a large sterilized canning jar. Tightly close lid, then shake a few times. Keep in a dark, cool place. Shake every few days. Let sit for about 4 weeks before using. The extract will turn a dark brown (browner than in the photos, which I poured out prematurely). Once extract is ready, you can pour into small bottles with a funnel for gifting. You can add half of a fresh vanilla bean inside each for decoration.
- For lemon extract, carefully peel off the skin of two clean lemons. Add lemon skin and vodka into a sterilized canning jar. Tightly close lid, then shake a few times. Keep in a dark, cool place. Shake every few days. Let sit for about 4 weeks before using. The peels will eventually brown. Remove peels after extract is ready. When the extract is ready, you can pour into small bottles with a funnel for gifting. You can add a few fresh lemon peels for decoration but advise your gift receivers to remove the peels once they brown. For orange or lime extract, repeat this same step except replacing lemons with oranges or limes.
- For mint extract, add leaves and vodka to a sterilized canning jar. Lightly crush leaves while in the jar, to release the oils. Seal jar and shake. Keep in a dark, cool place. Shake every few days. Let sit for about 4 weeks before using. The extract will turn a light green/brown (darker than in the photos, which I poured out prematurely). Remove mint leaves when the extract is ready. When the extract is ready, you can pour into small bottles with a funnel for gifting. You can add a few fresh mint leaves for decoration but advise your gift receiver to remove them once they brown.
- For all extracts, store in a dark, cool place.
How to make wax seals
- Wrap a layer of filament tape all the way around the bottle cap. I used a 9mm tape, which fit within the caps of the bottles I used.
- Melt wax beads down. Make sure you use equipment that will not be used for food later. I used a disposable aluminum pan which I covered in foil. I added enough wax to the pan so that it would be a deep enough to dip the entire bottle cap once melted. I then put the pan on top of a pot of simmering water. After a few minutes, the wax will start to melt and you can stir it until it is completely melted.
- Once the wax is completely melted, dip your already filled, closed and taped bottle upside down into the wax so that the wax covers the bottle cap. Lean your bottle a little to one side while still in the wax before lifting upright, to create a drip down the side of the bottle when you lift the bottle out of the wax. Let the wax cool. If you don't like how your seal turned out, you can gently break it off after it has cooled, put the wax back in and melt it and redo your seal.
Are these shelf stable or do they need to be refrigerated?
You should store them in a cool, dry place – they don’t need to be refrigerated.
Do you use any particular brand of vodka, or use an inexpensive one?
Thanks
Nilda
As long as it’s 80 proof plain vodka any brand should be fine, even less expensive brands.
This way of Extracts is also considered Tincturing if looking for medicinal. Thank you
What can you use these with?
You can use them in different recipes that you want to add flavor, too – like you would vanilla extract in baking. They’re also great for flavoring drinks. Hope that helps!
Did you also sterilize the small 2oz jars that you put the extracts in to gift?
Yes, we sterilize them similar to how you sterilize jars for canning.
Perfect ? thanks for idea for gift
We hope you enjoy it!
Are these just for cooking, or can you make and use for home remedies, like for cough syrups
We only use them for cooking.
Hi. I make them with Oregano/vodka, a great alternative for health.
I would love to make these as gifts but am wondering if a different alcohol is suitable as my sister is allergic to vodka
Sorry, but we’re not sure.
Can these be used in hard candy
You can use extracts to make hard candy, but we haven’t tested that with this recipe. So, we can’t say how it will turn out. Please let us know if you try it!
Could one use these extracts to flavor plain sparkling water? We received 2-3 tiny “fruit essence” bottles with our Soda Stream, but they’re super expensive to replace.
I think that should work
Hi!
This is awesome! I love the look of the finished product!
I’m wanting to make a mango extract. Would I just use the skin or the fruit part?
Sorry I have not experimented with mango. In general you want to stick to using rind and not fruit.
I’ve made crab apple vodka by peeling and coring the crab apples, adding them to a 1L mason jar with a cup of sugar. I stored it in a cool dry place for a year then bottled. You won’t get an extract with Mango but you could make a nice mango vodka.
I have orange and lemon extracts working. I also used the meat for candied slices and after the meats were transparent and removed, I had some wonderful jelly from what had cooked down. I certainly got my money’s worth! What wonderful Christmas gifts are working!
Sounds great! I’m glad you were able to find uses for the whole fruit.
I love this idea!! But what do you do with them? Thanks
Use them in baked goods
Hi I’m planning to do my first batch here soon. For vanilla another recipe says to let the extract develop for 6 months to achieve a deep and dynamic flavor. Will this work for the others as well or do they have to be made in the shorter amount of time?
4 weeks is the minimum amount of time they need, you can definitely develop them for longer. However, for the herbs, the leaves may start to break down if left in there for too long so I would check on them periodically.
Could you use dark brown bottles, so that you wouldn’t have to store them in the dark? Obviously you wouldn’t see the pretty stuff on the inside, but I’d love to make cute labels and place on display in the kitchen. But the kitchen isn’t dark! 🙂
The brown bottles should work but it’ll be harder to see the progress.
You could use vegetable glycerin in place of vodka should you prefer a non alcoholic process.
Hi..can vodka be substituted with non alcohol..?
I have not made extracts without alcohol before. sorry!
All pure extracts have alcohol in them…even the ones in the store.
I had this question too. You can use food grade glycerin in place of vodka.
I just started this project and am looking forward to the results in a month! Thanks for the info. Mine will be orange extract.
i hope you enjoy the results!
Where did you find the cute tiny bottles for gifting? I have seen larger ones but none that small and cute.
Hi Christie- if you look at the post, right before the recipe, I list all the materials I purchased including the 2 oz bottles I got. Hope that helps!
I’m one month into lemon, vanilla, and mint extracts. Did you find at all that once the mint leaves turned brown, that there is a minty ”off” odour? I’m currently about to strain out the old leaves and putting fresh ones in. Do you think I should pour out some vodka and add fresh to dilute it a bit?
Thank you!
I did not have any issues with an off odor when the mint turned brown. I left them in until I was ready to gift, and then I removed and placed fresh ones in. If you are worried, you can take them out now and place fresh ones in.
Does the quality of the vodka matter or can I use the cheap stuff?
cheap stuff should be fine!
How long is the extract good for?
as long as your containers are clean and sterile and stored in a dry, cool place, they should last a year or more.
Wow I would like to make pistachio extract. I have a cake recipe I want to enhance
Are these extracts just for cooking or could you use them in humidifiers or air fresheners?
I have only used them for cooking.
The mint extract could be used to prevent mice from raiding your pantry or house. Just Spray at typical entry points and baseboards of pantry. They hate it.
thanks for sharing!
The wax seals are a nice touch! We are still using the vanilla from last year.
thanks! Mr. K suggested I also get a stamp to add to the top