
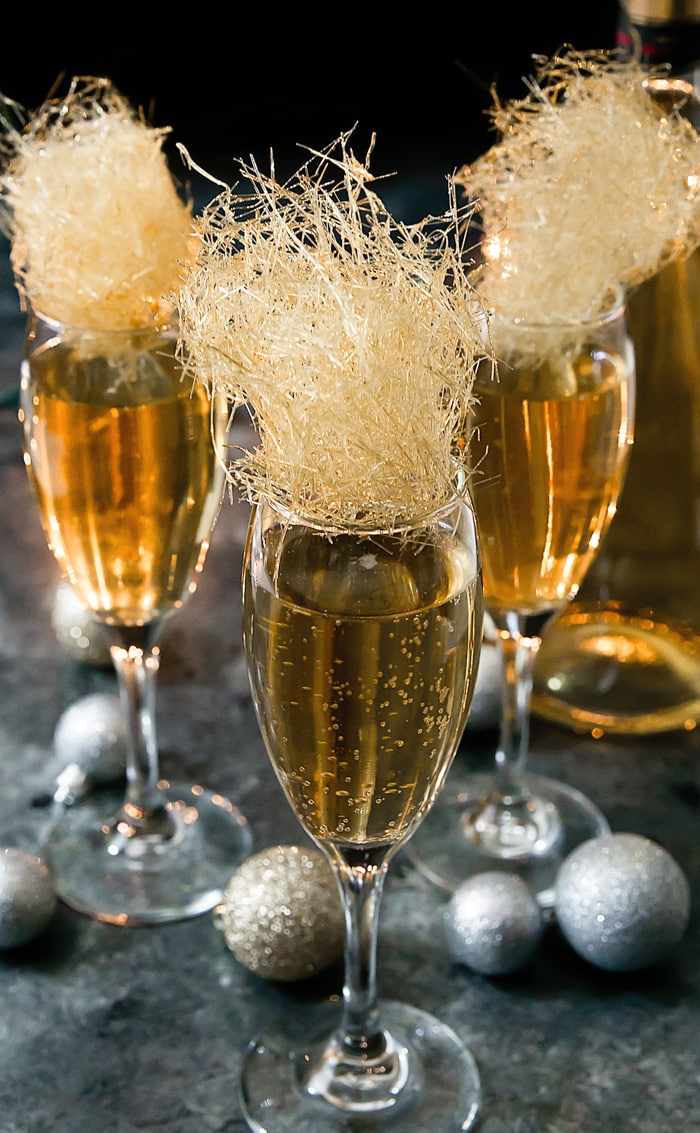
Champagne cocktails topped with homemade spun sugar. Perfect for New Year’s Eve, a wedding or engagement party, or any other fancy celebratory occasion. No candy thermometer is needed!

Happy New Year’s, everyone! I made these Gold Champagne Cocktails with Spun Sugar for New Year’s Eve. I really love how they turned out! They look a little bit like sparklers. They are easier to make than you might think, and you don’t need any special tools.
I was trying to relax during the shampoo portion of my haircut when I came up with this idea. Because apparently, when I’m trying to clear my mind, I just start thinking about food. I originally thought of doing a gold version of my cotton candy champagne cocktails, but then I got the idea of making spun sugar instead.
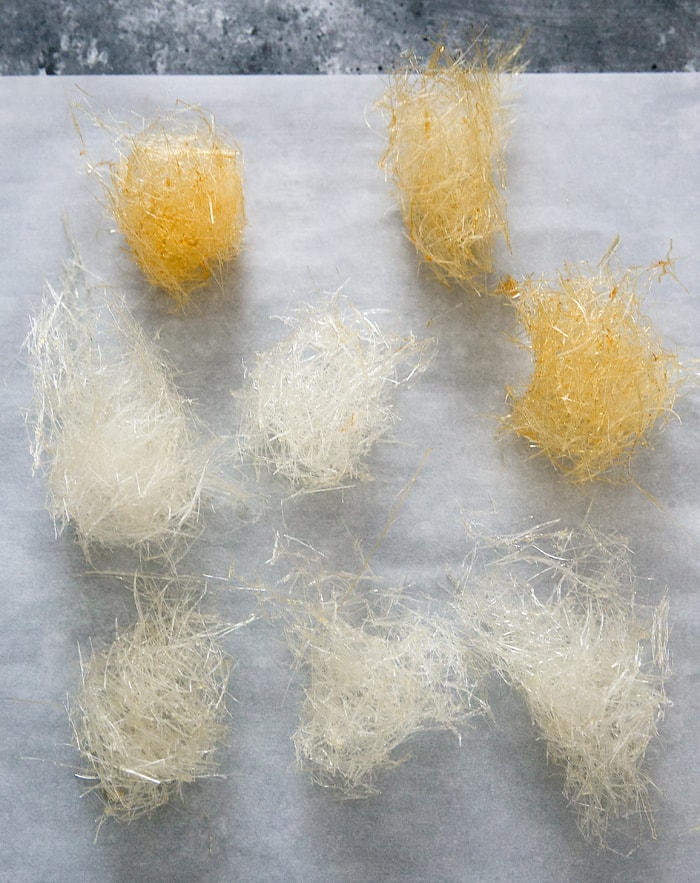
I’ve never made spun sugar before until now, but it is surprisingly easy. I made quite a few different colors and batches, and now I love it. I want to place spun sugar on all my desserts!
It is a little messy to make, though, so unless you want sticky sugar everywhere, I suggest you line your surface area with some newspaper.
More Party Drinks

Champagne Cocktails with Spun Sugar
Ingredients
- 1 1/4 cup granulated white sugar
- 1/4 cup water
- 1/4 cup light corn syrup
- champagne
Instructions
- Line the table or floor you are working on with newspaper. The sugar can fling quite far sometimes, so make sure you have a large work space covered and newspapers will make clean-up much easier. Place a 13 x 9 baking pan upside down onto your work space. Place a piece of parchment paper over it, tucking the end into the pan. You can also use a large bowl or something similar. You basically want a non-stick surface for the spun sugar threads. When the sugar is first spun, it is malleable enough to bend and shape so you can make them on a flat surface and then shape them. However, if you have specific shapes in mind, you can adjust accordingly. For example, if you want to make a nest, you could wrap parchment around a small upside down bowl and fling threads around the bowl. If you want a cotton candy shape, you can wrap parchment paper around a large stick/mixing spoon, etc.
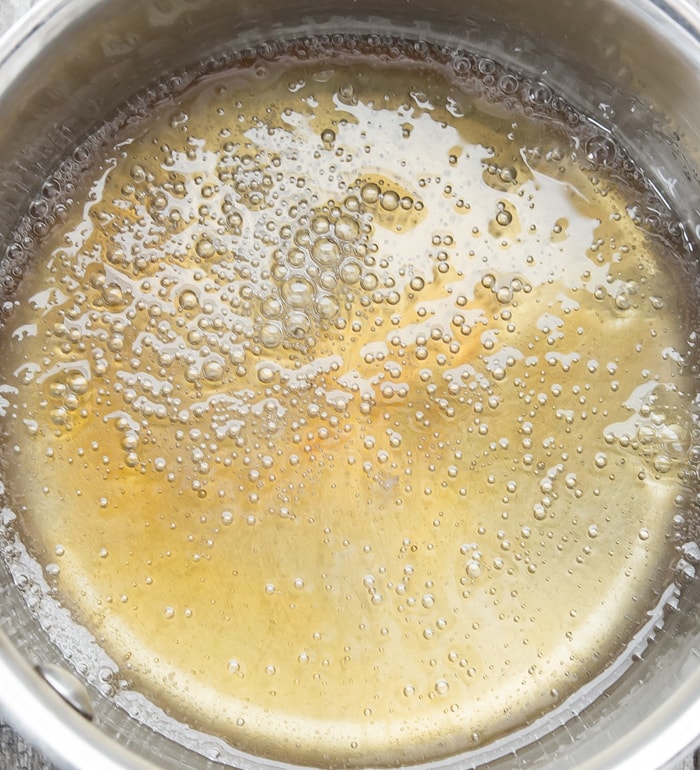
- In a medium pot, add sugar, water and corn syrup. Stir lightly until all sugar is wet. If any sugar is sticking to the edges of the pot, brush them down.
- Bring your pot to medium heat. Let mixture boil and do not stir or touch it (very important!!). Allow it to boil until it turns a light pale yellow. Once it reaches that color, immediately remove pot from heat. If you want to make a more gold colored spun sugar, allow the mixture to boil slightly longer until it turns a slightly darker yellow. However, keep in mind that you will likely have to warm up the sugar mixture again before you are done making all your spun sugar and each time you warm it up it will get darker. So I started out making some lighter ones for practice and then made darker/golden ones that I used for the champagne.
- Allow the mixture to cool slightly. Using two forks (you can also use a decapitated whisk tool, but I just used two forks held about 1 inch apart), start stirring the mixture. Lift up your fork to check the consistency of the syrup. You want the consistency to no longer be drips, but instead it should be a solid thin stream. You can actually start making the spun sugar before it's a steady stream but your spun sugar will have little blobs so I waited until it was a steady stream.
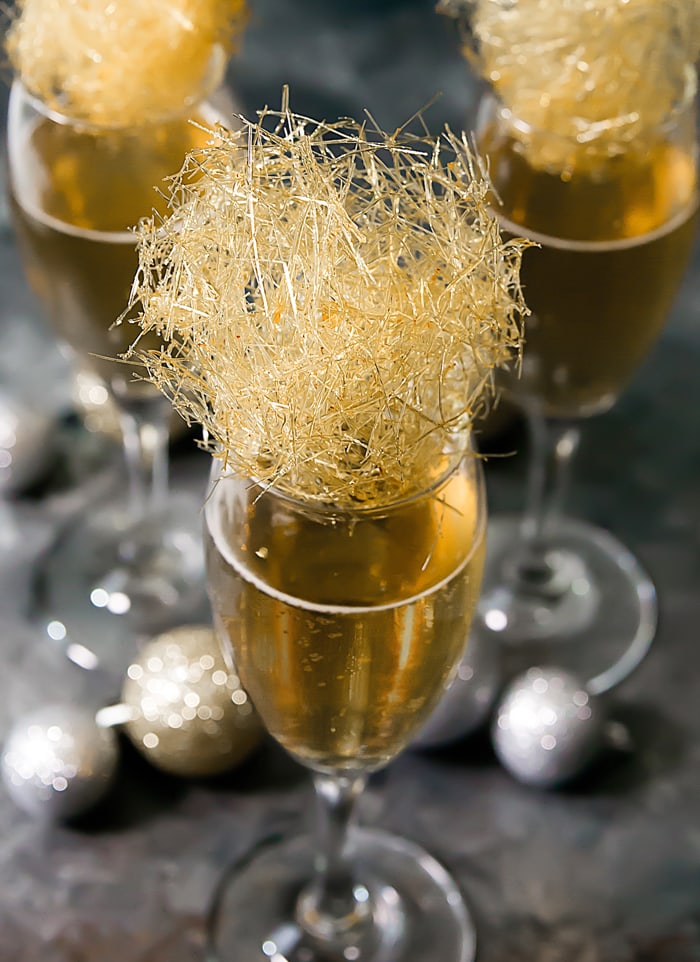
- Working quickly (the sugar cools quickly), dip the two forks in the syrup and then move them back and forth quickly across your parchment paper (holding forks 1 foot above). Continue doing this until you have quite a few threads, like a nest. Once it's as thick as you'd like, remove from parchment paper and shape to desired shape before sugar hardens. I wanted mine to sit on the champagne glasses and the tops to be loose stray strands going different directions so that they looked like sparklers, so mine are balled up at the bottom and then looser on top. I made 2-3 each time. Repeat process again to make more. If sugar in the pot cools off too much and begins to harden, place it back on the stove and warm up. You should have more than enough sugar syrup to make tops for 12 champagne glasses and probably have some leftover.
- The finished spun sugar will eventually get sticky and melty if they sit out too long. If you do not plan on using right away, place them gently in some ziploc bags (separated with parchment paper so they don't stick together).
- Pour champagne into flutes. Top with the spun sugar. Guests can eat the spun sugar or place into the champagne where it will dissolve for a sweet champagne cocktail.
Notes
- To clean your tools, use very hot water. For the pot, you can add water and bring to a boil to wash off hardened sugar.
The nutrition information provided are only estimates based on an online nutritional calculator. I am not a certified nutritionist. Please consult a professional nutritionist or doctor for accurate information and any dietary restrictions and concerns you may have.


These are beautiful! I wonder if they could be made a day or two ahead of time.
We’re not sure about that – you may be able to store the spun sugar in an airtight container for a day, but not sure it will keep well beyond that.
stunning pictures + cocktail!
thank you! I was pretty happy with how the photos turned out which is very rare. haha! i dont usually have a lot of time to style my photos.