
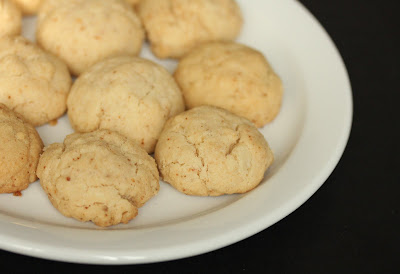
These crunchy cookies are made with browned butter which gives them a rich, nutty flavor. Brown butter cookies are a great way to learn how to make browned butter, which can be used in all kinds of baked goods.
For a while now I’ve seen recipes floating around that require the use of browned butter like chocolate chip cookies. I thought it sounded pretty amazing because I’ve read that it has a great aroma and flavor.
But I’ve been a bit afraid to try one of these recipes because browning butter sounded complicated, but I decided to try it this weekend and I’m so happy I did. Turns out it’s not that hard and it’s also so good.
It’s so easy, in fact, I got it right on my first try. All that worry for nothing! I made some and it was everything that was promised. Butter is completely transformed after it’s browned. The smell is incredible – it’s like a nutty caramel aroma and yellow butter turns into a beautiful rich color. Now I understand why everyone loves it and I couldn’t wait to use it in a recipe.

I decided to make brown butter cookies and chose Food Gal’s recipe. The simplicity of the ingredients really showcased the browned butter flavor.
How to Make Browned Butter
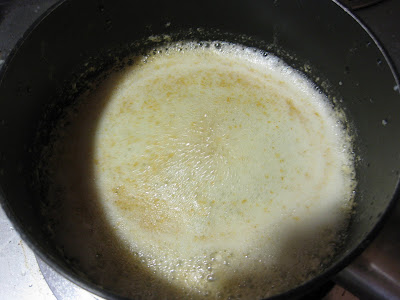
- Melt the butter in a heavy 1 and 1/2-quart saucepan over medium-low heat.
- Once the butter has melted, keep a close eye on it. For a while, it will simmer and bubble and its color will be bright yellow.
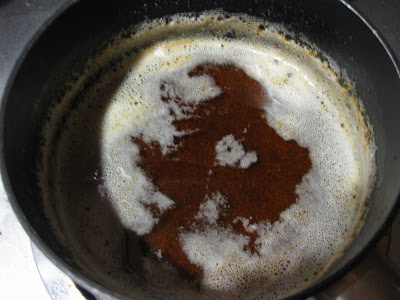
- At some point, it will stop bubbling loudly and will turn frothy. At this point, it will start to turn brown. As soon as you see it turn lightly golden, turn off the heat and pour the browned butter into a bowl. This is what mine looked like when I took it off the stove:
- This whole process took about 8 minutes for me, but depending on your stove and heat level, it could be longer or shorter than this. That’s why it’s so important to watch it, otherwise it can burn easily.
- Be careful to watch the butter and turn off the heat when it turns brown, or else you will burn it.
As the browned butter cools, the froth with dissipate and it should look like this:
Ingredients
Once the browned butter is cooled you can make the cookies. You will need these ingredients:
- Brown butter
- All-purpose flour
- Baking soda
- Vanilla extract
- Granulated sugar
How to Make the Cookies
Sift together the flour and baking soda onto a piece of waxed paper and set it aside.
In a bowl combine the vanilla and butter. Stir in half of the sugar, blending well before adding the remaining sugar. Add the flour mixture in two additions, blending well after each addition.
Set the mixture aside for 10 minutes to allow the flour to absorb the ingredients.
To shape each cookie, measure about 1 ½ teaspoon of the dough, or scoop up the dough with an ice cream scoop about 1 1/4 inches in diameter. The dough will be very crumbly. Mash it between your palms to form balls, and place them on the prepared baking sheet, spacing them about ½” apart.
Bake the cookies until they puff up, crack a bit on top, and are golden on the bottom, 15 to 18 minutes. Transfer the baking sheet to a wire rack and let the cookies cool on the pan for about 5 minutes. Using a metal spatula, transfer the cookies to a wire rack to cool completely.
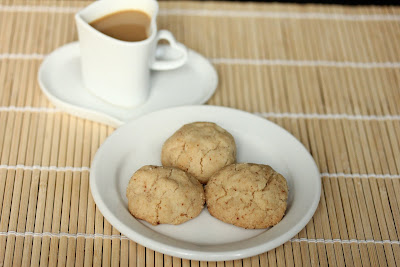
I was a little surprised by the texture of the cookies. I expected them to be more like Russian tea cakes, which melt in your mouth, but these browned butter cookies are crunchy. The flavor is similar, though.
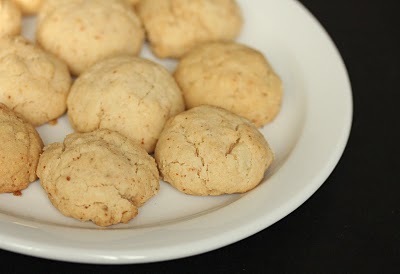
These cookies have a nutty flavor even though there aren’t any nuts in them. It’s from the browned butter, so I could definitely tell it was in the dough. The cookies also have little flecks of brown.
More Cookie Recipes
Brown Butter Buttons
Ingredients
- 8 oz (2 sticks/225 g) unsalted butter
- 2 cups (9-oz/225 g) all-purpose flour
- 1/2 tsp baking soda
- 1 tsp pure vanilla extract
- 1 cup (7-oz/200 g) granulated sugar
Instructions
- Center a rack in the oven and preheat the oven to 350°F. Line a large baking sheet with parchment paper.
- Melt the butter in a heavy 1 1/2-quart saucepan over medium-low heat and heat just until it begins to turn a delicate brown, about 8 minutes. Remove from the heat and pour into a medium bowl. Be careful to watch the butter and turn off the heat when it turns brown, or else you will burn it. When you heat the butter, it will boil and bubble and stay a bright yellow for a long time. At some point, it stop bubbling loudly and instead takes on a frothy texture. You can hear the sound difference in the cooking too. It is at this point that the you'll see the liquid begin to brown. As soon as you see most of the liquid turn brown, turn off the stove. See the photo in the post to see what it should look like. When it cools, the froth dissipates and you can see that the whole melted butter liquid is a deep brown like in the photo.
- Set the butter aside to cool slightly, about 15 minutes. Meanwhile, sift together the flour and baking soda onto a piece of waxed paper; set aside.
- Add the vanilla to the butter, and then stir in half of the sugar, blending well before adding the remaining sugar. Add the flour mixture in two additions, blending well after each addition. Set the mixture aside for 10 minutes to allow the flour to absorb the ingredients.
- To shape each cookie, measure about 1 ½ teaspoons of the dough, or scoop up the dough with an ice cream scoop about 1 1/4 inches in diameter. The dough will be very crumbly. Mash it between your palms to form balls, and place on the prepared baking sheet, spacing them about 1/2 inch apart.
- Bake the cookies until they puff up, crack a bit on top, and are golden on the bottom, 15 to 18 minutes. Transfer the baking sheet to a wire rack and let the cookies cool on the pan for about 5 minutes. Using a metal spatula, transfer the cookies to a wire rack to cool completely.
Notes
The nutrition information provided are only estimates based on an online nutritional calculator. I am not a certified nutritionist. Please consult a professional nutritionist or doctor for accurate information and any dietary restrictions and concerns you may have.


Loved your article. You need to try the Brown Butter Cookie Co., brown butter cookies. They’re a variation of a short bread cookie but a bit sweeter and more flavorful with the perfect ‘tooth’ when you bite into them.
i have! my friend brought me back some and I really enjoy the cookies they make
I’ve tried 3 brown butter recipes so far and love how all of them turned out 🙂
– Bon Appetit’s Browned Butter Brownies
https://www.bonappetit.com/recipes/2011/02/cocoa_brownies_with_browned_butter_and_walnuts
– Browned Butter cc cookies (cookie dough tasted sooo good, even toffee-like)
https://www.divine-baking.com/2010/12/perfect-brown-butter-chocolate-chip.html
– Browned Butter Rice Crispy Treats from SK! (ridiculously easy to make, have already made it 3 times in the past month)
https://smittenkitchen.com/2009/11/salted-brown-butter-crispy-treats/
Oh thanks so much! I can’t wait to try these out.
Pingback: Brown Butter Chocolate Chip Cookies | Kirbie Cravings
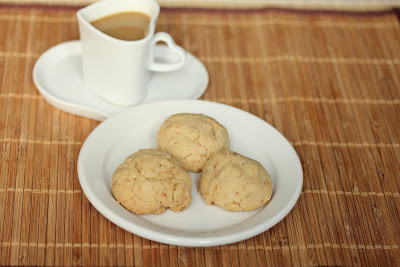
I found it at Daiso (the $1.89 japanese store that is usually nearby Marukai). I’m loving it too. I need to get some more.
Okay I just ADORE that coffee cup. Where didja get it?