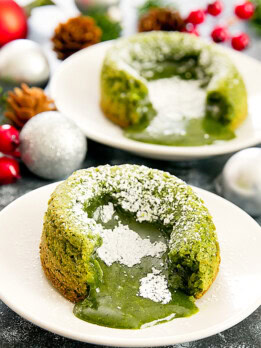
Matcha Green Tea Molten Lava Cakes
Matcha flavored chocolate cakes that have a molten lava center. These festive and naturally green cakes are easier to make than you might think and a great dessert to serve.
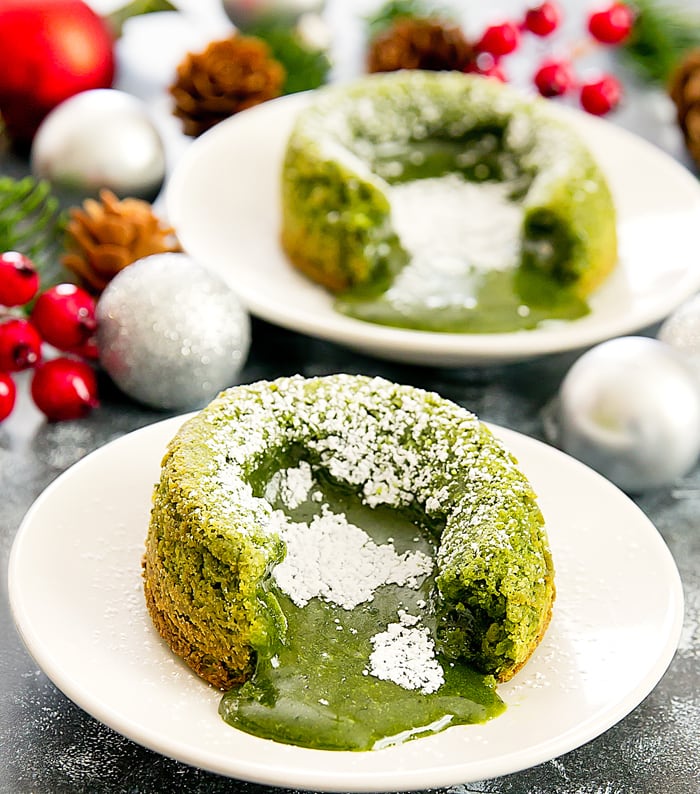
Matcha green tea is mixed with white chocolate to create delicate cakes with a molten lava center. It’s an easy dessert to make for a dinner party or date night.

I am all about matcha flavored desserts and even more so around the holidays since the natural green fits in with Christmas themed desserts.
I love a good molten lava cake. Last year I made these 4 Ingredient Nutella Molten Lava Cakes for the holidays. And this year, I am making green tea ones, inspired by our recent visit to Japan where I ate my fill of green tea flavored candy, cakes, and more.
This recipe comes together fairly easily. You don’t even need a mixer!
More Matcha Cake Recipes
Matcha Green Tea Molten Lava Cakes
Ingredients
- 1/3 cup white chocolate chips
- 3 tbsp unsalted butter, melted
- 1/4 cup granulated white sugar
- 1 large egg
- 3 tbsp all purpose flour
- 1 tbsp high quality matcha powder, I use Maeda-En Ceremonial Quality
- powdered sugar for dusting
Instructions
- Add white chocolate to a medium or large glass mixing bowl. Find a pot that is slightly smaller in diameter than your mixing bowl so that when you place the mixing bowl on top of the pot, the bowl will not touch the bottom of the pot. Add about 1 inch of water to your pot and bring to a simmer. Place bowl with chocolate on top. Slowly whisk chocolate until it is completely melted. This will take a few minutes.
- When chocolate is melted, turn off heat but keep your mixing bowl in the pot and on the stove. This will keep the batter warm. Add in melted butter and stir until butter is completely incorporated. Stir in sugar until smooth.
- Whisk in the egg until batter is smooth. Add in flour and whisk until smooth. Add in matcha powder and whisk again until smooth.
- Thoroughly grease the insides of two 4 oz ramekins with butter. Make sure you don't miss any spots, especially along the bottom of the ramekin, otherwise the cakes won't pop out properly. Lightly flour the inside of the ramekins. Turn ramekins upside down and hit a few times against counter so that any excess flour falls out.
- Divide batter evenly into the two ramekins. Place into freezer for 30 minutes.
- While freezing, preheat oven to 400°F. After 30 minutes in the freezer, place ramekins onto a baking sheet. Place into oven and bake about 14-16 minutes. Watch the cakes closely. You want the center to barely set (no longer liquid, but still slightly wobbly). Remove cakes and allow to cool and set for 10 minutes.
- Use a spatula and run around the edges of the cake to loosen the cake. Place a dessert plate, inverted, on top of ramekin. Pressing the plate on top of the ramekin (use gloves as the ramekin should still be quite hot), very carefully and quickly, turn over so that the plate is now at the bottom and the ramekin is upside down. (You need to do this in one fluid motion. Otherwise, the liquid lava filling will tumble out too quickly and break through the bottom layer of the cake.) Gently tap the upside down ramekin to ensure cake has popped into plate. Lift up ramekin. Dust with powdered sugar and serve.
Hello, what is the weight of white chocolate in grams please? I do not have white chocolate chips, I have the baking chocolate bar.
It should be about 55 to 60 grams.
These came together really quickly, perfect small batch recipe. I personally found them a tad too sweet but my husband thought they were perfect. Thank you for the delicious matcha recipe!
We’re glad you enjoyed them!
Hi I want to make this at a dinner party I’m hosting and wanted know if I could prep the batter the night before, and if so how long should I cook it so that it will come out right?
We haven’t tried making the batter ahead – not sure how that will work.
Hi does the brand of match powder I use matter
We like to use Maeda-En ceremonial grade matcha powder for baking. You can learn more about it in our The Best Matcha Powder for Baking post.
Hi! May I know if the matcha can be omitted for a white chocolate molten lava cake? Will this affect is in any way? Thanks!
It will probably work but I haven’t tried
I tried this and it was so delicious!! Only downside is that I wish there were more :’) Thank you so much for sharing <3
I’m so glad you liked it!
Just made them and love it!!! I cut the sugar by half and it’s still a bit sweet to me. I will probably cut the sugar to 1 tbsp next time. Thanks for the recipe!
I’m glad it worked out for you!
Hello, I’m very interested in trying your recipe but I wonder if it really takes 3 tablespoons of flour. I used that amount the other day on a recipe for Brownies and I thought it was too much.
yes it really needs 3 tbsp of flour.
Do you put them in the freezr or the fridge?
Are you talking about the cake batter? The batter needs to be placed in freezer for 30 min before baking.
I made them today and it was beyond delicious. I used 1.5 tbsp matcha powder for a stronger matcha flavour.
I’m so glad you liked it!
Hi! Would you happen to have pictures of each of these step? I’m not exactly the world’s greatest cook but drooling over your picture and would love to make this. I’m a bit confused with some of the words or tools/pans you use to create this. Thank you!!!
sorry I do not
Hi, if i were to leave the batter in the fridge overnight, do i need to add extra time baking??
yes you will need extra baking time
Made them today and it was deliciousssssss!!! Thank you :))
so glad you enjoyed it!
Followed your recipe exactly and froze them for 30 minutes before baking. Took them out of the oven at 14 minutes and they both came out completely cooked without the molten lava center. 🙁
I am sorry to hear that. Mine were still very molten in the middle. You could try freezing them longer. But I wonder if it was the cake base you started out with originally. Did you reduce or change any of the ingredients?
Hi, do you have to freeze it for 30 minutes? Thanks!! so excited to try this!
yes you need to chill the batter for at least 30 minutes in the freezer, otherwise it will cook too quickly and won’t have a molten lava center
This looks amazing! I’m so excited to try and make this. =)! But I have to ask, would brown sugar be okay to use as a substitute for white sugar?
I would try to stick to white sugar if possible. brown sugar will likely change the color of your cakes and make them browner and it might also change the texture.
I feel like I’m missing a step! When do I mec the batter and the white chocolate?
Step 1 is melting the chocolate. the steps after are adding other ingredients into the melted chocolate.